Ubuntu Network Connections Guide in FPGA Board Development Environment
Ubuntu Network Connections Guide
Table of Contents
Section 1: Exchanging Files Between Ubuntu and Windows 3
Setting up the FTP Client in Windows 4
Setting up FileZilla and Transferring Files 5
Section 2: Creating a tftp Server in Ubuntu 9
Using NFS and SSH in Ubuntu 10
Section 1: Exchanging Files Between Ubuntu and Windows
*In order to follow along to this tutorial, you will be required to have Ubuntu 16.04.01 already installed on your Virtual Machine using Oracle’s VirtualBox. Because this tutorial is geared towards Ubuntu 16.04.01, using other versions may have differences between the execution of commands.
During development, files will be constantly transferred between Windows and Ubuntu. For example, writing code in Windows and the transferring it over to Ubuntu for compilation. In order to do so, we will need to use FTP.
Setting up FTP in Ubuntu
If you don’t have VIM installed yet, you may want to install it now; as it will make it easier to edit text files, which we will do in a bit. You may install it by using the following command:
sudo apt-get install vim
After VIM is installed, we can open up the Ubuntu Terminal and execute the following command to install FTP:
sudo apt-get install vsftpd
After it automatically installs, use the vi command to open /etc/vsftpd.conf, as follows:
sudo vi /etc/vsftpd.conf
After opening the vsftpd.conf file, please locate the following two lines:
local_enable=YES
and
write_enable=YES
Make sure that they both don’t have a # in front. Please delete it if there is. It should look like the following when you’re done. Make sure to save the document after the change.

Next, we use the following command to restart FTP.
sudo /etc/init.d/vsftpd restart
![]()
Setting up the FTP Client in Windows
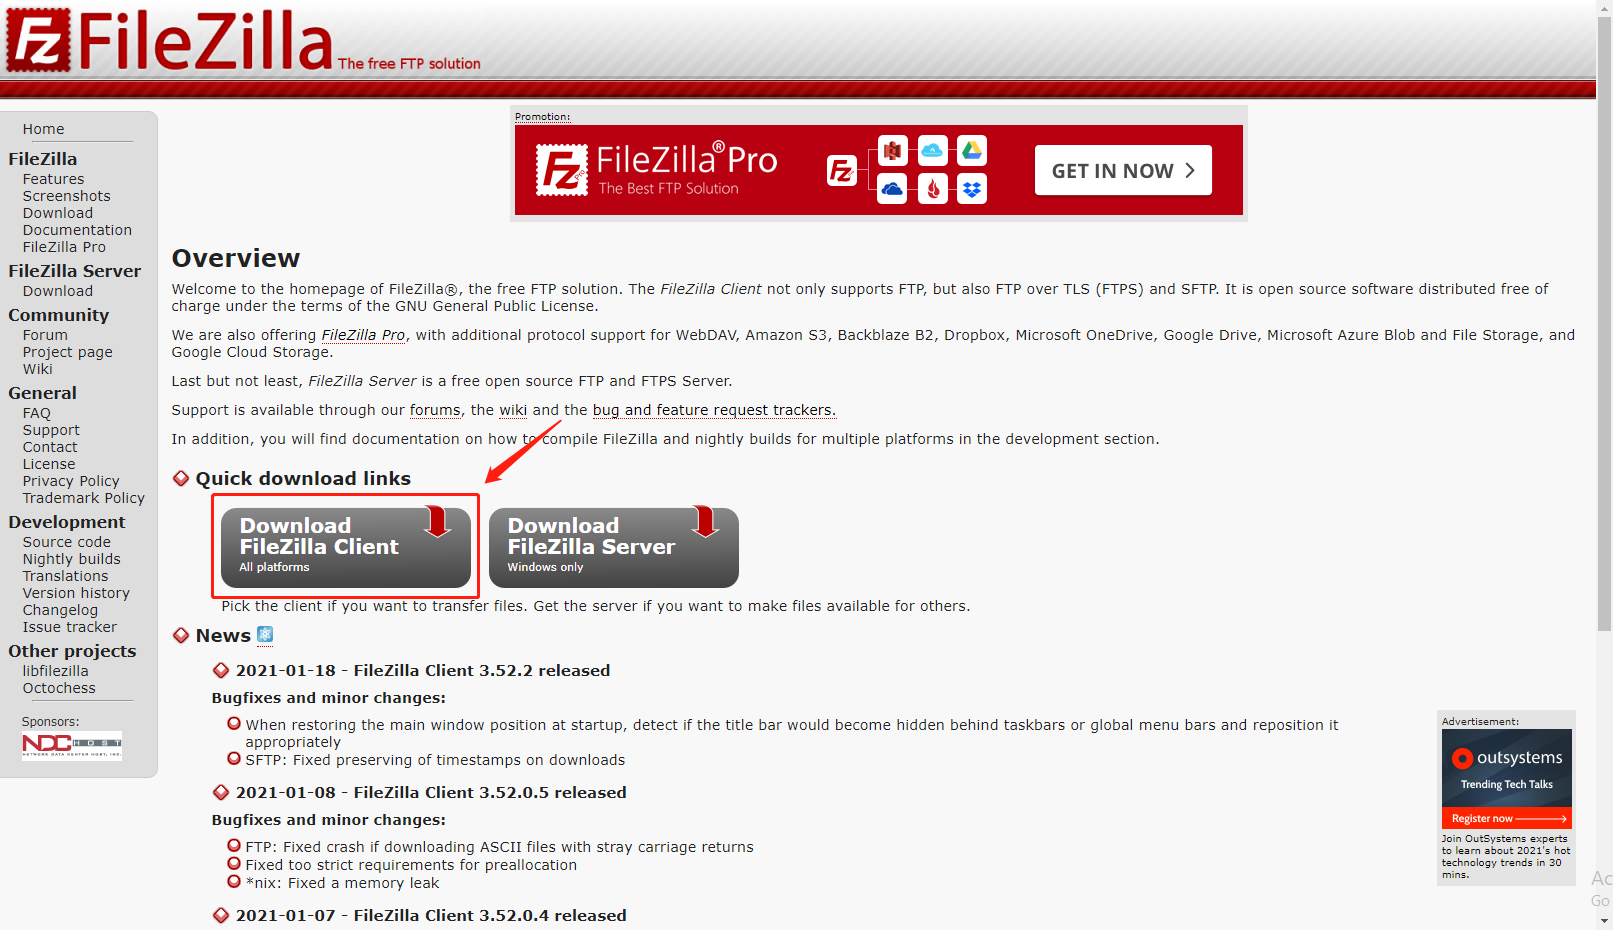
We will be using the free Windows FTP client FileZilla, which can be download on the official website at https://filezilla-project.org/
Make sure you choose to download the client and not the server.
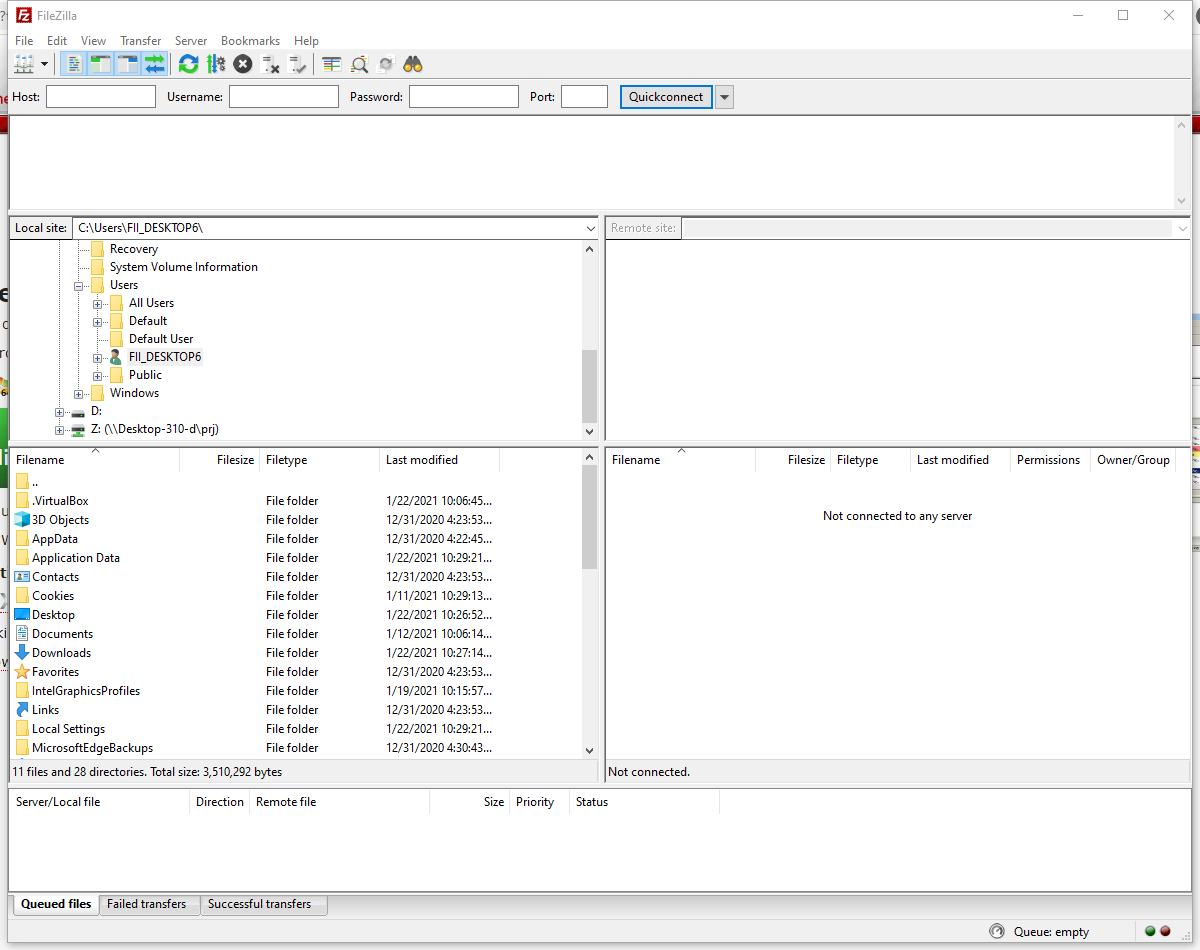
You should see the following upon successful install.
Setting up FileZilla and Transferring Files
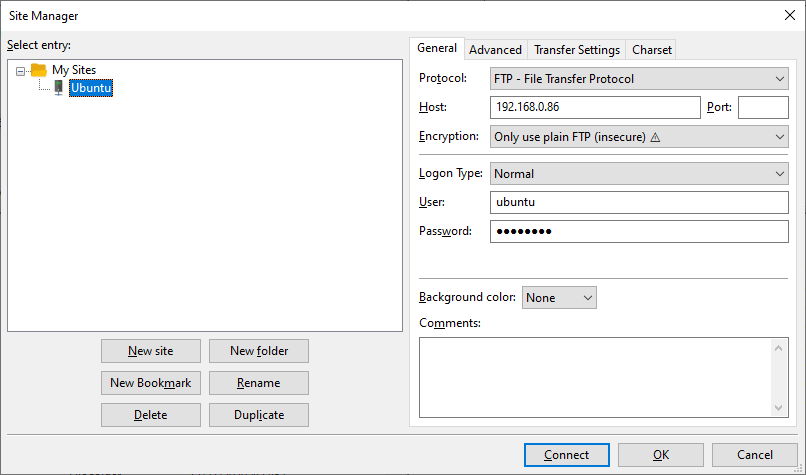
We will let Ubuntu be the FTP server, and FileZilla be the FTP client. Thus, we will need to connect the client to the server. First, click File in the top bar, and select Site Manager in the Windows client. You should see the following when you open it up.
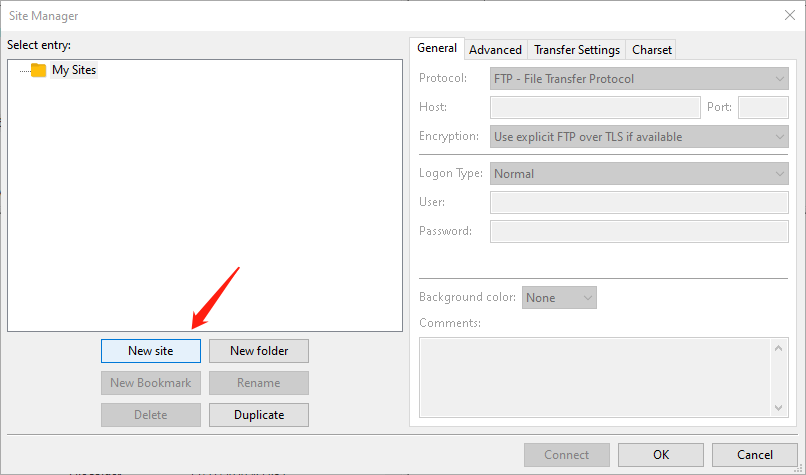
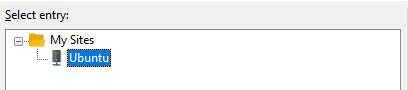
Next, click on the New site button to create a new site, and rename it as “Ubuntu” for simplicity.
We will now fill in the General Settings for the Ubuntu site as shown on the next page,
Where Protocol is FTP – File Transfer Protocol
Host is the IP address of your Ubuntu system
You can check your IP by executing ifconfig in the Terminal. Your IP is the series following “inet addr:”

Encryption is Only use plain FTP (insecure)
Logon Type is Normal
User is your Ubuntu system username
And Password is your Ubuntu system password.
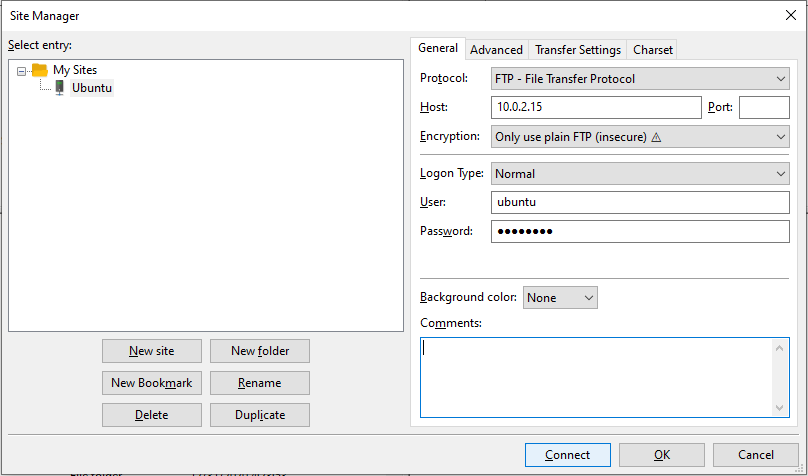
Now, we can go ahead to go press Connect.
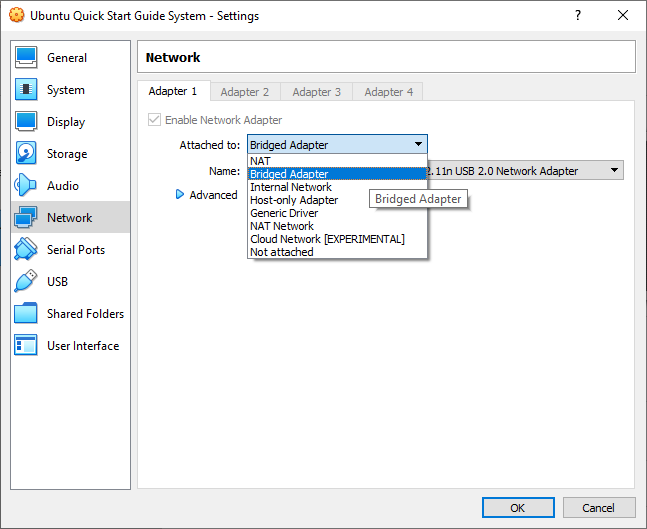
If you are unable to connect, you may want to change your VirtualBox Ubuntu Network Settings from NAT to Bridged Adapter. Your IP address will change too, so you may want to check it again and re-enter it.
After you manage to successfully connect, you should see the following:
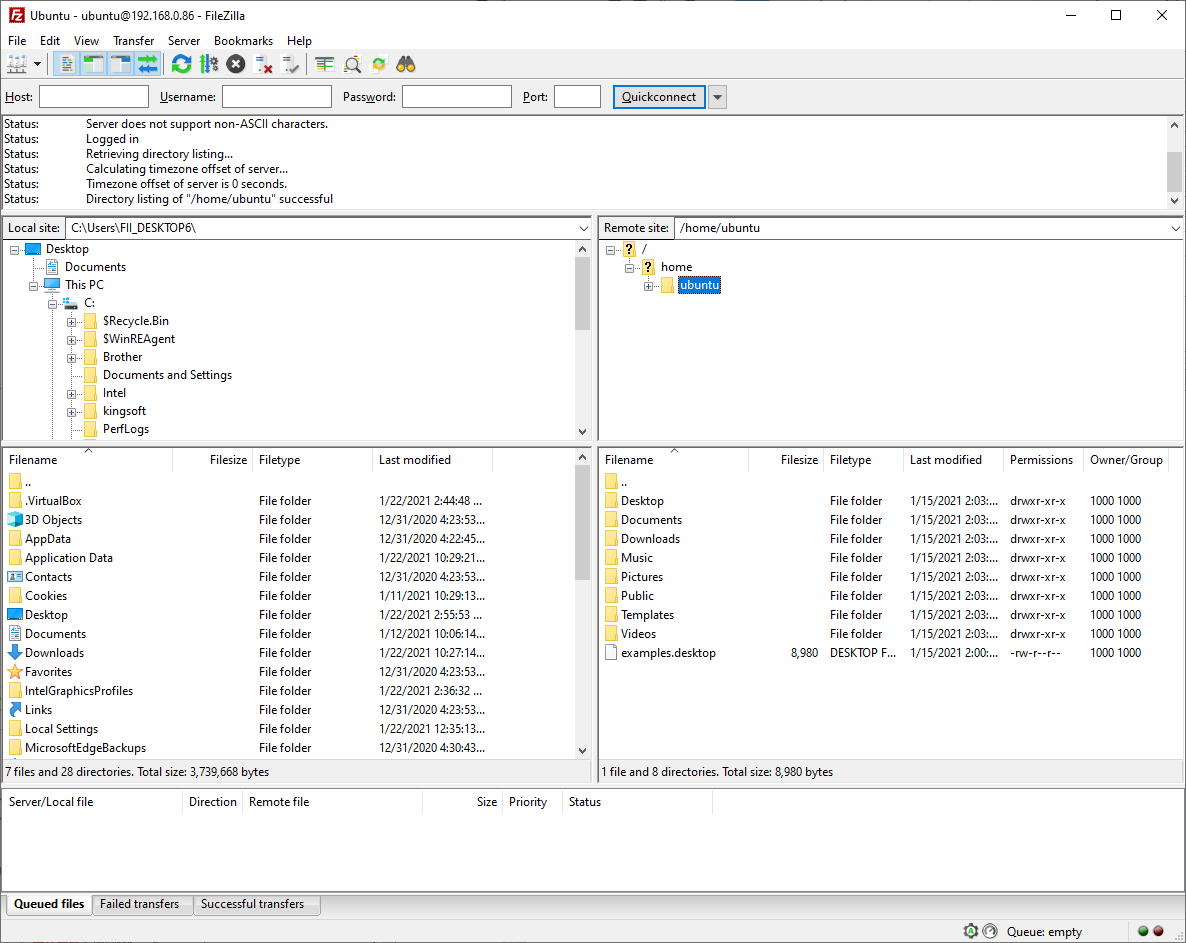
Where the files on the left half of the screen are files that are on your Windows system, and the files on the right are files that are on your Ubuntu system.
If some filenames are wrong and have out of place characters in them, we can fix this by changing Charset to Force UTF-8. Otherwise, we can leave it as Autodetect. Note that this typically happens with languages that don’t consist of letters, such as Chinese.

If we want to copy Windows files into Ubuntu or vice versa, we can simply drag and drop the files from one side to the other within the interface.
Section 2: Creating a TFTP Server in Ubuntu
TFTP is a simple file transfer system widely used in embedded development. It will also be needed when dealing with PetaLinux. First, we will have to install tftp-hpa as well as tftpd-hpa. The command is as follows:
sudo apt-get install tftp-hpa tftpd-hpa
TFTP requires a folder in order to store files. We can create a folder named tftp in the root directory, which would have the directory of /tftpboot. This is because PetaLinux defaults to this directory, thus making our lives easier in the future when everything is installed. The commands are as follows:
sudo mkdir -p /tftpboot
sudo chmod 777 /tftpboot
Note how we used 777 in the second command, which gives it permissions to read, write, and execute for all users; we want to help set up the permissions for the tftpboot folder for future usage.
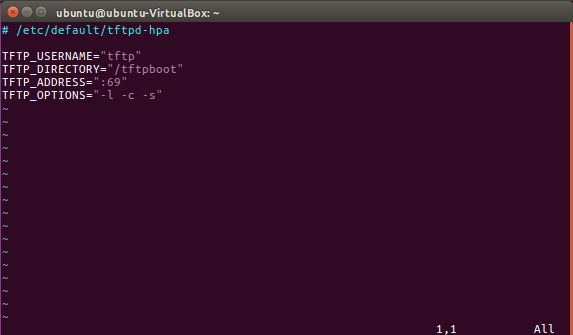
Finally, we will go on to configure tftp. We can create and open /etc/default/tftpd-hpa by using the following command:
vi /etc/default/tftpd-hpa
We will proceed to fill it out as follows:
# /etc/default/tftpd-hpa
TFTP_USERNAME=“tftp”
TFTP_DIRECTORY=“/tftpboot”
TFTP_ADDRESS=“/tftpboot”
TFTP_OPTIONS=“-l -c -s”
Finally, we will enter the following command to restart the tftp server, and thus finish building it.
sudo apt-get install nfs-kernel-server
Section 3: Using NFS and SSH in Ubuntu
Turing on NFS
We will need to use NFS when developing Linux drivers. Thus, we will first download and turn on NFS by using the following command to download it:
sudo apt-get install nfs-kernel server
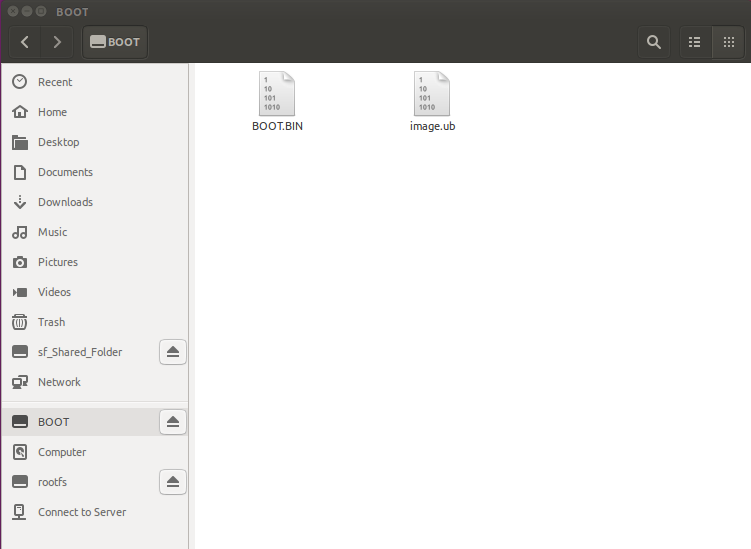
After installation is complete, we will create a folder named “linux” in the user’s root directory, and then create another folder named “nfs” within that folder.

Note that the nfs folder that we created is for the NFS server to use. We can then be able to use the network file system on development boards to access the nfs folder.
First, we will go on to set up NFS. NFS allows for mounted directories and permissions to be defined in the file /etc/exports. We can use the following command to setup the /etc/exports file:
sudo vi /etc/exports
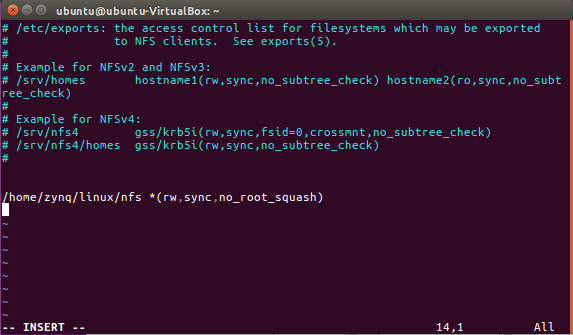
After we open up /etc/exports, we can append the following to the file:
/home/zynq/linux/nfs *(rw, sync, no_root_squash)
Note that /home/zynq/linux/nfs is the directory to be shared, while “*” allows for all of the network segments to be able to access it. rw represents the permission to both read and write, and sync is writing synchronous files to the storage. Finally, no_root_squash represents the permissions of the user of the client shared directory. If the client is using the root user, the shared directory client would then have root permissions.
After the addition, /etc/exports would look like the following on the next page:
Next, we will save the file and restart NFS by using the following command:
sudo service nfs-kernel-server restart
We will then execute the following command to show the shared directory:
showmount -e
We can thus see that it is the correct directory.
While NFS is running, the /etc/exports setup file is changed. We can use the exportfs command to apply the changes:
sudo exportfs -rv
Turning on SSH
We will first install SSH by using the following command:
sudo apt-get install openssh-server
Note that the configuration file for SSH is /etc/sshd_config. We can leave it as is without doing anything, and just use the default settings.
Section 4: Installing and Using PuTTY
Installing PuTTY
Installing PuTTY on Ubuntu only requires the execution of the following command:
sudo apt install putty
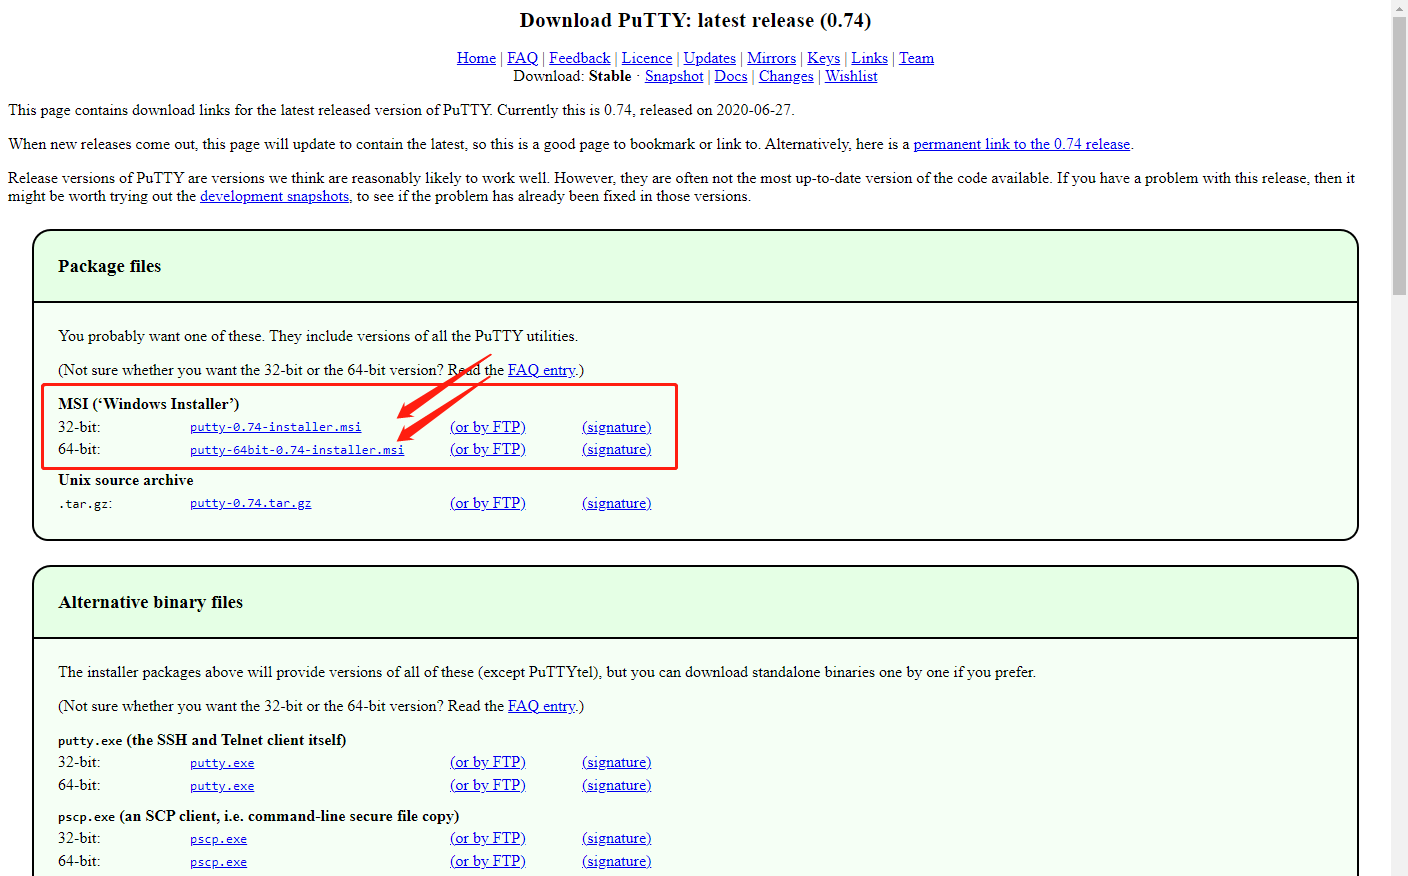
In order to install PuTTY on Windows, you can go to the official download page:
https://www.chiark.greenend.org.uk/~sgtatham/putty/latest.html
You may choose to download either the 32-bit or 64-bit version depending on the specs of your computer.
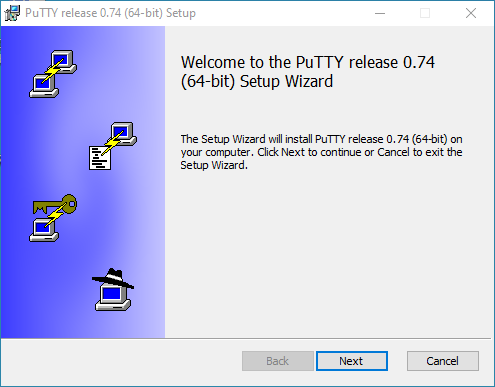
Upon launching the installer, you should see the following:
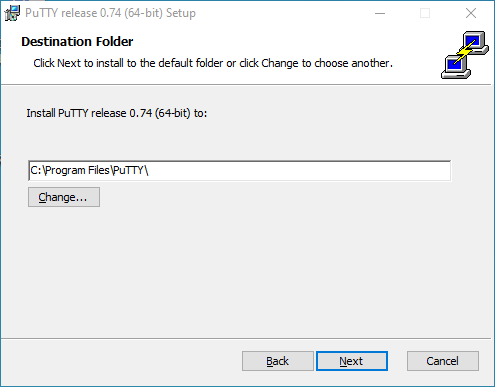
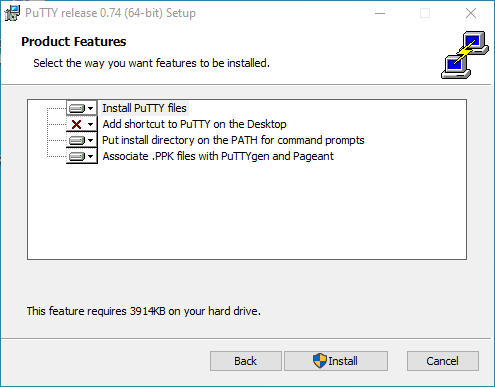
You may choose to install PuTTY to your own preferred path. Next, leave the next page as is before pressing Install. If you want to have a desktop shortcut, you may choose to modify Add shortcut to PuTTY on the Desktop.
Using PuTTY
First, we can use a USB connection to connect the Development Board to the Computer. Next, we will open up PuTTY.
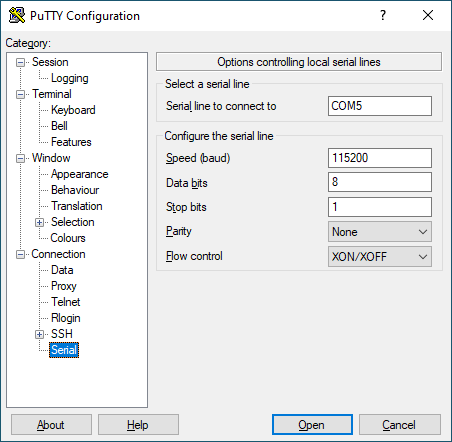
We need to use Serial Ports; thus, we can click the Serial tab from the menu on the left and make corresponding configurations.
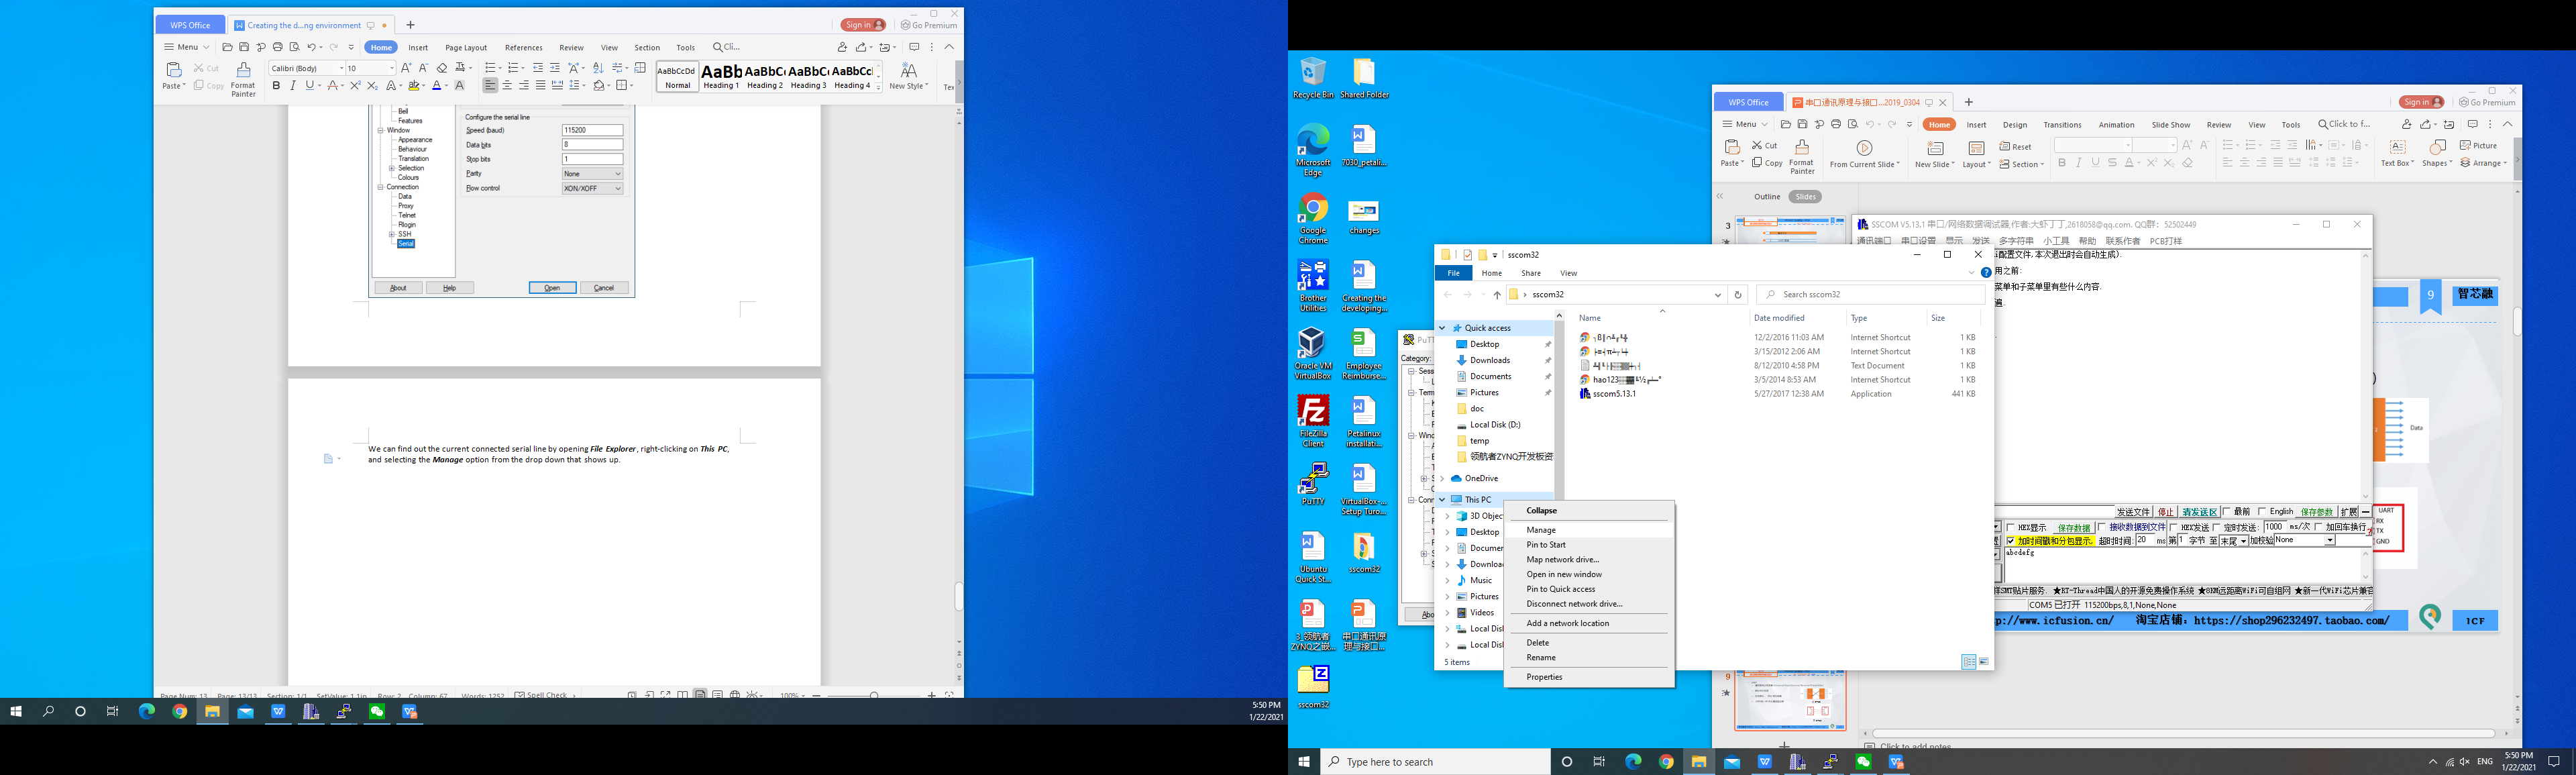
We can find out the current connected serial line by opening File Explorer, right-clicking on This PC, and selecting the Manage option from the drop-down that shows up.
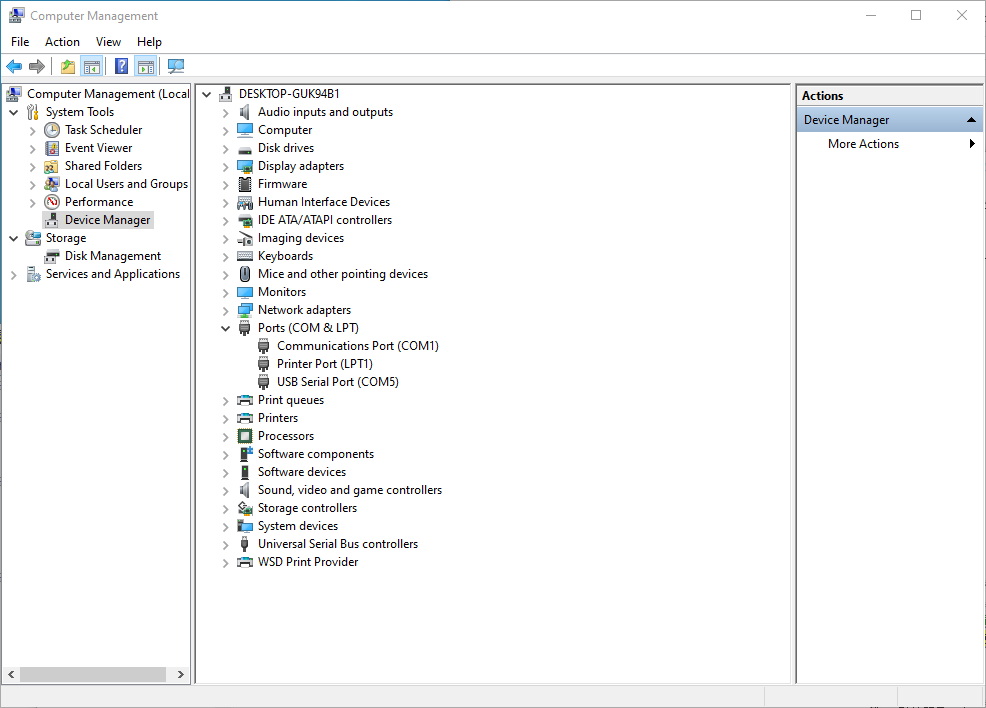
This would open up the Computer Management page, and we can select Device Manager from the menu on the left side.
Next, we will open up the Ports drop-down, and we will be able to see the different ports.
Here, we can see that our board is connected via COM5.
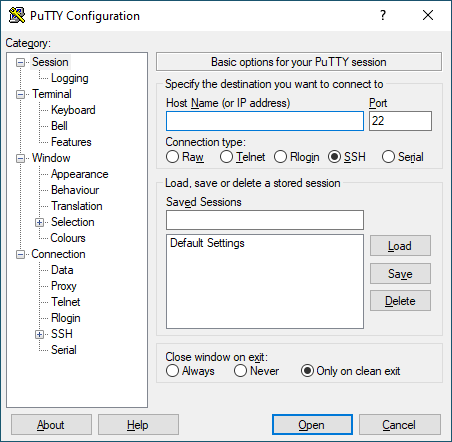
Next, we will go to the Session tab in PuTTY, and choose Serial as the Connection type. We will fill in the corresponding information.
We will set 115200 for speed as it is typically the default.
We can save the configuration for future usage by clicking the Save button on the right side.
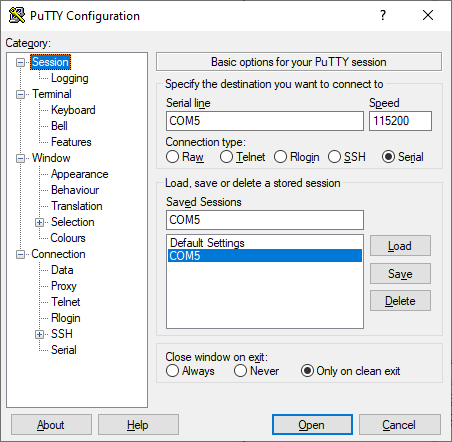
Finally, we will press Open on the bottom.
This will then establish the connection between the board and the computer.
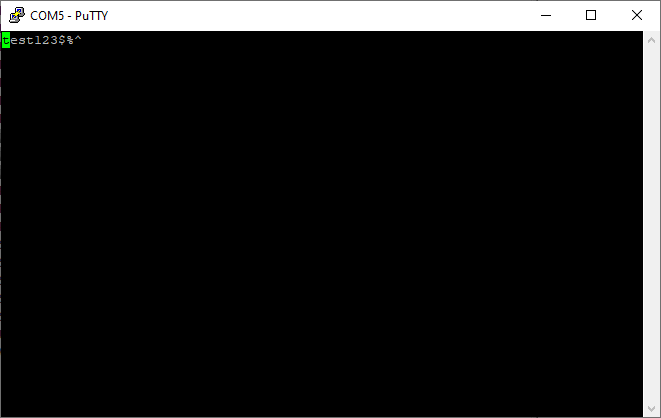
Because the board I am currently using returns what is entered, we can test it out to see if it’s truly working.
If we type in test123$%^ into the console and hit [Enter], we can see that it does indeed return the same, as shown on the next page.

Copyright Notice:
© 2020 Fraser Innovation Inc ALL RIGHTS RESERVED
Without written permission of Fraser Innovation Inc, no unit or individual may extract or modify part of or all the contents of this manual. Offenders will be held liable for their legal responsibility.
Thank you for purchasing the FPGA development board. Please read the manual carefully before using the product and make sure that you know how to use the product correctly. Improper operation may damage the development board. This manual is constantly updated, and it is recommended that you download the latest version when using.
Official Shopping Website: