Using NFS to Transfer Files and Boot Remotely
Table of Contents
Section 1: Using NFS to Transfer Files 3
Setting up NFS server in Development Board 6
Section 2: Using NFS to Boot Remotely 8
Section 1: Using NFS to Transfer Files
*In order to follow along to this tutorial, you will be required to have Ubuntu 16.04.01 already installed on your Virtual Machine using Oracle’s VirtualBox. Because this tutorial is geared towards Ubuntu 16.04.01, using other versions may have differences between the execution of commands.
Setting up NFS
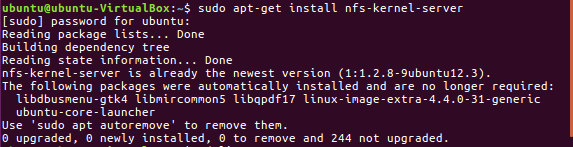
First, we will want to set up NFS on our Ubuntu machines. We can do this by executing the following command:
sudo apt-get install nfs-kernel-server
When the installation is complete, we will create a dedicated nfs folder within the linux folder in our home directory. This folder will act as a shared folder with the target system that you wish to transfer files to.
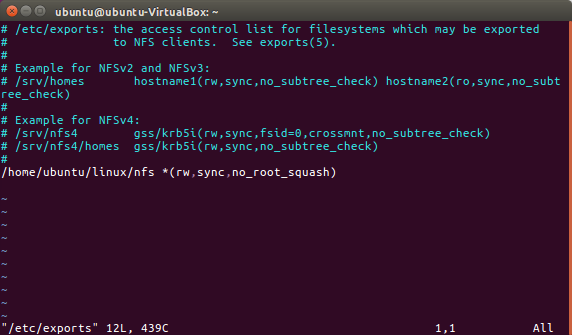
Next, we will open up and configure the /etc/exports file by using the following command:
sudo vi /etc/exports
You may also choose to use the gedit command instead.
Once the file is open, we will proceed to append the following line to it:
/home/ubuntu/linux/nfs *(rw,sync,no_root_squash)
Make sure you change ubuntu to your own username and modify the nfs folder directory if you have it elsewhere.
Note that * allows access from all networks, rw gives permission to read and write, sync synchronizes files to storage, and no_root_squash is the nfs client-side user permission.
Please see reference image on next page.
After the addition, we will use the following command to restart NFS.
sudo service nfs-kernel-server restart
We can use the following command to see the shared directory.
showmount -e
While NFS is running, the /etc/exports file is changed. We can use the exportfs command to apply those changes.
sudo exportfs -rv

Transferring Files with NFS
We will first put the files that we would like to transfer into the /nfs folder we just created. You may choose to use anything you like.
Next, we will mount the NFS directory that is on our Ubuntu system from our development board system. Note that you have to be logged in on the development board system. We will use the following command to do so:
mount -t nfs -o nolock 192.168.0.86:/home/ubuntu/linux/nfs /mnt
Make sure you change the command accordingly and use the IP address of your Ubuntu machine.

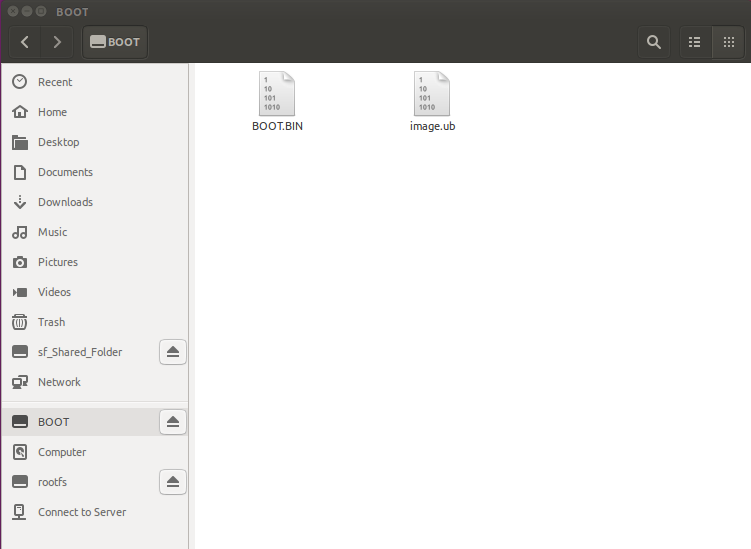
Next, we will be able to access the /nfs folder from the development board system if nothing goes wrong. We can check this by using the ls command like so:
ls /mnt
![]()
As we can see, the two files are what we originally had in the /nfs folder on our Ubuntu system.
You may choose to freely open and edit the shared files.
Setting up NFS server in Development Board
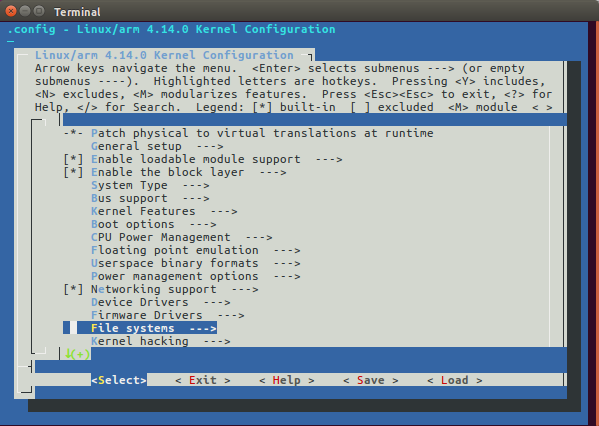
You can set up the Development Board as a NFS server just like our Ubuntu system, and to be able to perform actions that way. In order to do so, we will need to modify the kernel settings for the PetaLinux project.
petalinux-config -c kernel
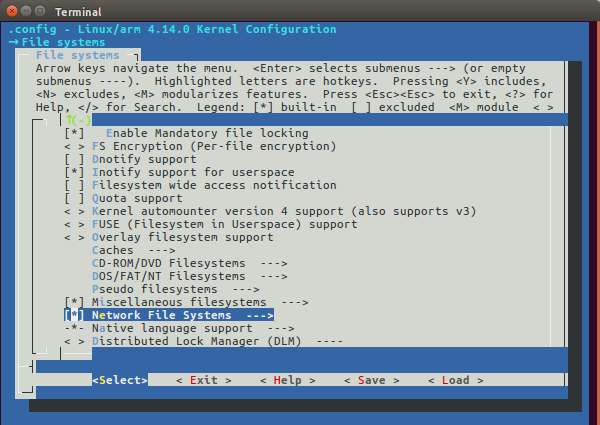
Once inside the graphical interface, we will first go into the File Systems tab.
Next, we will go into the Network File Systems tab.
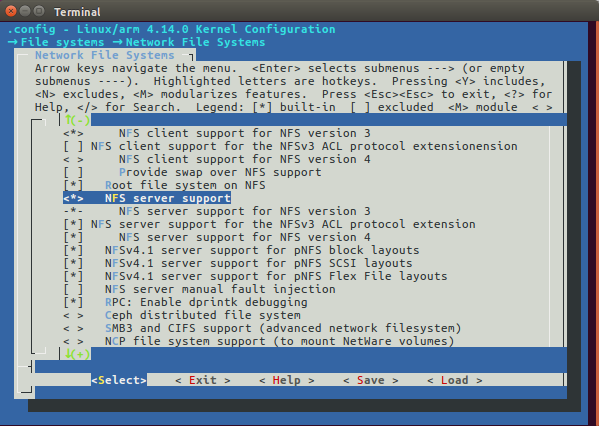
Finally, we will enable all options related to NFS server support. Don’t forget to save the changes, re-build the project, and replace the boot file on the SD card with the new one.
Thus, you will now be able to treat the development board Linux system as a server for NFS services.
Section 2: Using NFS to Boot Remotely
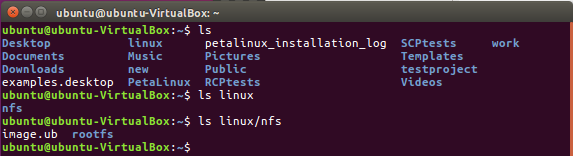
First, we will need to locate the nfs shared folder which we created. In my case, it is in the linux folder in my home directory. We will proceed to create a new folder titled rootfs inside by using the mkdir command.

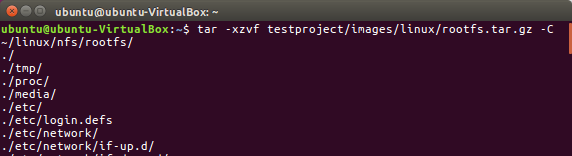
Next, we will decompress the rootfs.tar.gz file in the images folder from our PetaLinux project folder to the rootfs folder we just created by using the following command. Make sure you change your directory accordingly.
tar -xzvf images/linux/rootfs.tar.gz -C ~/linux/nfs/rootfs/
Now, we will boot the root file system using the network.
Please turn on your development board. When prompted to hit a key to stop autoboot, please hit a key to stop autoboot.
The command formatting is as follows:
root =/dev/nfs nfsroot=[Server IP]:[Root Directory][, NFS Options] ip=[Client IP]:[Server IP]:[Gateway IP]:[Netmask]:[Host Name]:[Device]:[Autoconfig]:[dns0-IP]:[dns1-IP]
Where the Netmask is typically 255.255.255.0,
Device is the name of your Network card, which is typically eth0,
And Autoconfig is typically set to off.
We can typically leave Host Name blank, along with dns0-IP and dns1-IP.
Thus, we will use the following command:
setenv bootargs ‘console=ttyPS0,115200 root=/dev/nfs rw nfsroot=192.168.0.86:/home/ubuntu/linux/nfs/rootfs ip=192.168.0.88:192.168.0.86:192.168.0.8:255.255.255.0::eth0:off’
Note that the three lines above above is a singular command.
Make sure you change the according IP addresses and file directories to your own.
We will use the boot command to boot into this filesystem. Note that you can choose to use saveenv to save the environment before using the boot command.
Please see the next page for reference.

After a while, the system should boot up without issues.
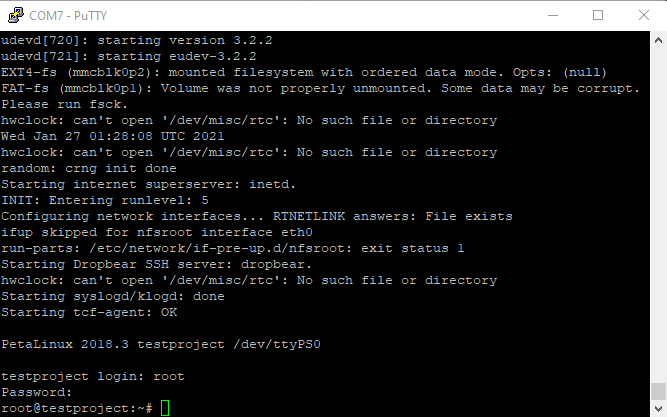
We can check to see if we are in the root directory by using the command ls /

© 2020 Fraser Innovation Inc ALL RIGHTS RESERVED
Without written permission of Fraser Innovation Inc, no unit or individual may extract or modify part of or all the contents of this manual. Offenders will be held liable for their legal responsibility.
Thank you for purchasing the FPGA development board. Please read the manual carefully before using the product and make sure that you know how to use the product correctly. Improper operation may damage the development board. This manual is constantly updated, and it is recommended that you download the latest version when using.
Official Shopping Website: