Step by Step Installation of PetaLinux on Ubuntu via VirtualBox in FPGA Development Board
Table of Contents
Section 1: Creating your first Virtual Machine using VirtualBox 3
1.2 Creating a Virtual Machine Part 1 – Setting up the VirtualBox environment 7
1.3 Creating a Virtual Machine Part 2 – Downloading and installing Ubuntu 12
Section 2: Setting up Ubuntu for PetaLinux 22
2.2 Getting familiar with Ubuntu – Shutting down & Restart 25
2.3 Getting familiar with Ubuntu – Changing the properties 26
Section 3: Installing and Working with PetaLinux 27
3.2 Sharing files and data between your system and the virtual machine 30
3.3 Installing PetaLinux and additional PetaLinux files 43
3.4 Setting up PetaLinux and .bashrc 51
© 2020 Fraser Innovation Inc ALL RIGHTS RESERVED
Without written permission of Fraser Innovation Inc, no unit or individual may extract or modify part of or all the contents of this manual. Offenders will be held liable for their legal responsibility.
Thank you for purchasing the FPGA development board. Please read the manual carefully before using the product and make sure that you know how to use the product correctly. Improper operation may damage the development board. This manual is constantly updated, and it is recommended that you download the latest version when using.
Official Shopping Website:
Section 0: Prerequisites
In order to follow along to this tutorial, you will be required to have:
- A computer with Windows 10, Windows 8, or Windows 7 as its operating system. A computer with Windows 10 will be used in the tutorial, so certain aspects may differ if you use a different Windows edition.
- A secure internet connection. We will be downloading multiple packages and installers from the internet. Due to the size of some of these files, you may find it frustrating if you have a slow internet connection.
- At least 10 Gigabytes of free space on your computer. Having sufficient free storage space on your computer will make the process smoother. Note that 10 Gigabytes is a minimum as we will be creating a virtual hard drive that is 100 Gigabytes. The more free space the better.
- (Recommended) At least 8 Gigabytes of memory. Having sufficient free memory on your computer will allow the Virtual Machine to run smoother and faster. Although you can still follow the tutorial with less than 8 gigabytes, you may find it to be very slow and frustrating.
Section 1: Creating your first Virtual Machine using VirtualBox
1.1 Installing VirtualBox
First, we want to download Oracle’s VirtualBox from www.virtualbox.org
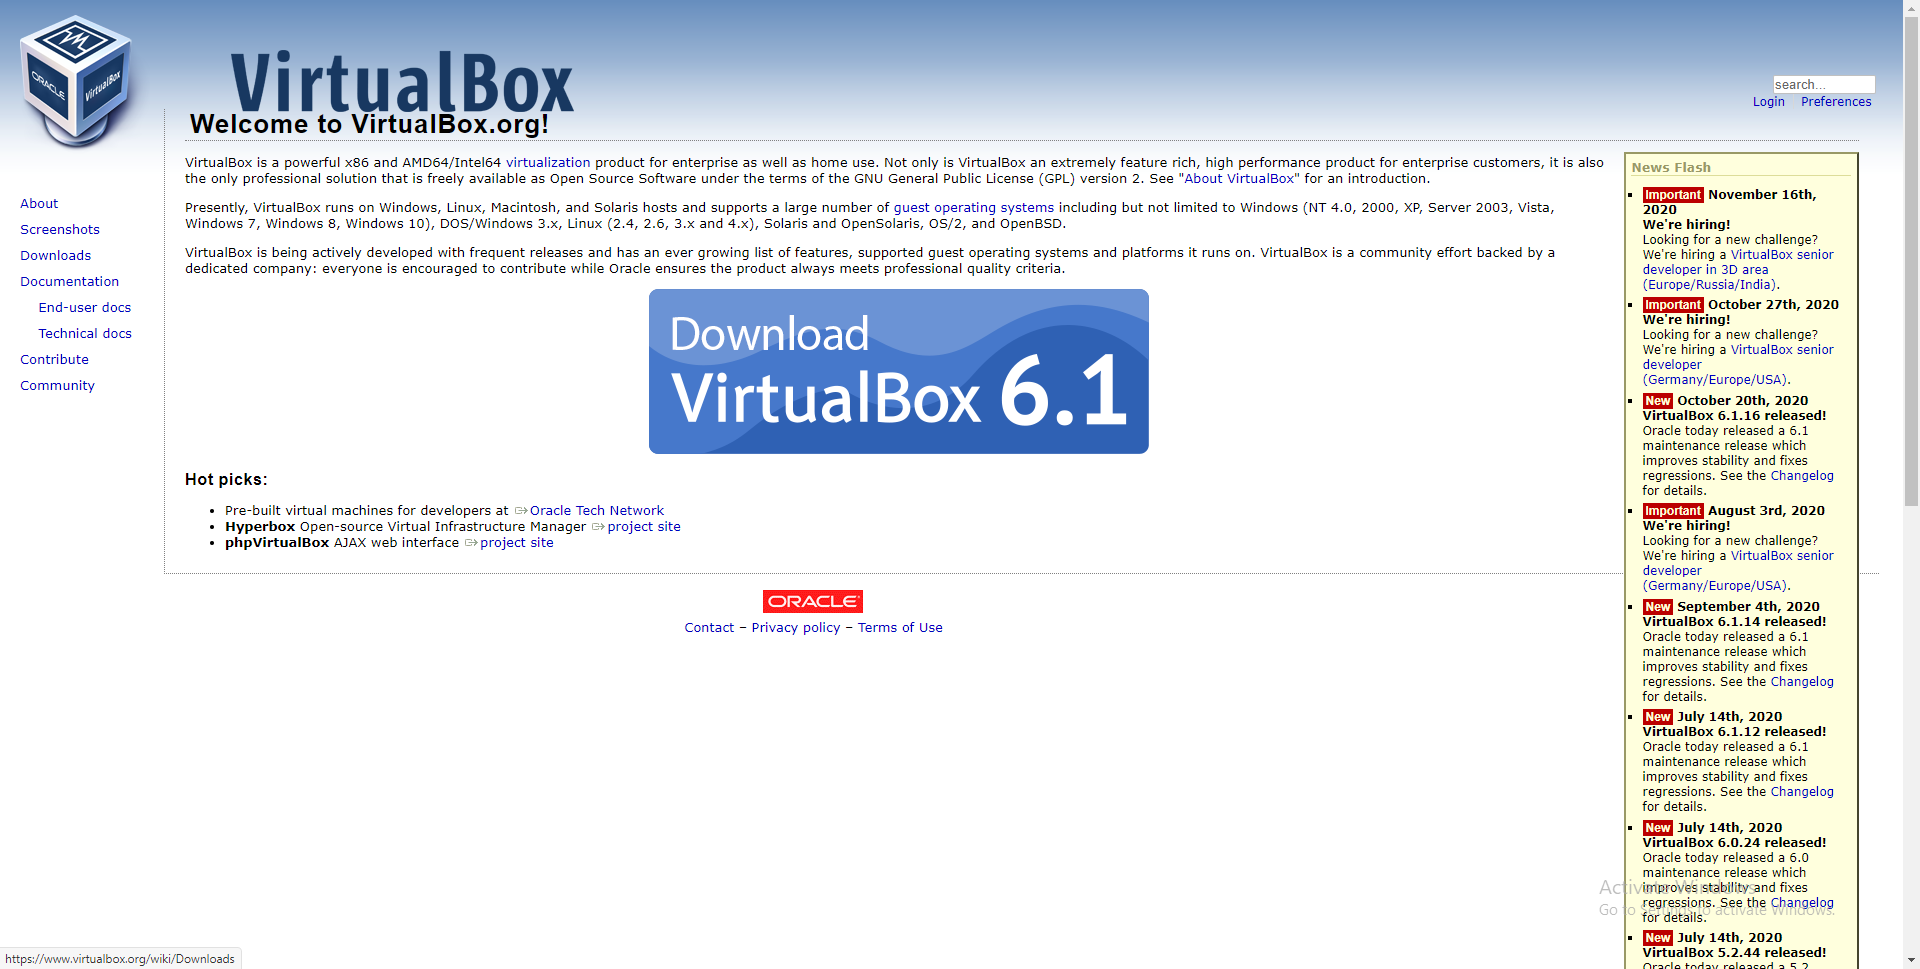 Once the page loads, click on the large “Download VirtualBox” button in the middle of the screen as can be seen in the figure below.
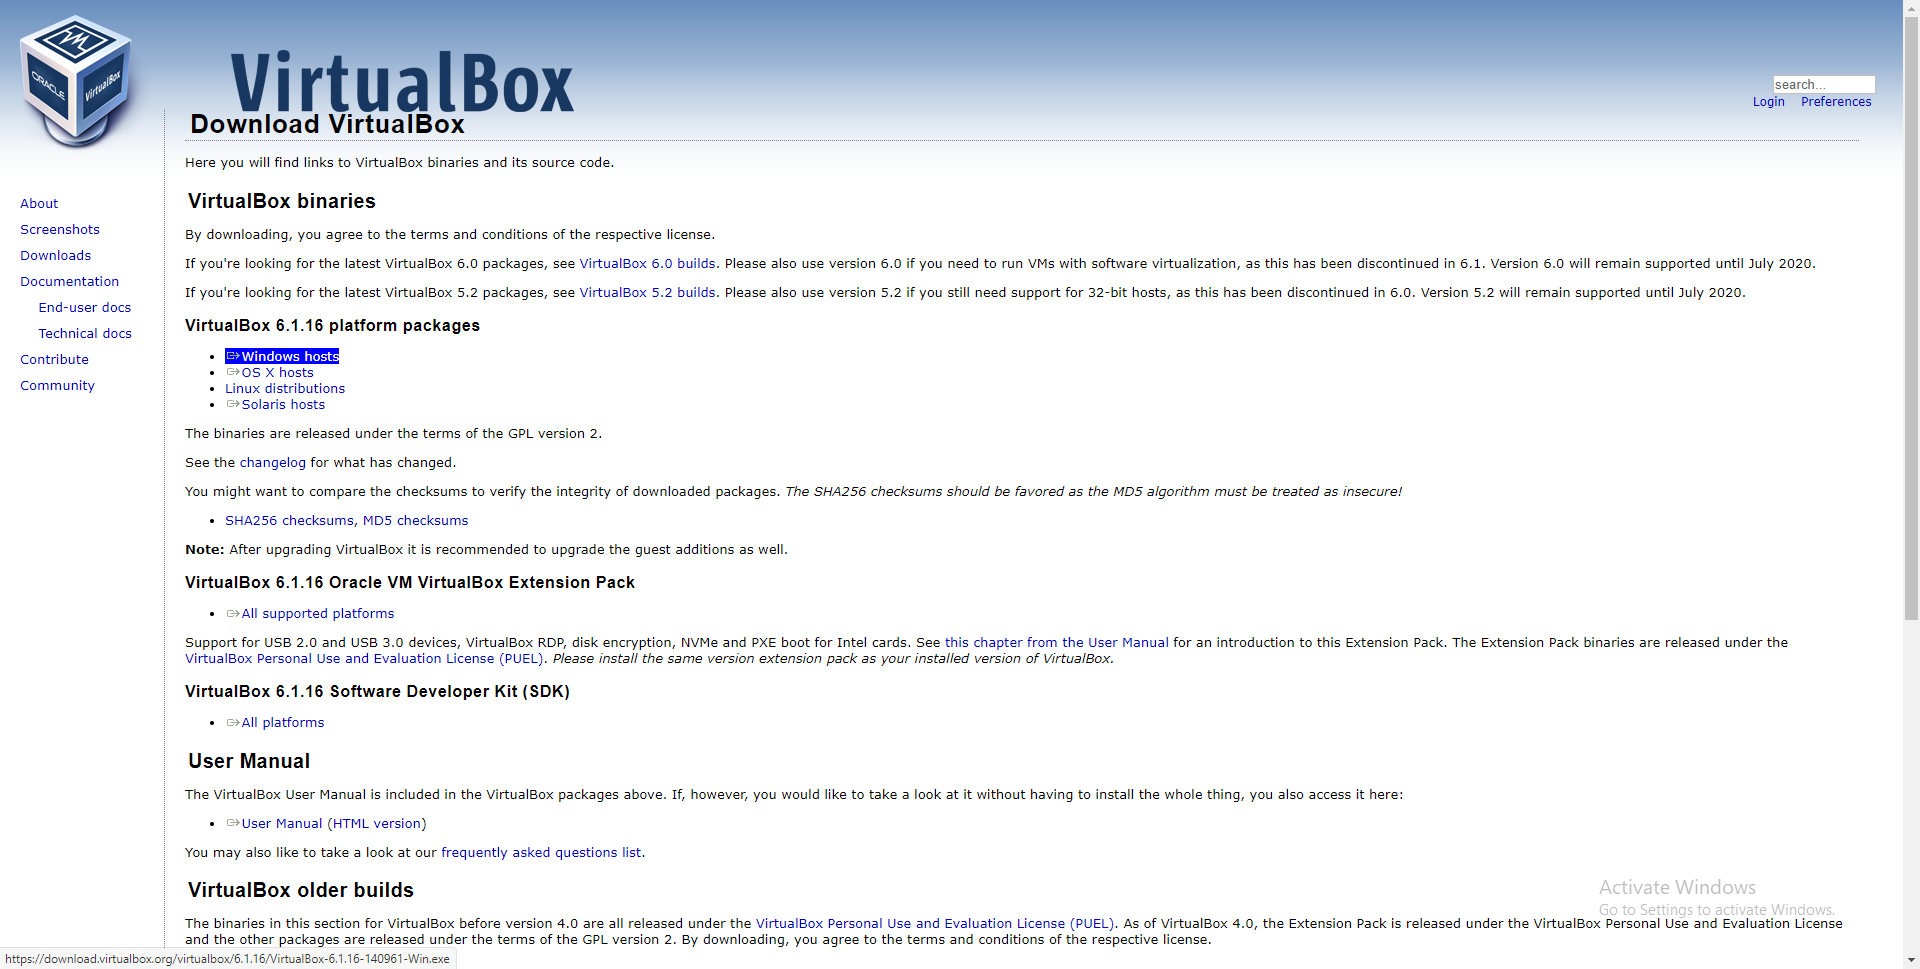 Because this tutorial is based off of the user having a Windows operating system, we will choose the corresponding Windows Hosts option. The download should begin shortly afterwards.
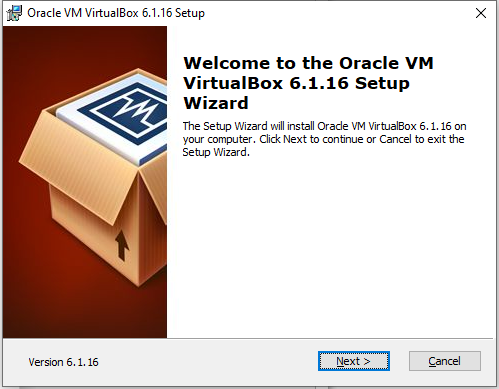
Next, we want to locate and open the downloaded file to begin the set up.
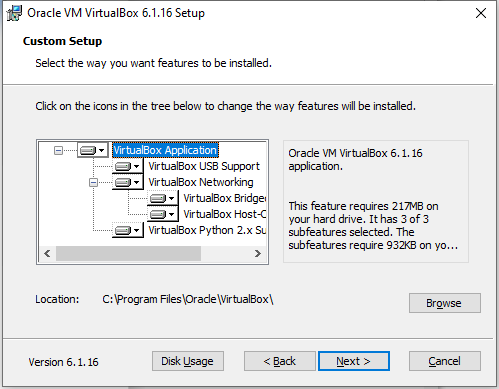
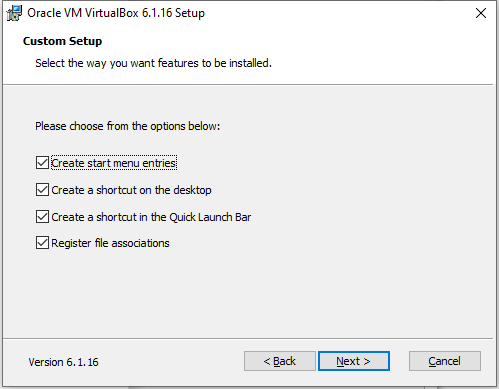
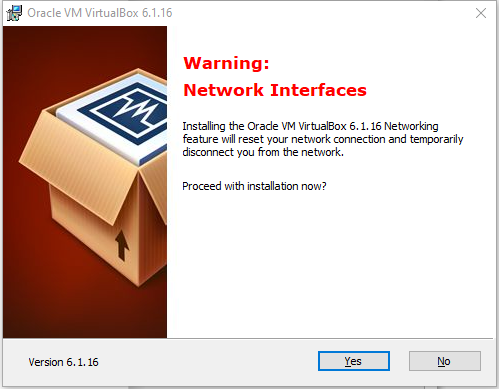
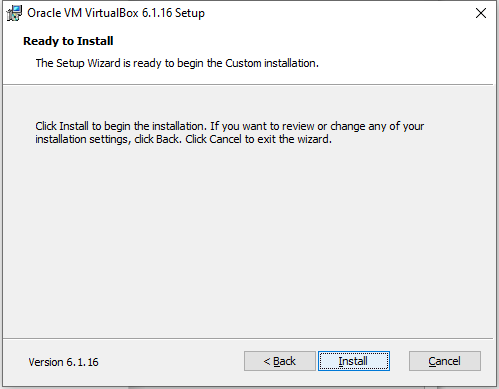
Keep in mind that everything during the setup will be left as its default setting. Click Next on each page, unless you wish to configure certain settings yourself, which is not recommended.
During installation, when prompted with “do you want to allow this app to make modifications to your device”, click Yes. This should result in a successful installation.
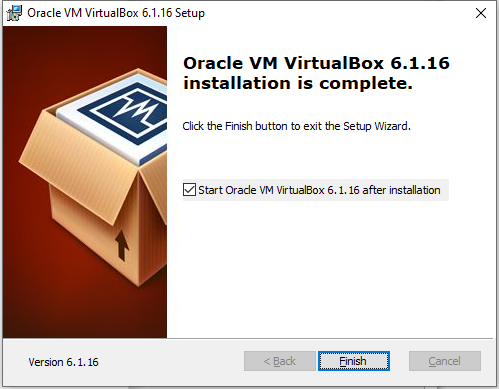
Finally, the following prompt should pop up. You can choose when to restart, but keep in mind that you will not be able to continue without restarting your device.
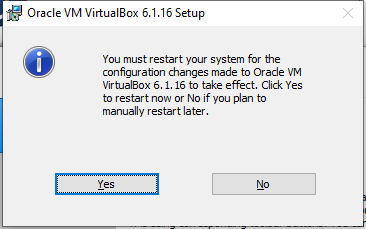
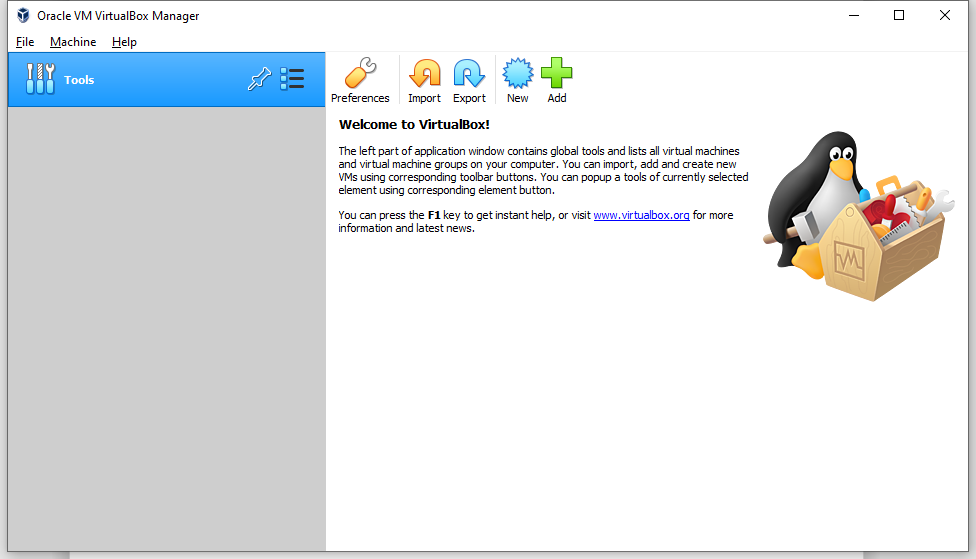
Upon restart, you should be able to successfully open the VirtualBox application.
1.2 Creating a Virtual Machine Part 1 – Setting up the VirtualBox environment
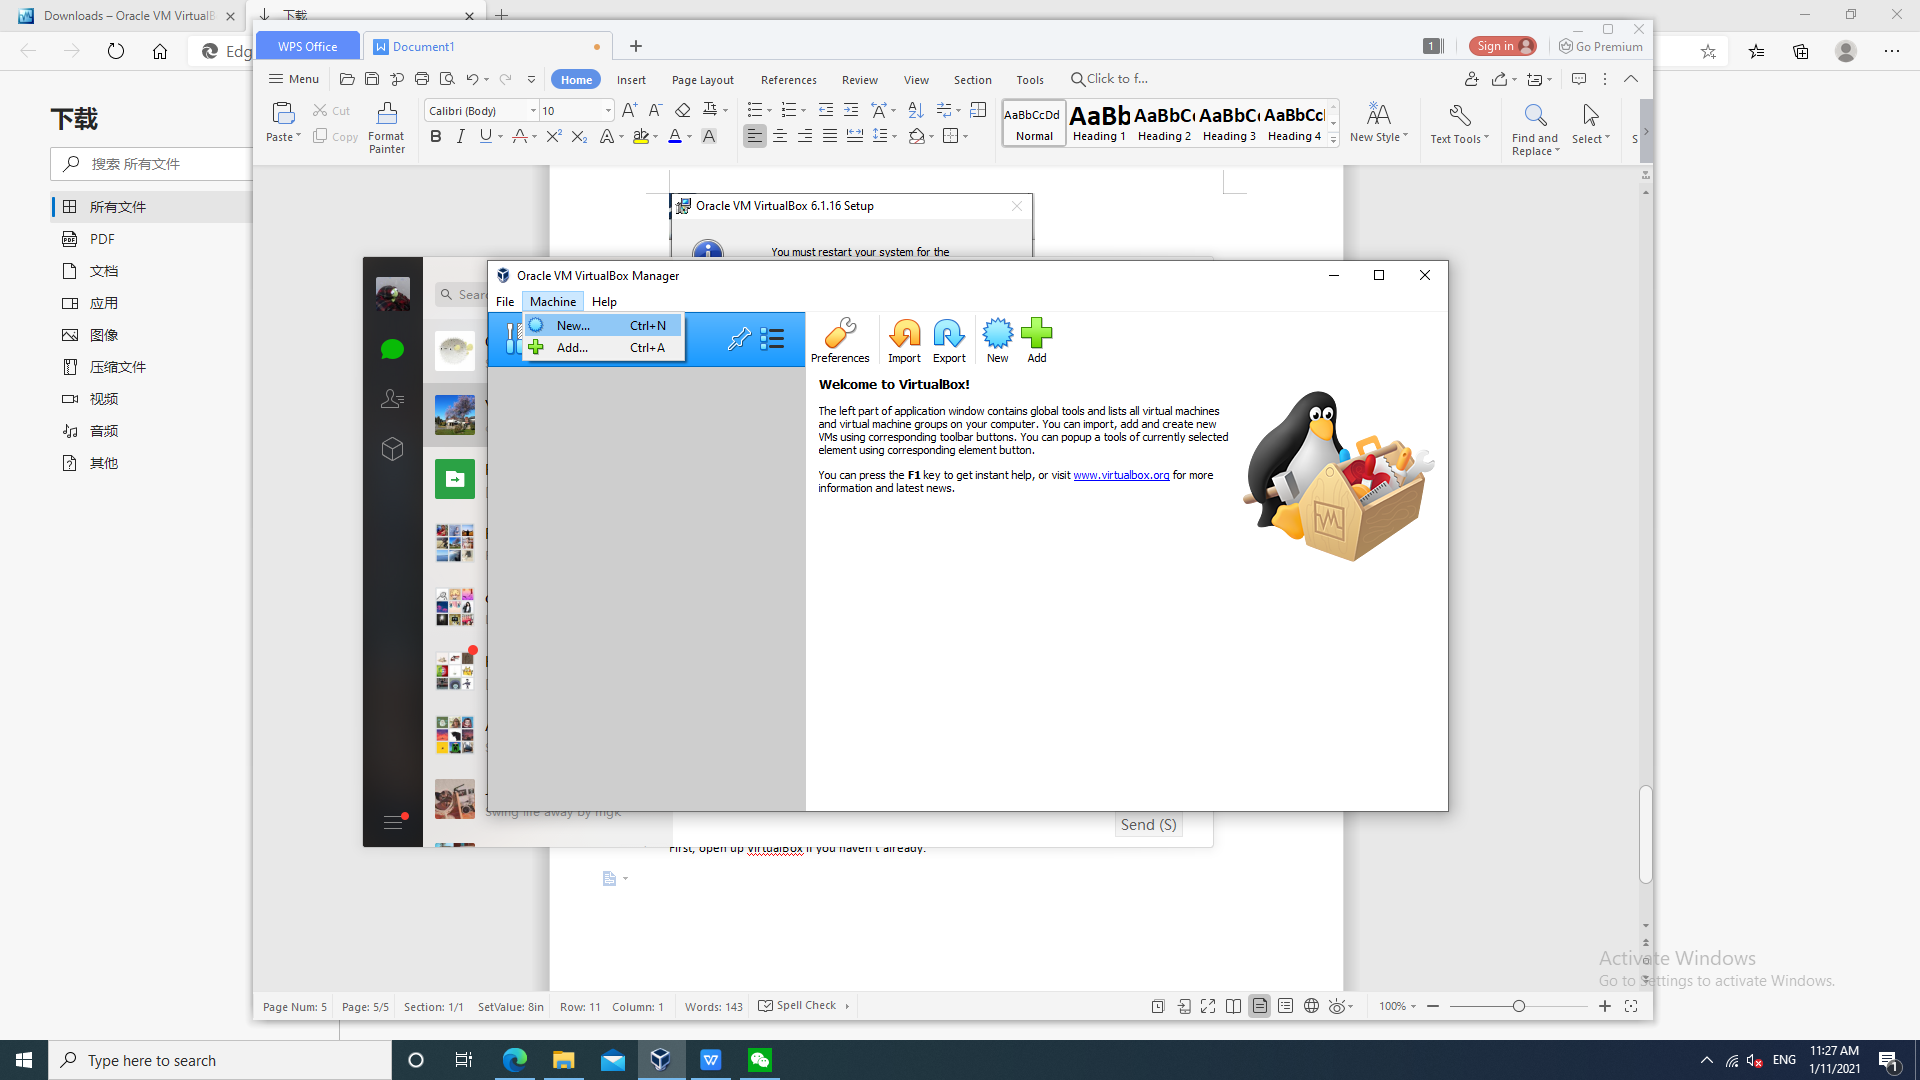
First, open up VirtualBox if you haven’t already.
Select Machine and then New, or use the shortcut Ctrl + N
*All numbered figures in this section are on the next two pages
Once in, select Expert Mode on the bottom. See Fig.1.2.1
For Type, please select Linux. See Fig.1.2.2
For Version, please select Ubuntu (64-bit). See Fig.1.2.3
For Memory Size, please change it to 8192 MB. You may choose to use the slider, or directly input it. It may be easier to directly type it into the box. See Fig.1.2.4
Finally, go back to the top and give it a Name. We will be using “Test Workstation” in this tutorial. See Fig.1.2.4
Make sure the Hard Disk selection has “Create a virtual hard disk now” chosen. See Fig.1.2.4
Click Create when you are finished.
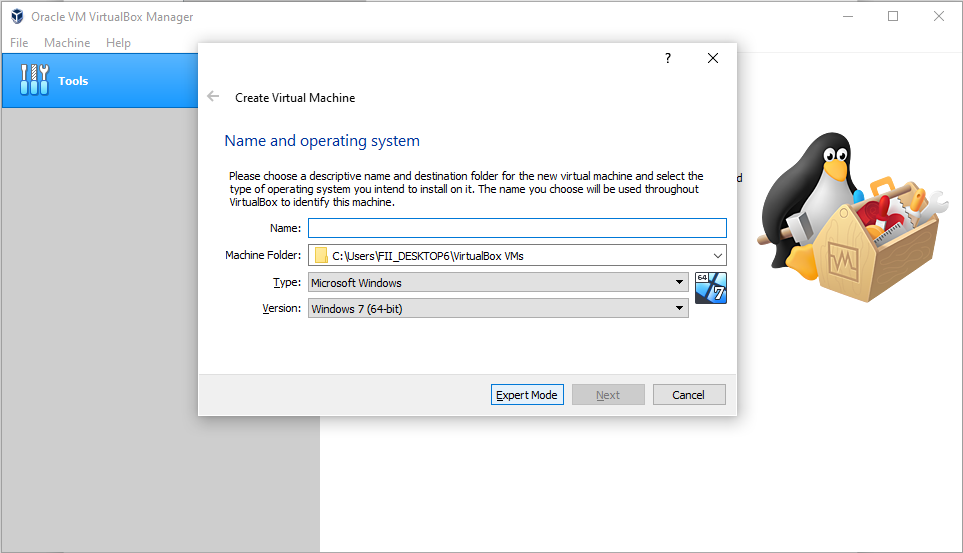
Fig.1.2.1
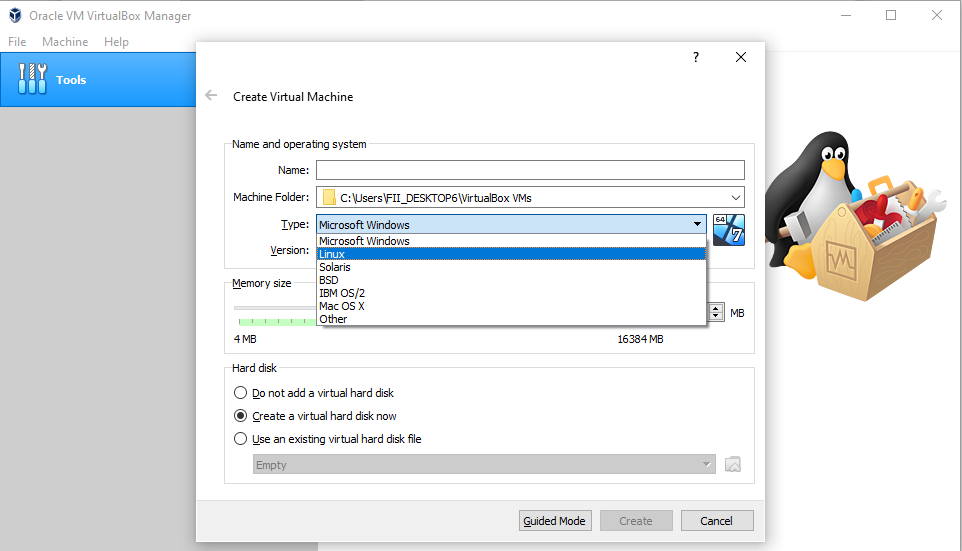
Fig.1.2.2
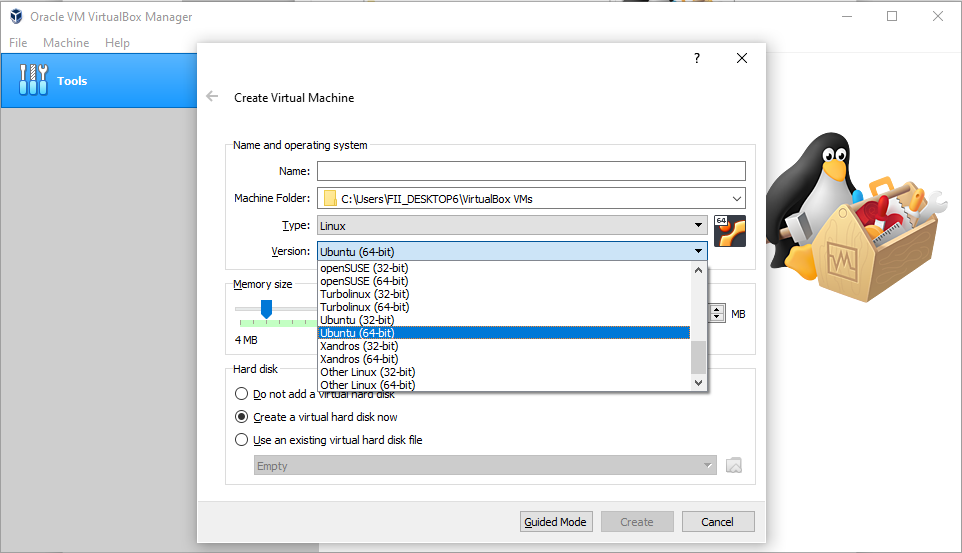
Fig.1.2.3
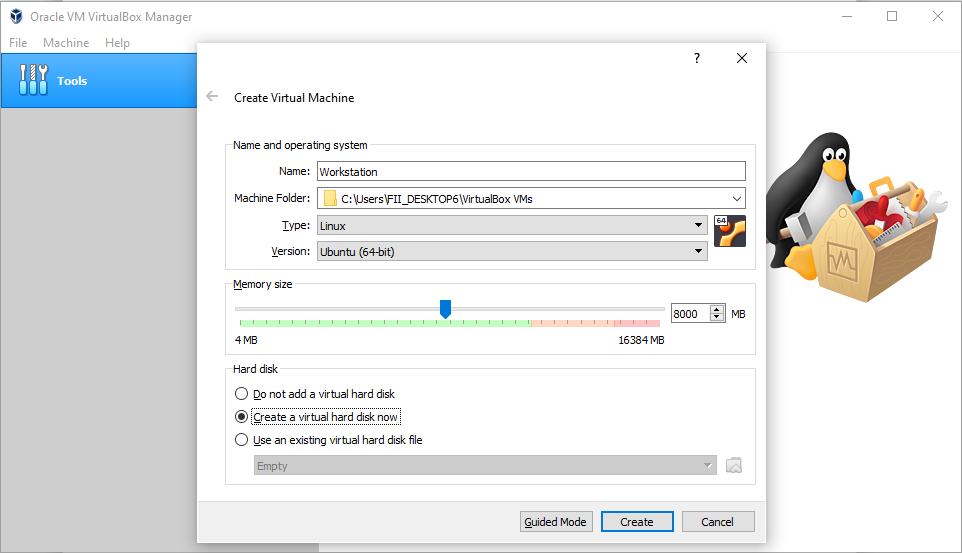


Fig.1.2.4
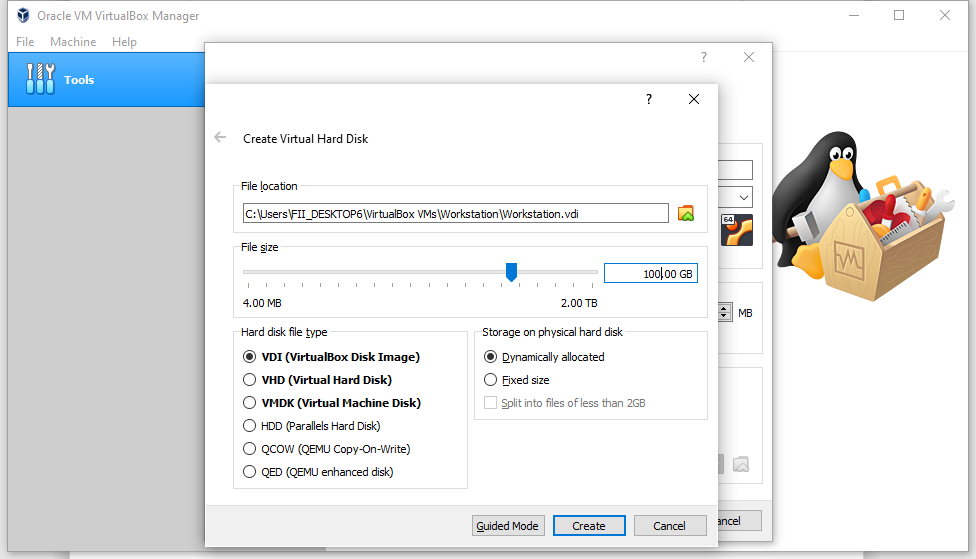
We will now be taken to the Create Virtual Hard Disk page.
The only change that we will make is changing the File Size to 100.00 GB from the default of 10.00 GB.
Click Create when you are finished.

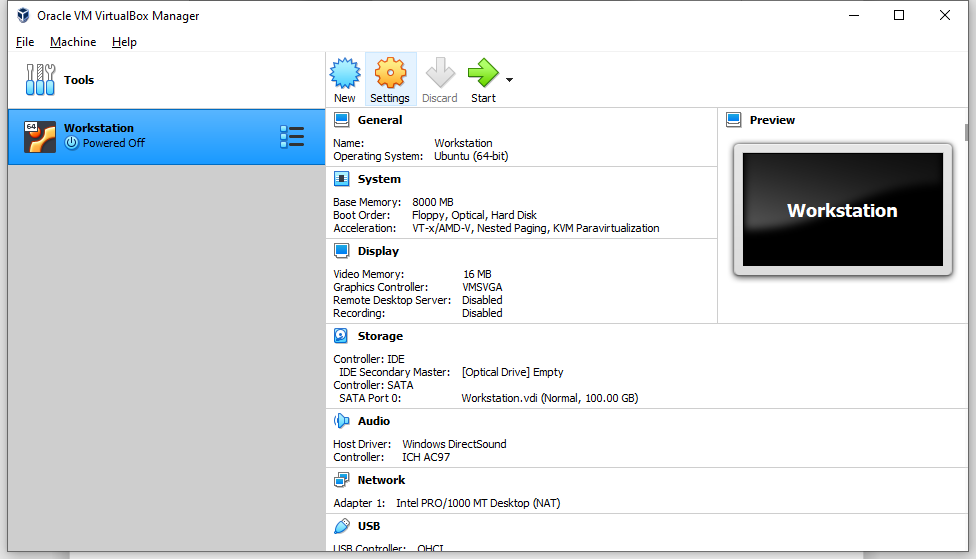

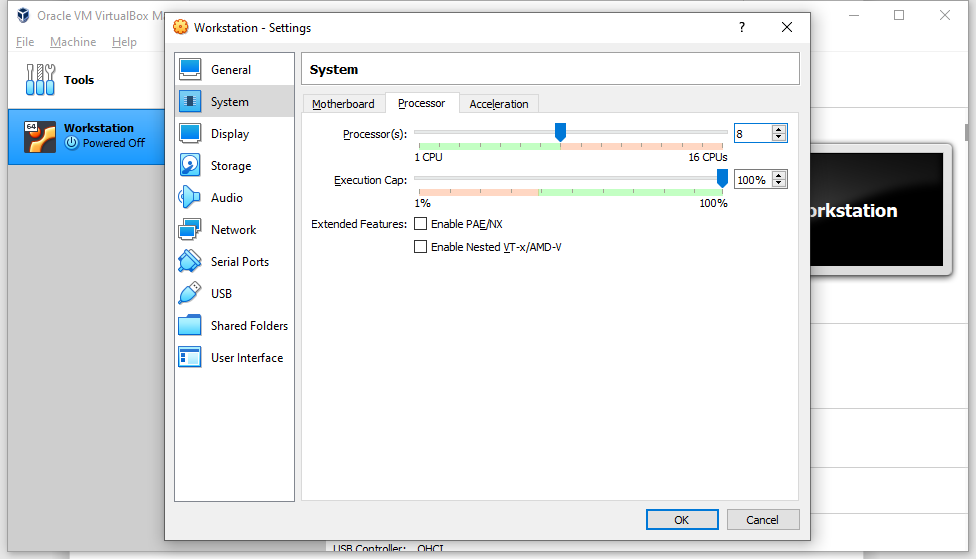
Navigate to Settings of Test Workstation (the yellow gear icon), or use the shortcut Ctrl + S.
Change the Number of Processors to 8.
Finally, click OK when finished.

1.3 Creating a Virtual Machine Part 2 – Downloading and installing Ubuntu
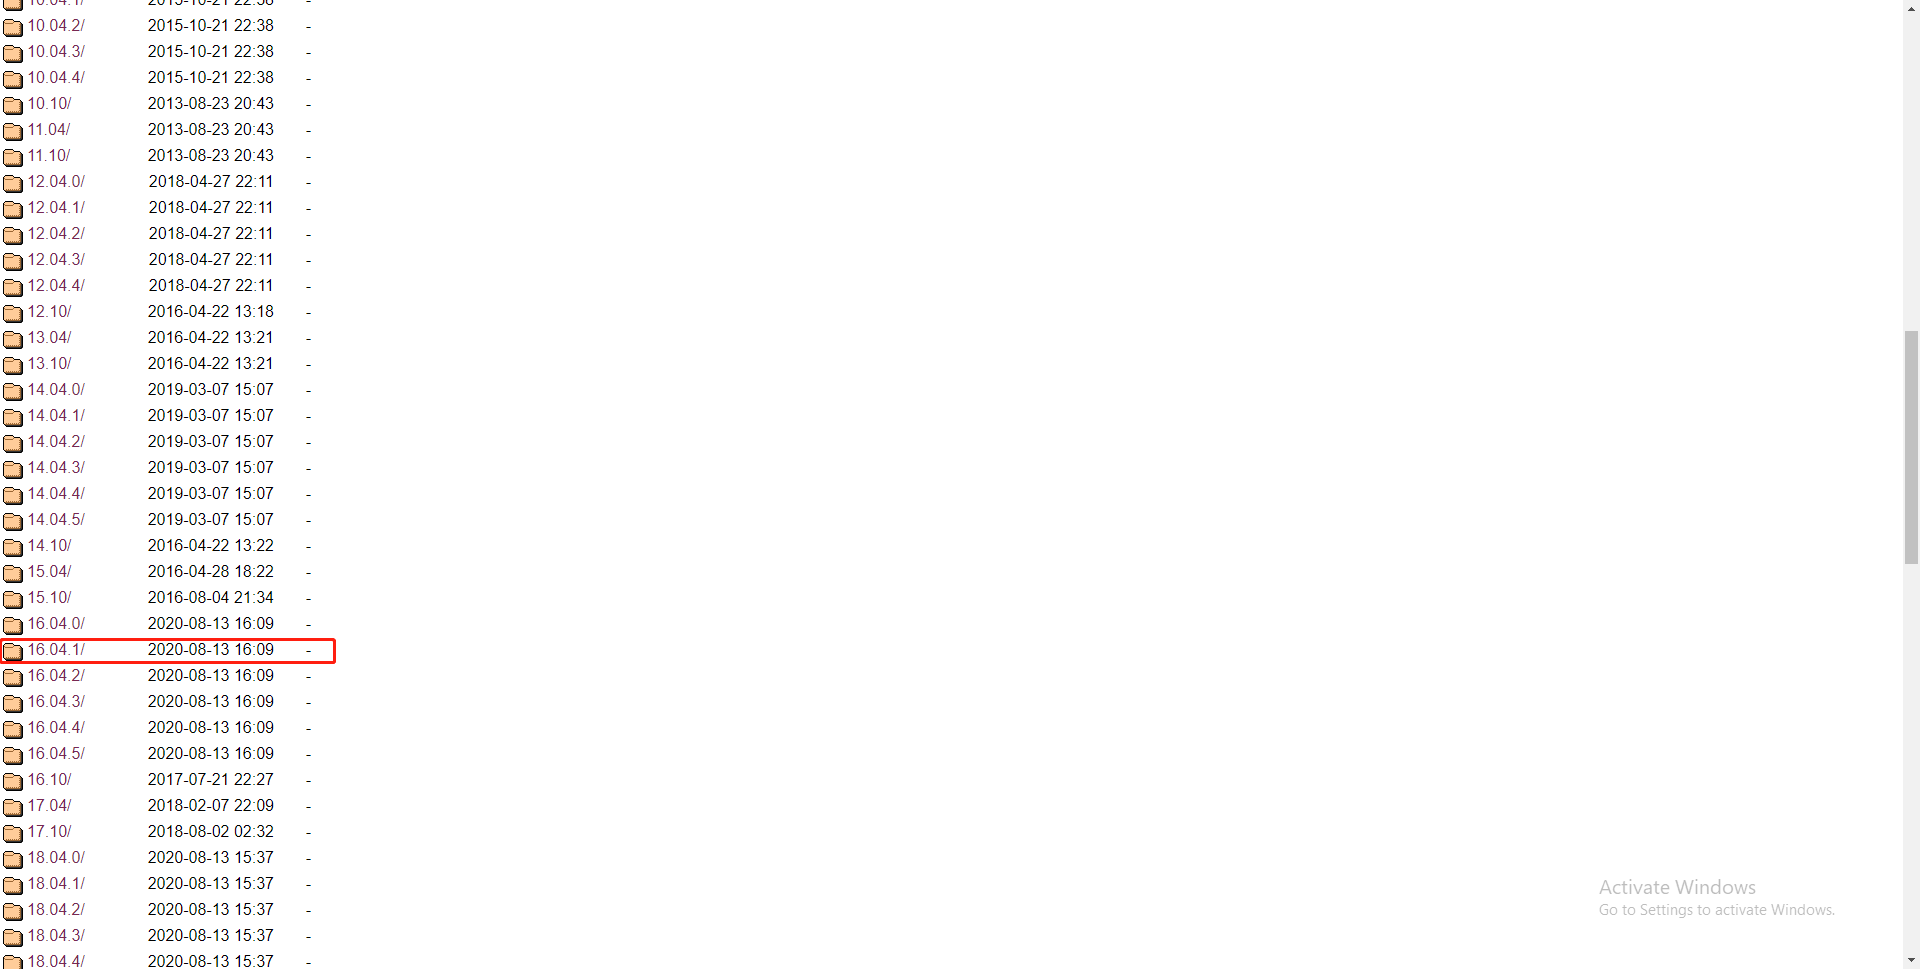
Because we will be using Ubuntu version 16.04.01 in this tutorial, we will proceed to download it from http://old-releases.ubuntu.com/releases/
Keep in mind that using versions of Ubuntu other than 16.04.01 may result in code incompatibility in later parts of the tutorial.
Scroll down to the 16.04.1 folder and click it.
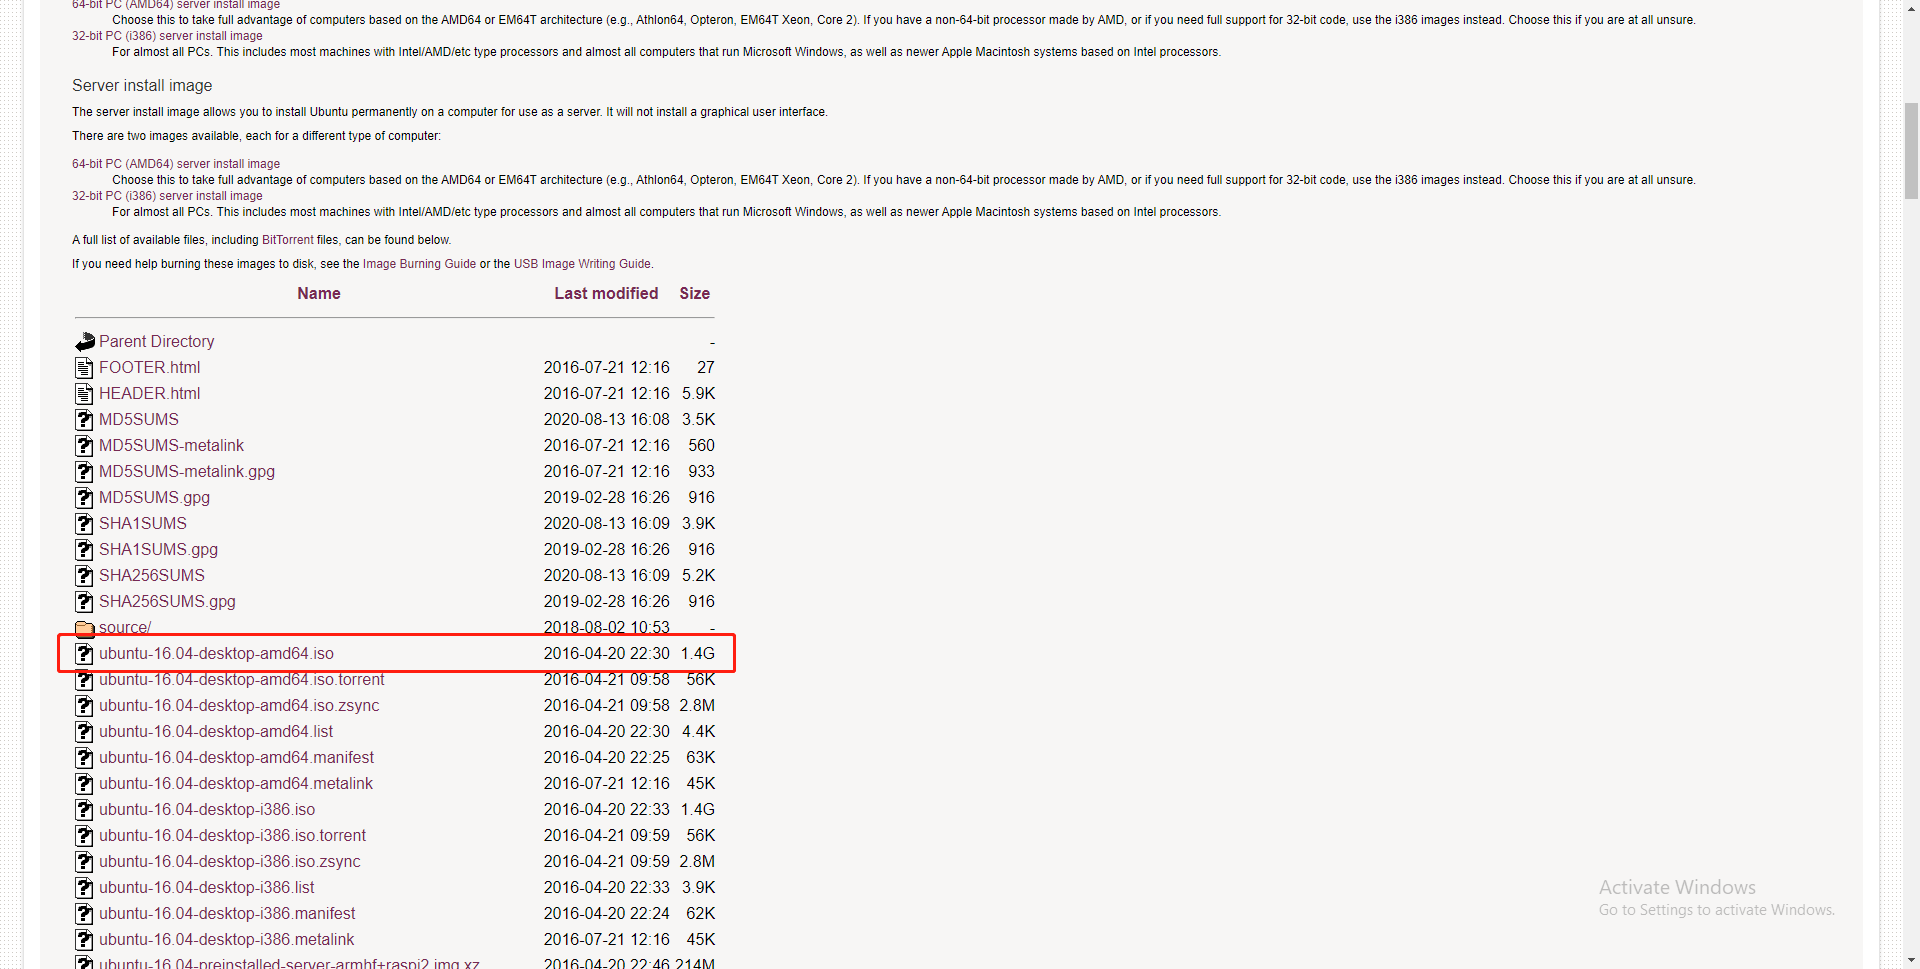
Within that folder, scroll down to find the file titled “ubuntu-16.04-desktop-amd64.iso”, and click to download it after making sure the size is around 1.4 G to see if it’s the correct file.
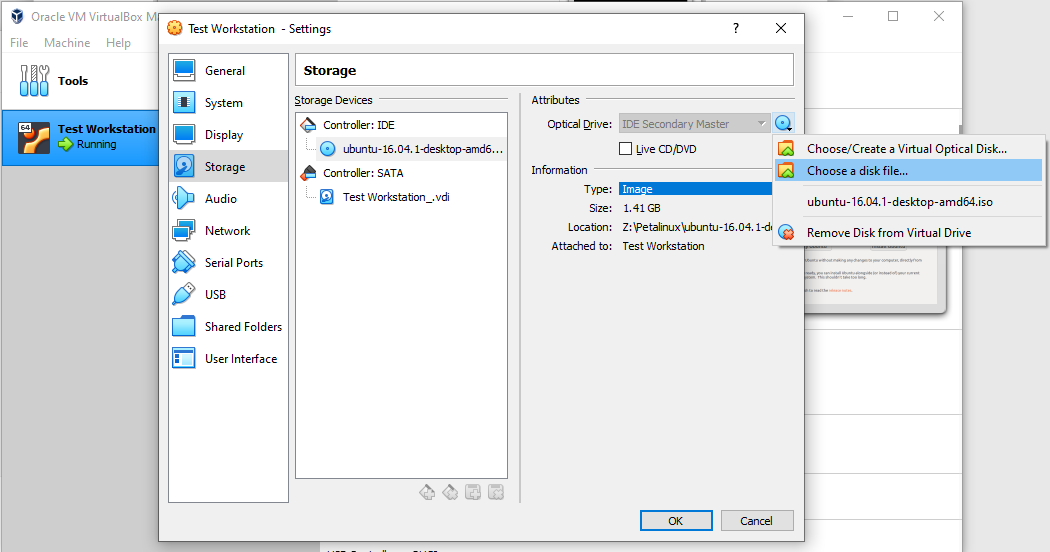
Open back up the Settings window in VirtualBox for the Test Workstation that we just created and click the Storage tab on the left.
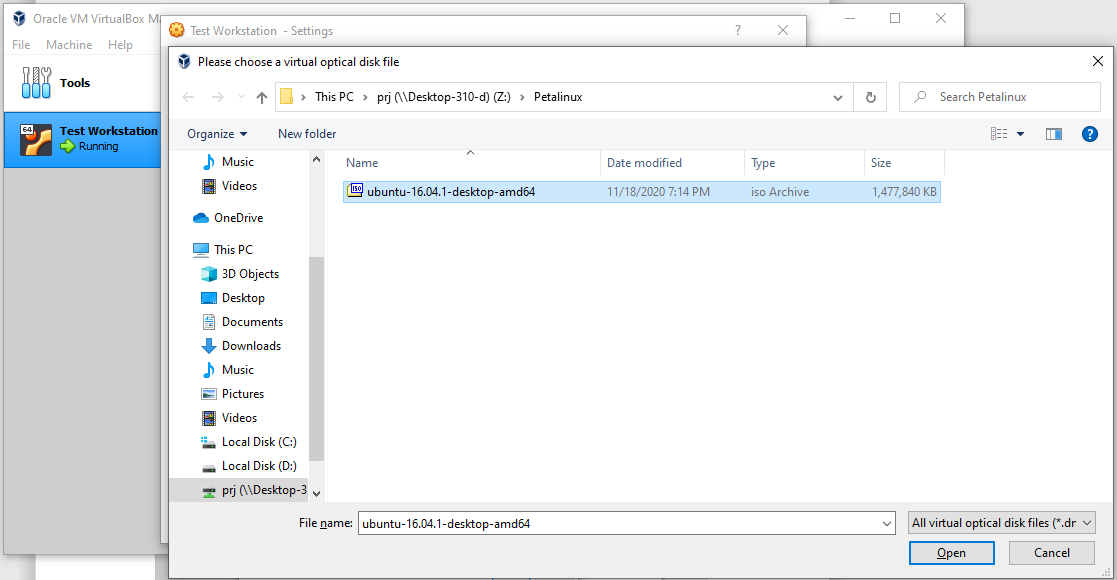
Next, click the blue icon on the far right, in line with the Optical Drive section. Select Choose a disk file and select the disk image file of Ubuntu 16.04.1 that we just downloaded.
Click Open after it is selected.
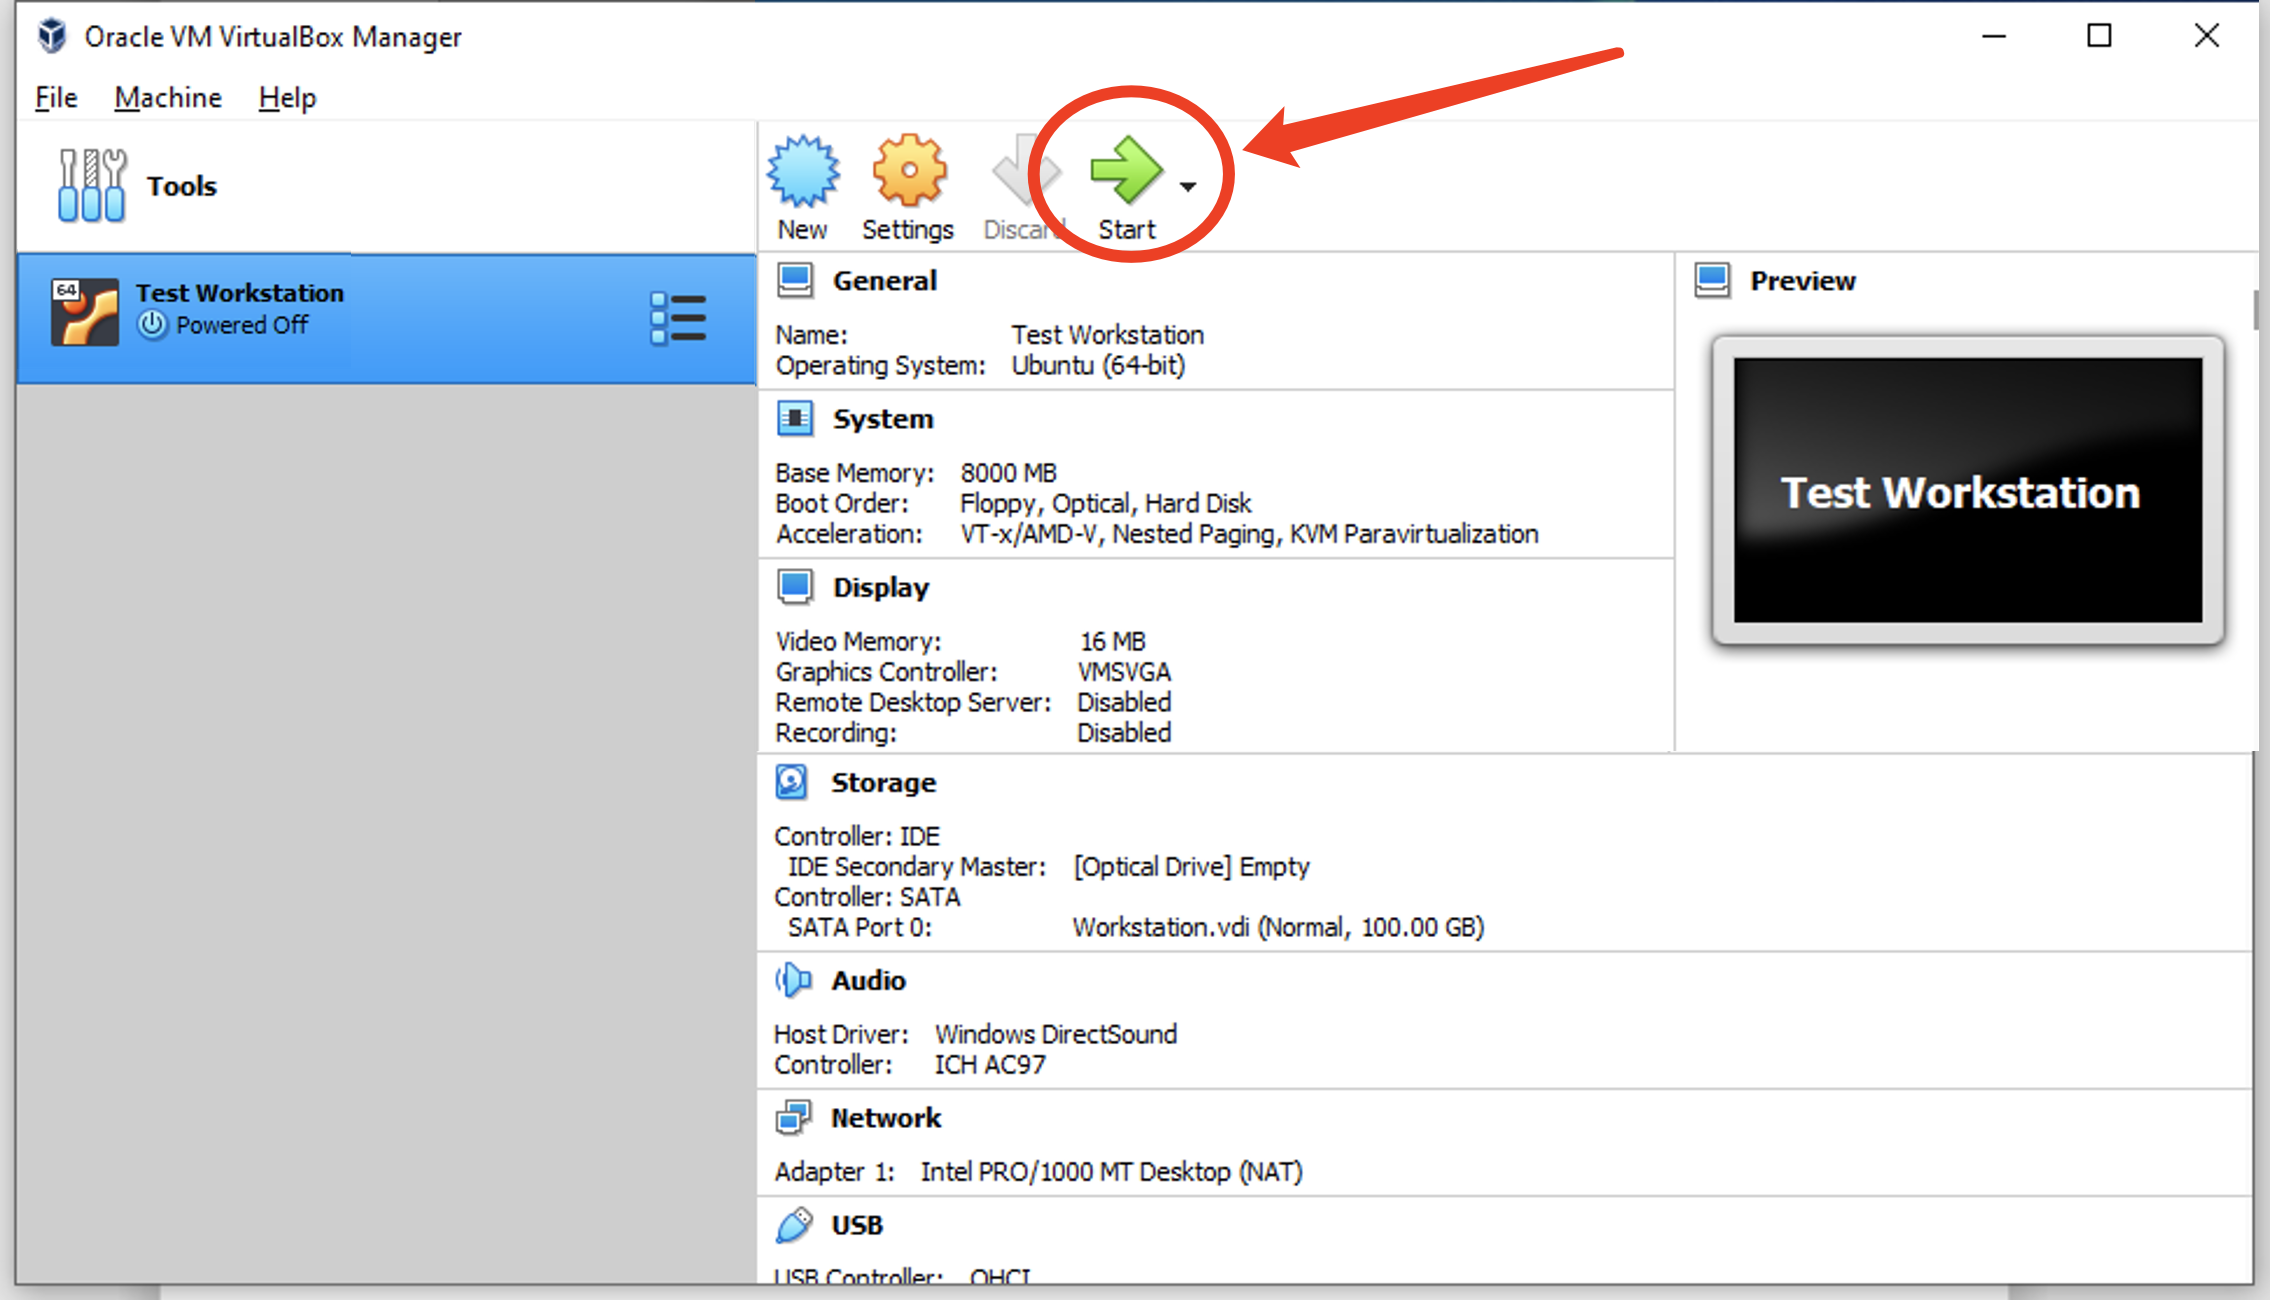
Now, we can click the green Start button to start up the Virtual Machine that we just created. Ubuntu should start up without any issues.
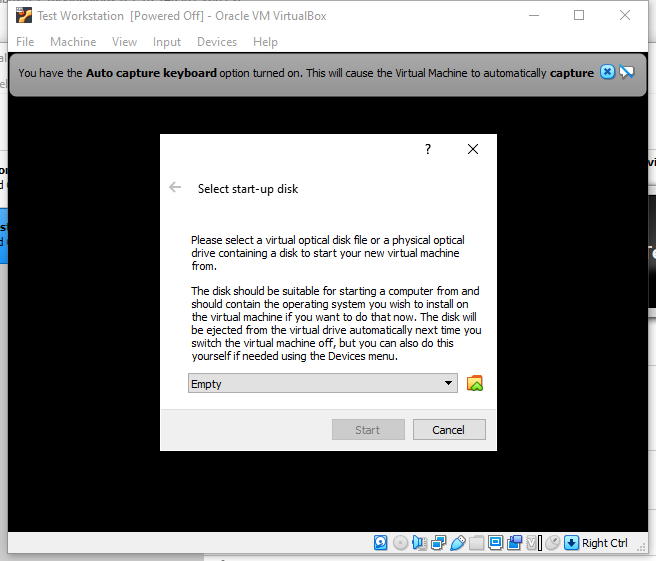
If you get the following prompt, that means you didn’t successfully complete the previous step regarding configuring the optical disk drive. Simply click the folder icon with a green arrow and select the Ubuntu 16.04.1 iso file we just downloaded.
Allow for Ubuntu to boot up, keep in mind that this may take a while.
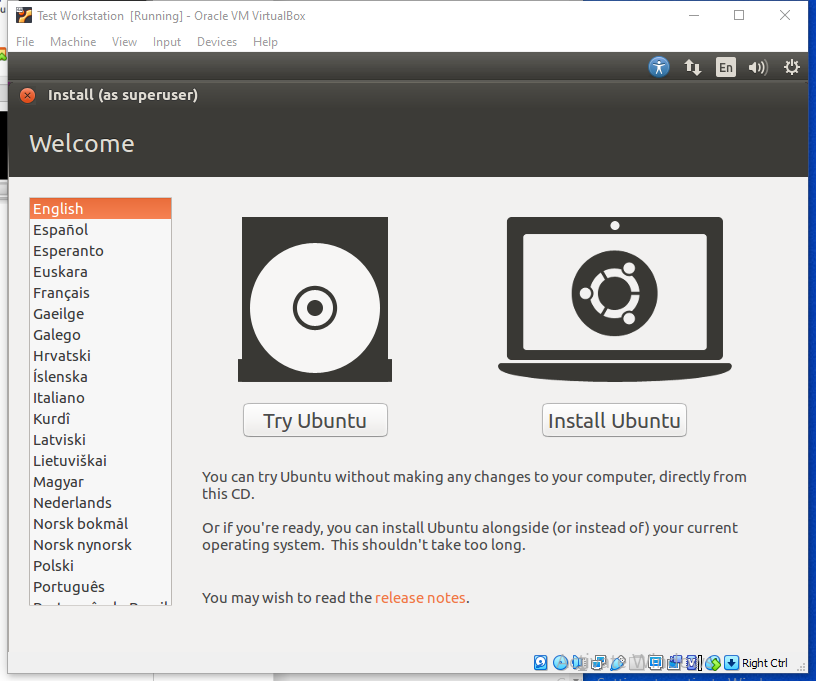
When you get to the page shown below, select Install Ubuntu.
*All numbered figures in this section are on the next page
On the following page, check the box that reads “Download updates while installing Ubuntu”. You may leave the other box unchecked, as checking it would result in a significantly longer install time. See Fig.1.3.1
Click Continue on the bottom right corner when you are ready to proceed. See Fig.1.3.1
On the next page, select Erase disk and install Ubuntu, and click Install Now on the bottom right corner. See Fig.1.3.2
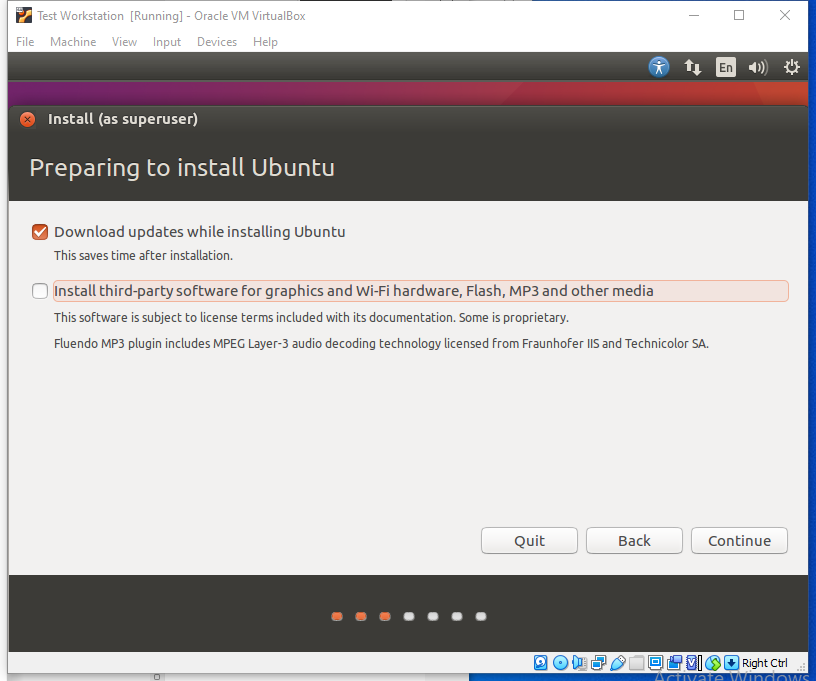 Fig.1.3.1
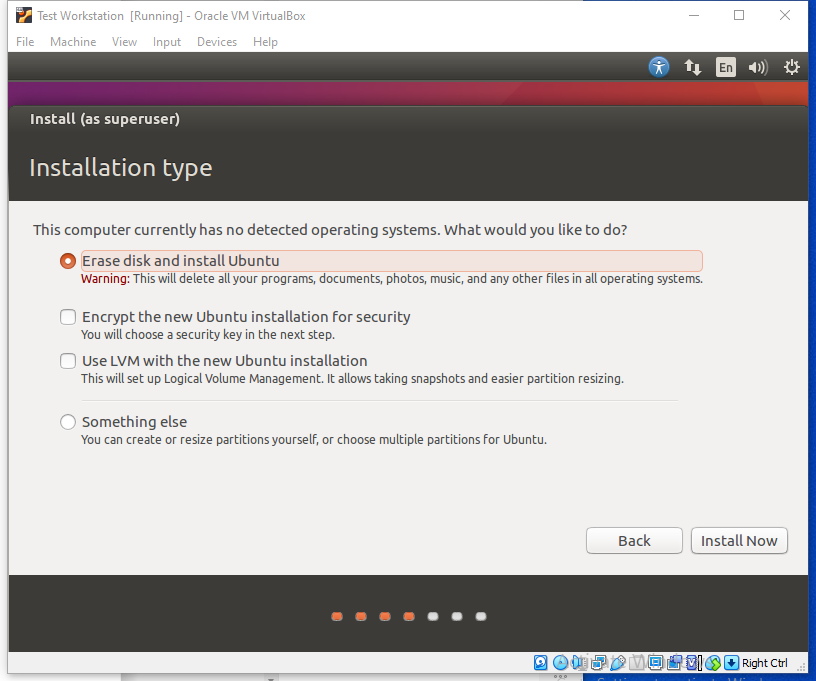 Fig.1.3.2
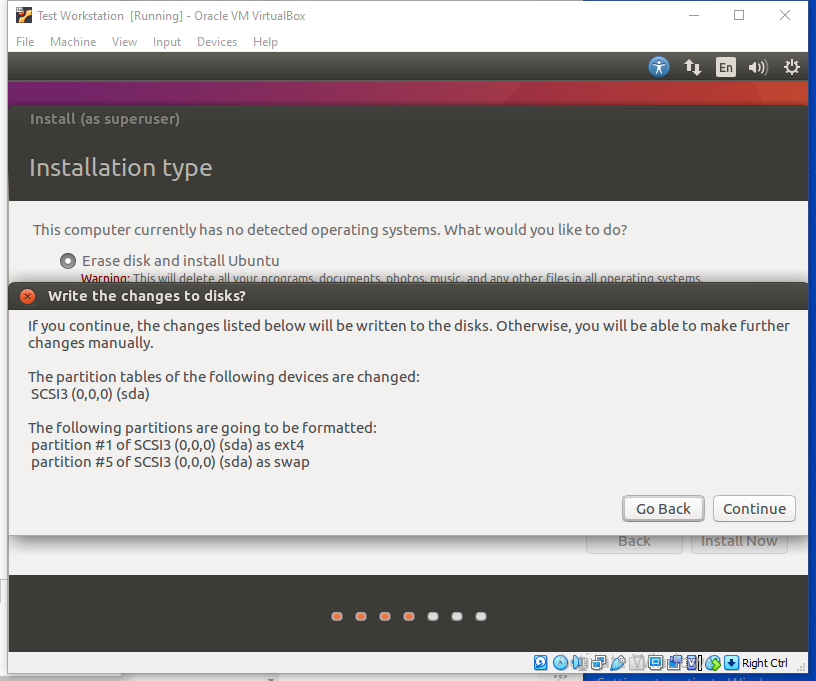
When the prompt pops up, simply select Continue.
*All numbered figures in this section are on the next page
Next, we will follow through and select where you are currently resided. This information only serves to help choose the time zone (Fig.1.3.3). Press Continue when you are done.
We will be using the English (US) keyboard layout in this tutorial, which should be set to be the default. Please press Continue when you are finished (Fig.1.3.4).
Keep in mind that the Continue button may be hidden off-screen. You can simply move your cursor to the top of the window next to “Install (as superuser)”, hold and drag the window to the left of the screen until the Continue button shows up (Fig.1.3.4).
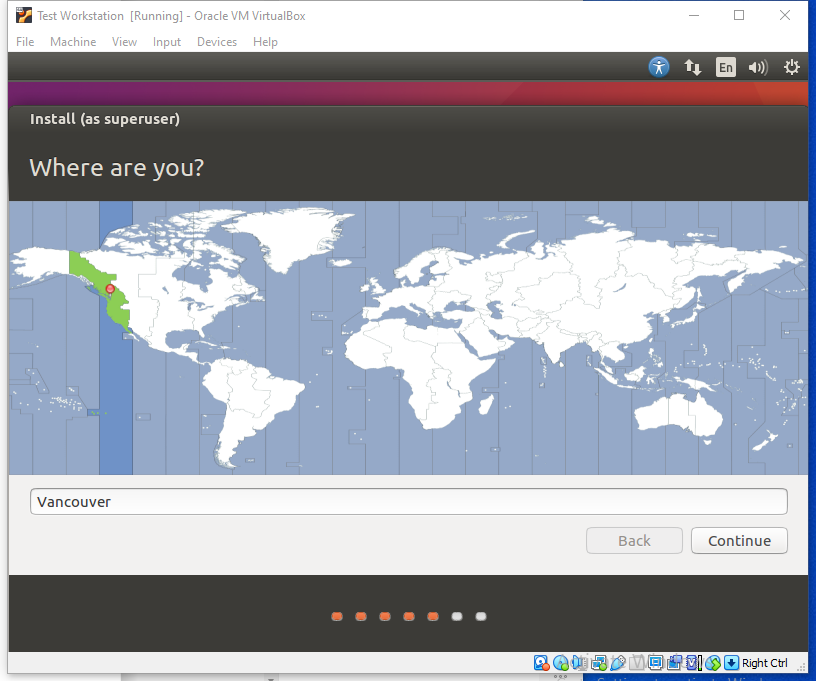 Fig.1.3.3
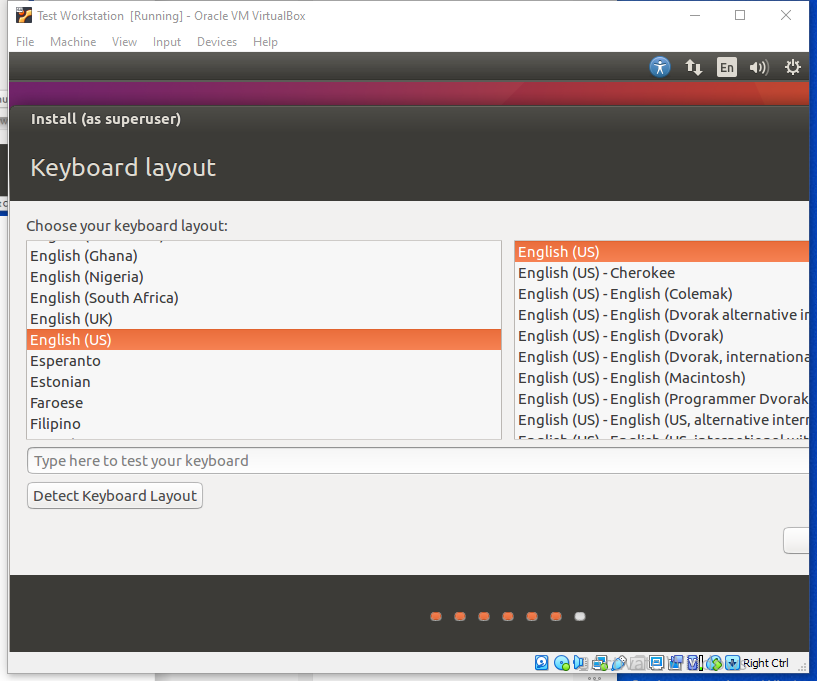 Fig.1.3.4
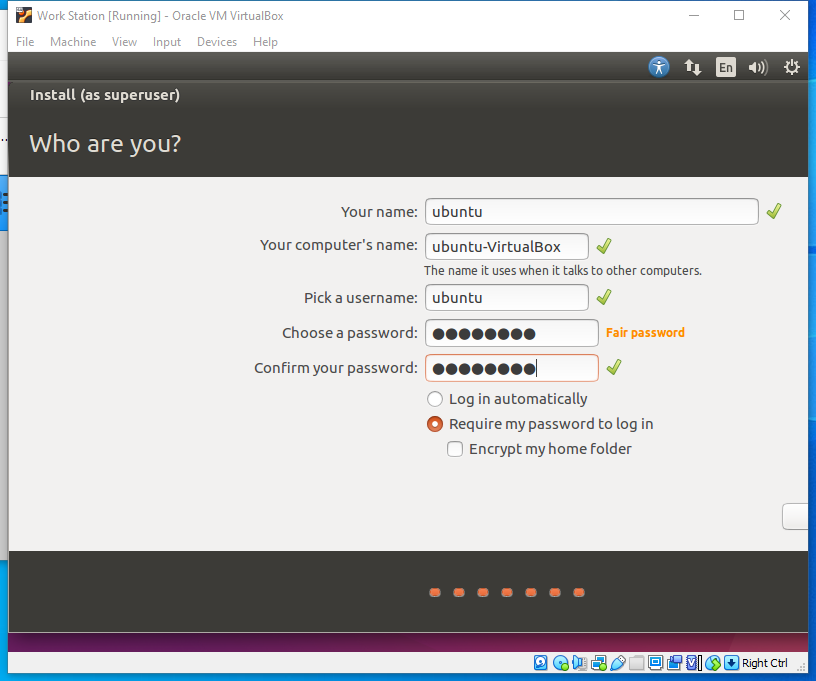
You should now be looking at the user setup page. For the sake of simplicity and uniformity, we will let the username be ubuntu, and we will set the password as 12345678.
Your computer’s name as well as Pick a username should all be automatically set as you fill in the Your name box.
Press Continue when you are finished. Once again, note that the button may be off-screen.
*Figures 1.3.5 – 1.3.7 are on the next two pages
The installation should begin after the Continue button is clicked. This may take a while (Fig.1.3.5)
When it is done, you will get the prompt to restart. Click Restart Now (Fig.1.3.6)
If the screen reads “Remove the installation medium and press Enter”, simply just press Enter.
The system should reboot and prompt you to enter your password, which we set as 12345678 (Fig.1.3.7)
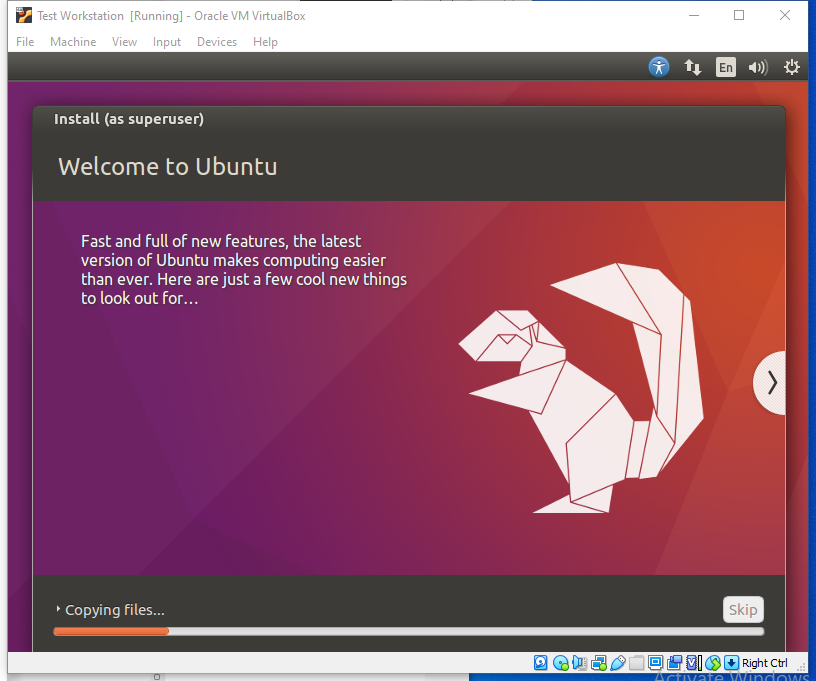 Fig.1.3.5
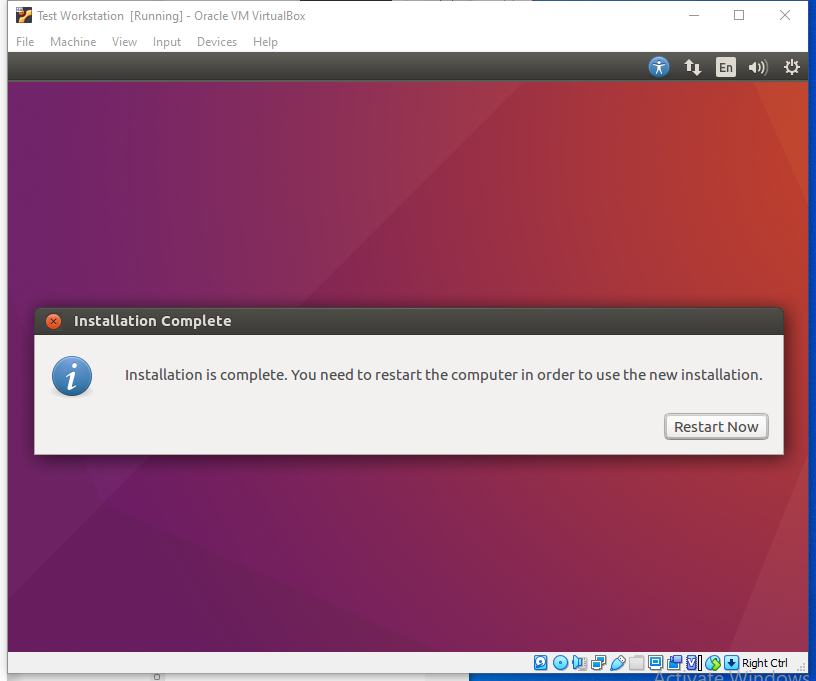 Fig.1.3.6
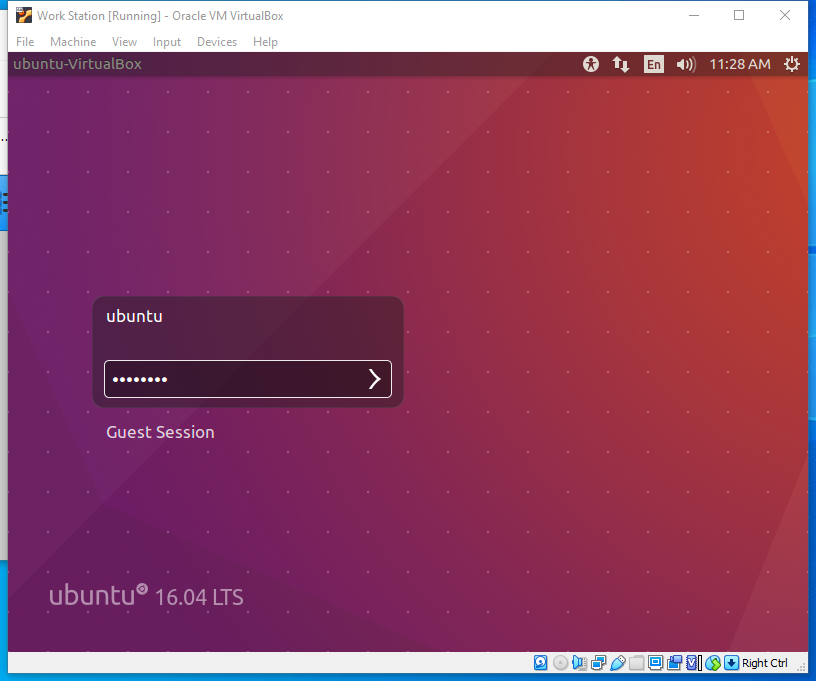 Fig.1.3.7
You may now choose to log in by pressing Enter or clicking the arrow next to the password you just entered.
You have now successfully installed Ubuntu.
Section 2: Setting up Ubuntu for PetaLinux
2.1 Creating a Snapshot
In order to make it easier on ourselves when we make a mistake that breaks the system, we will be creating Snapshots as we progress on this tutorial.
Snapshots allow for the user to create a backup of the current machine state, and you may choose to go back to certain Snapshots in case anything goes wrong.
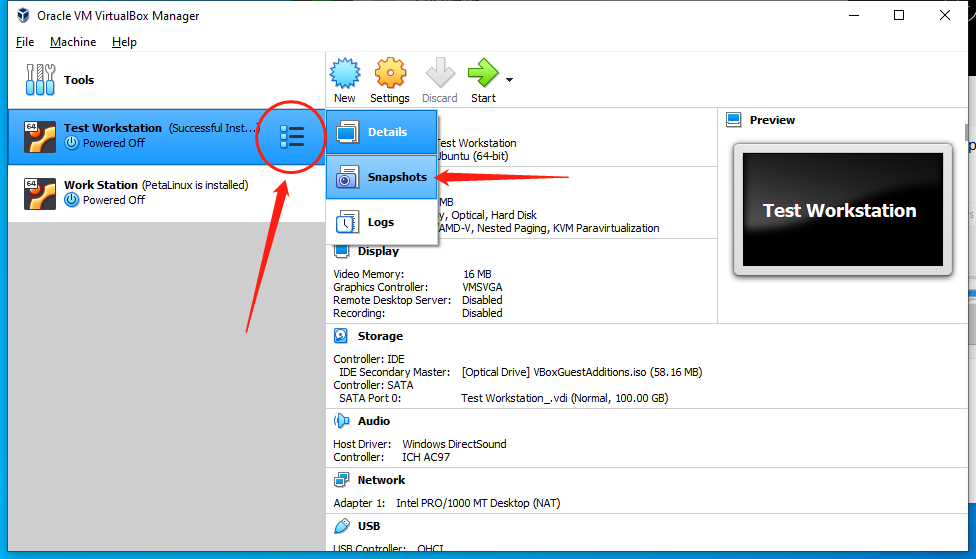
You may create a Snapshot by going to the VirtualBox Manager and clicking the button that shows up next to the Virtual Machine you wish to take a Snapshot of.
From the options that pop up, select Snapshots.
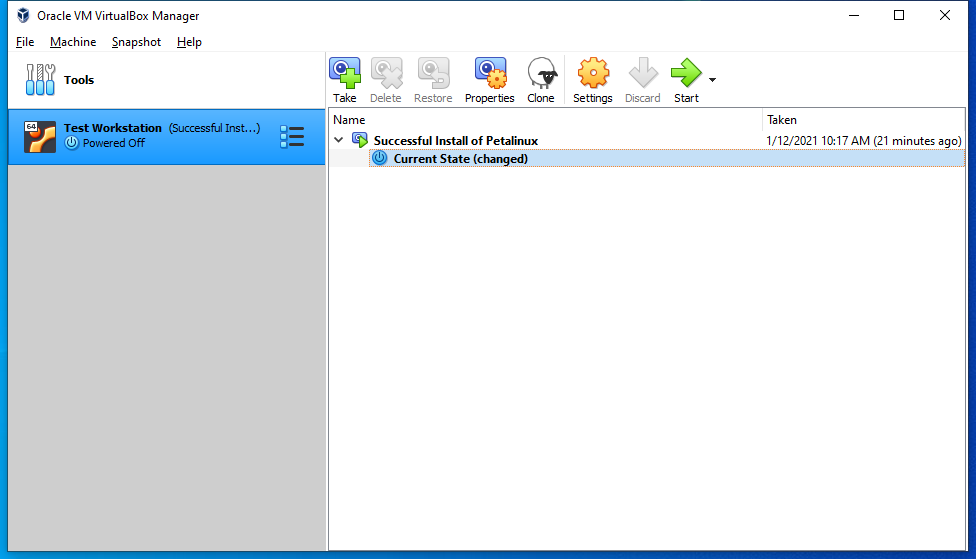
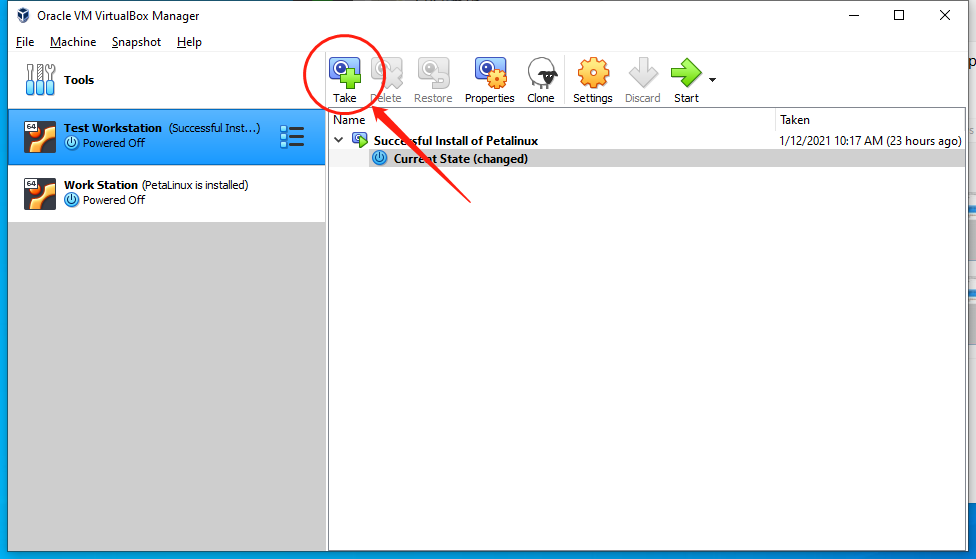
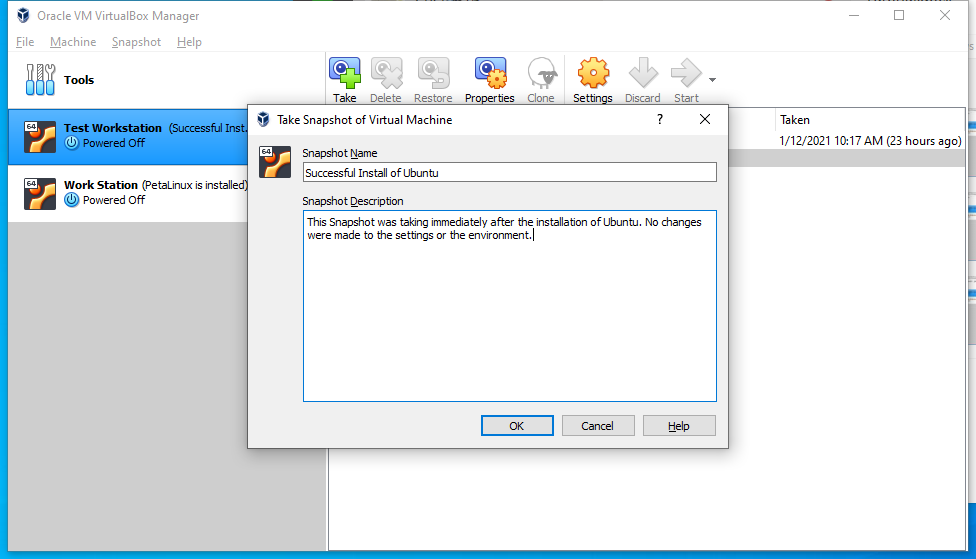
We will now click on the Take button on the top to take a Snapshot. Keep in mind that your screen may look a bit different as a Snapshot was already taken on my machine prior to this tutorial.
Next, we will give our Snapshot a Name and a Description. To help us identify it.
Because we are taking this Snapshot immediately after successfully installing Ubuntu, we may choose to give it the name of “Successful Install of Ubuntu”,
and the description of “This Snapshot was taken immediately after the installation of Ubuntu. No changes were made to the settings or the environment”.
Keep in mind that Snapshots are created to make your life easier, so you don’t have to completely start over creating a new Virtual Machine and installing Ubuntu again if you mess up somehow.
You may choose to give the Snapshot any name and description you want. As long as it helps you.
The reference image is on the following page.
Press OK when you are done, and the Snapshot should be created. This may take a while.
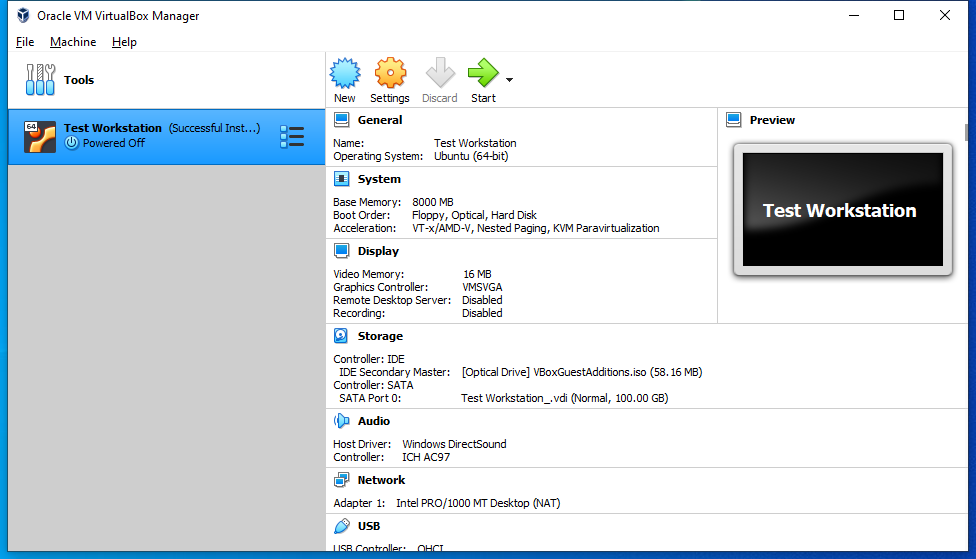
After it is done, you should see it show up under your Snapshots, and your Virtual Machine would have the name of the Snapshot in parenthesis next to it.
To revert back to a certain Snapshot, simply click on the name of the Snapshot and click Restore on the top next to the button we clicked to take the Snapshot. You may also right-click on a Snapshot and then select Restore from the dropdown.
Feel free to take Snapshots whenever you want throughout this tutorial; we will not be telling you or forcing you to take Snapshots throughout the rest of this tutorial, but it is highly recommended you take one after each major change.
2.2 Getting familiar with Ubuntu – Shutting down & Restart
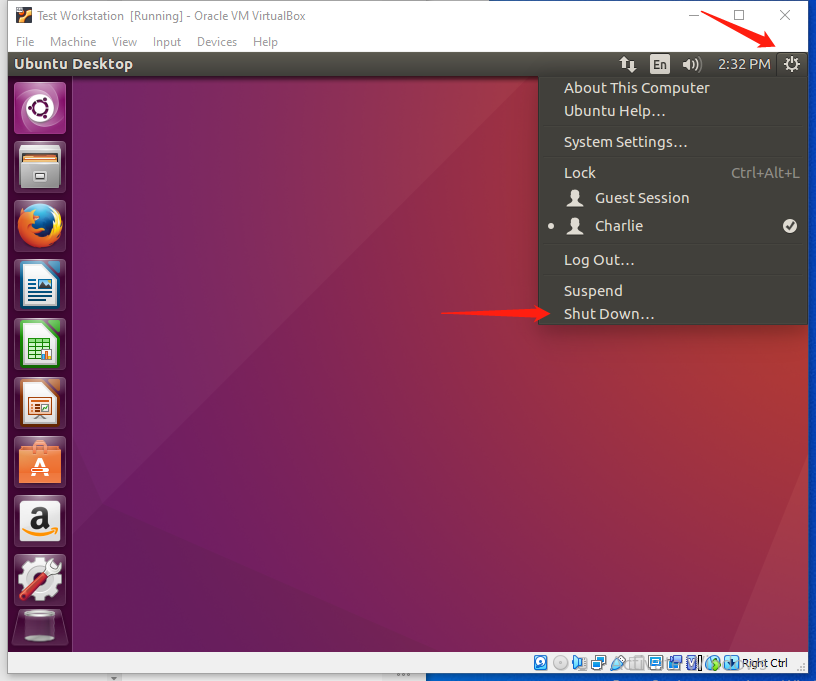
To shut down Ubuntu / the Virtual Machine, simply navigate your cursor to the top right corner of the screen and select Shut Down.
From the menu that pops up, you may choose the option on the right to turn it off or choose the option on the left to issue a restart. This should be very straightforward.
2.3 Getting familiar with Ubuntu – Changing the properties
You may feel that the screen size is too small, or too big for your liking.
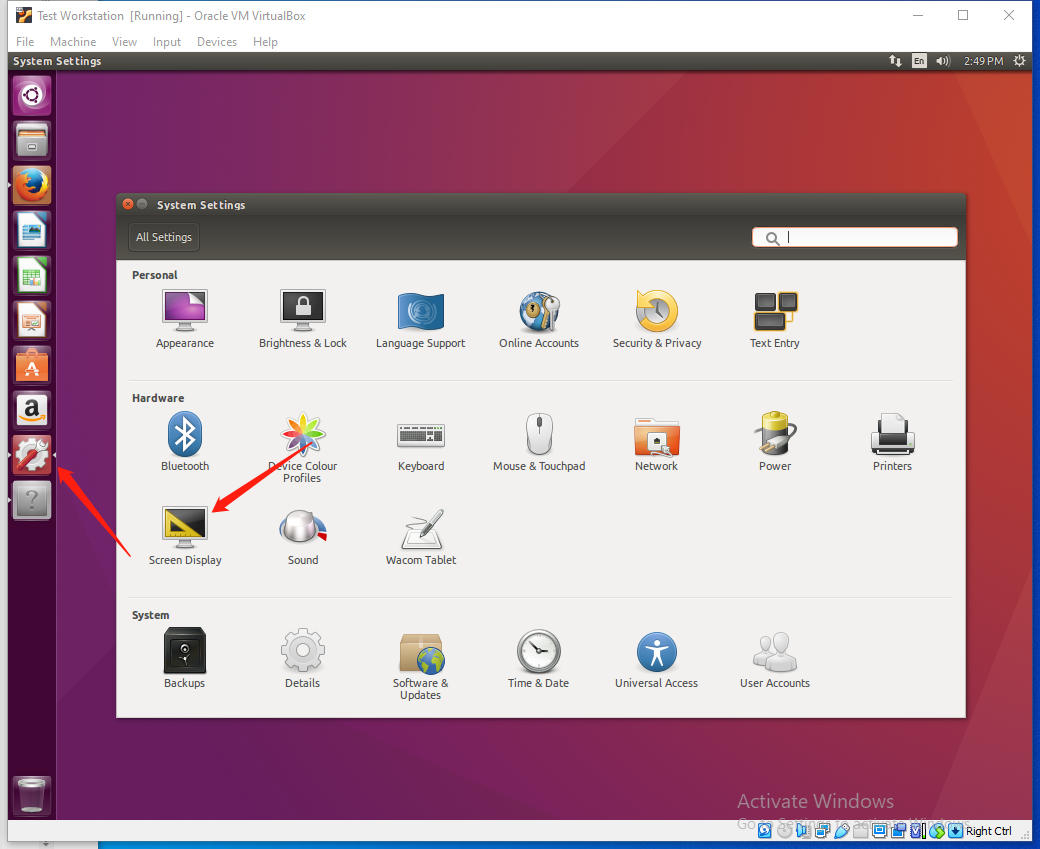
You can change this by clicking System Settings either from the drop-down menu from the top right corner that we used for Shut Down / Restart, or by directly clicking the gear icon in the task bar on the left.
Then, we will click on Screen Display to access its settings.
Feel free to play around with the Resolution and Scale until it’s comfortable to you.
If you feel the need to alter any other settings, feel free to go for it. If anything goes wrong, simply go back to restore a previous Snapshot (See section 2.1).
Section 3: Installing and Working with PetaLinux
3.1 Downloading PetaLinux
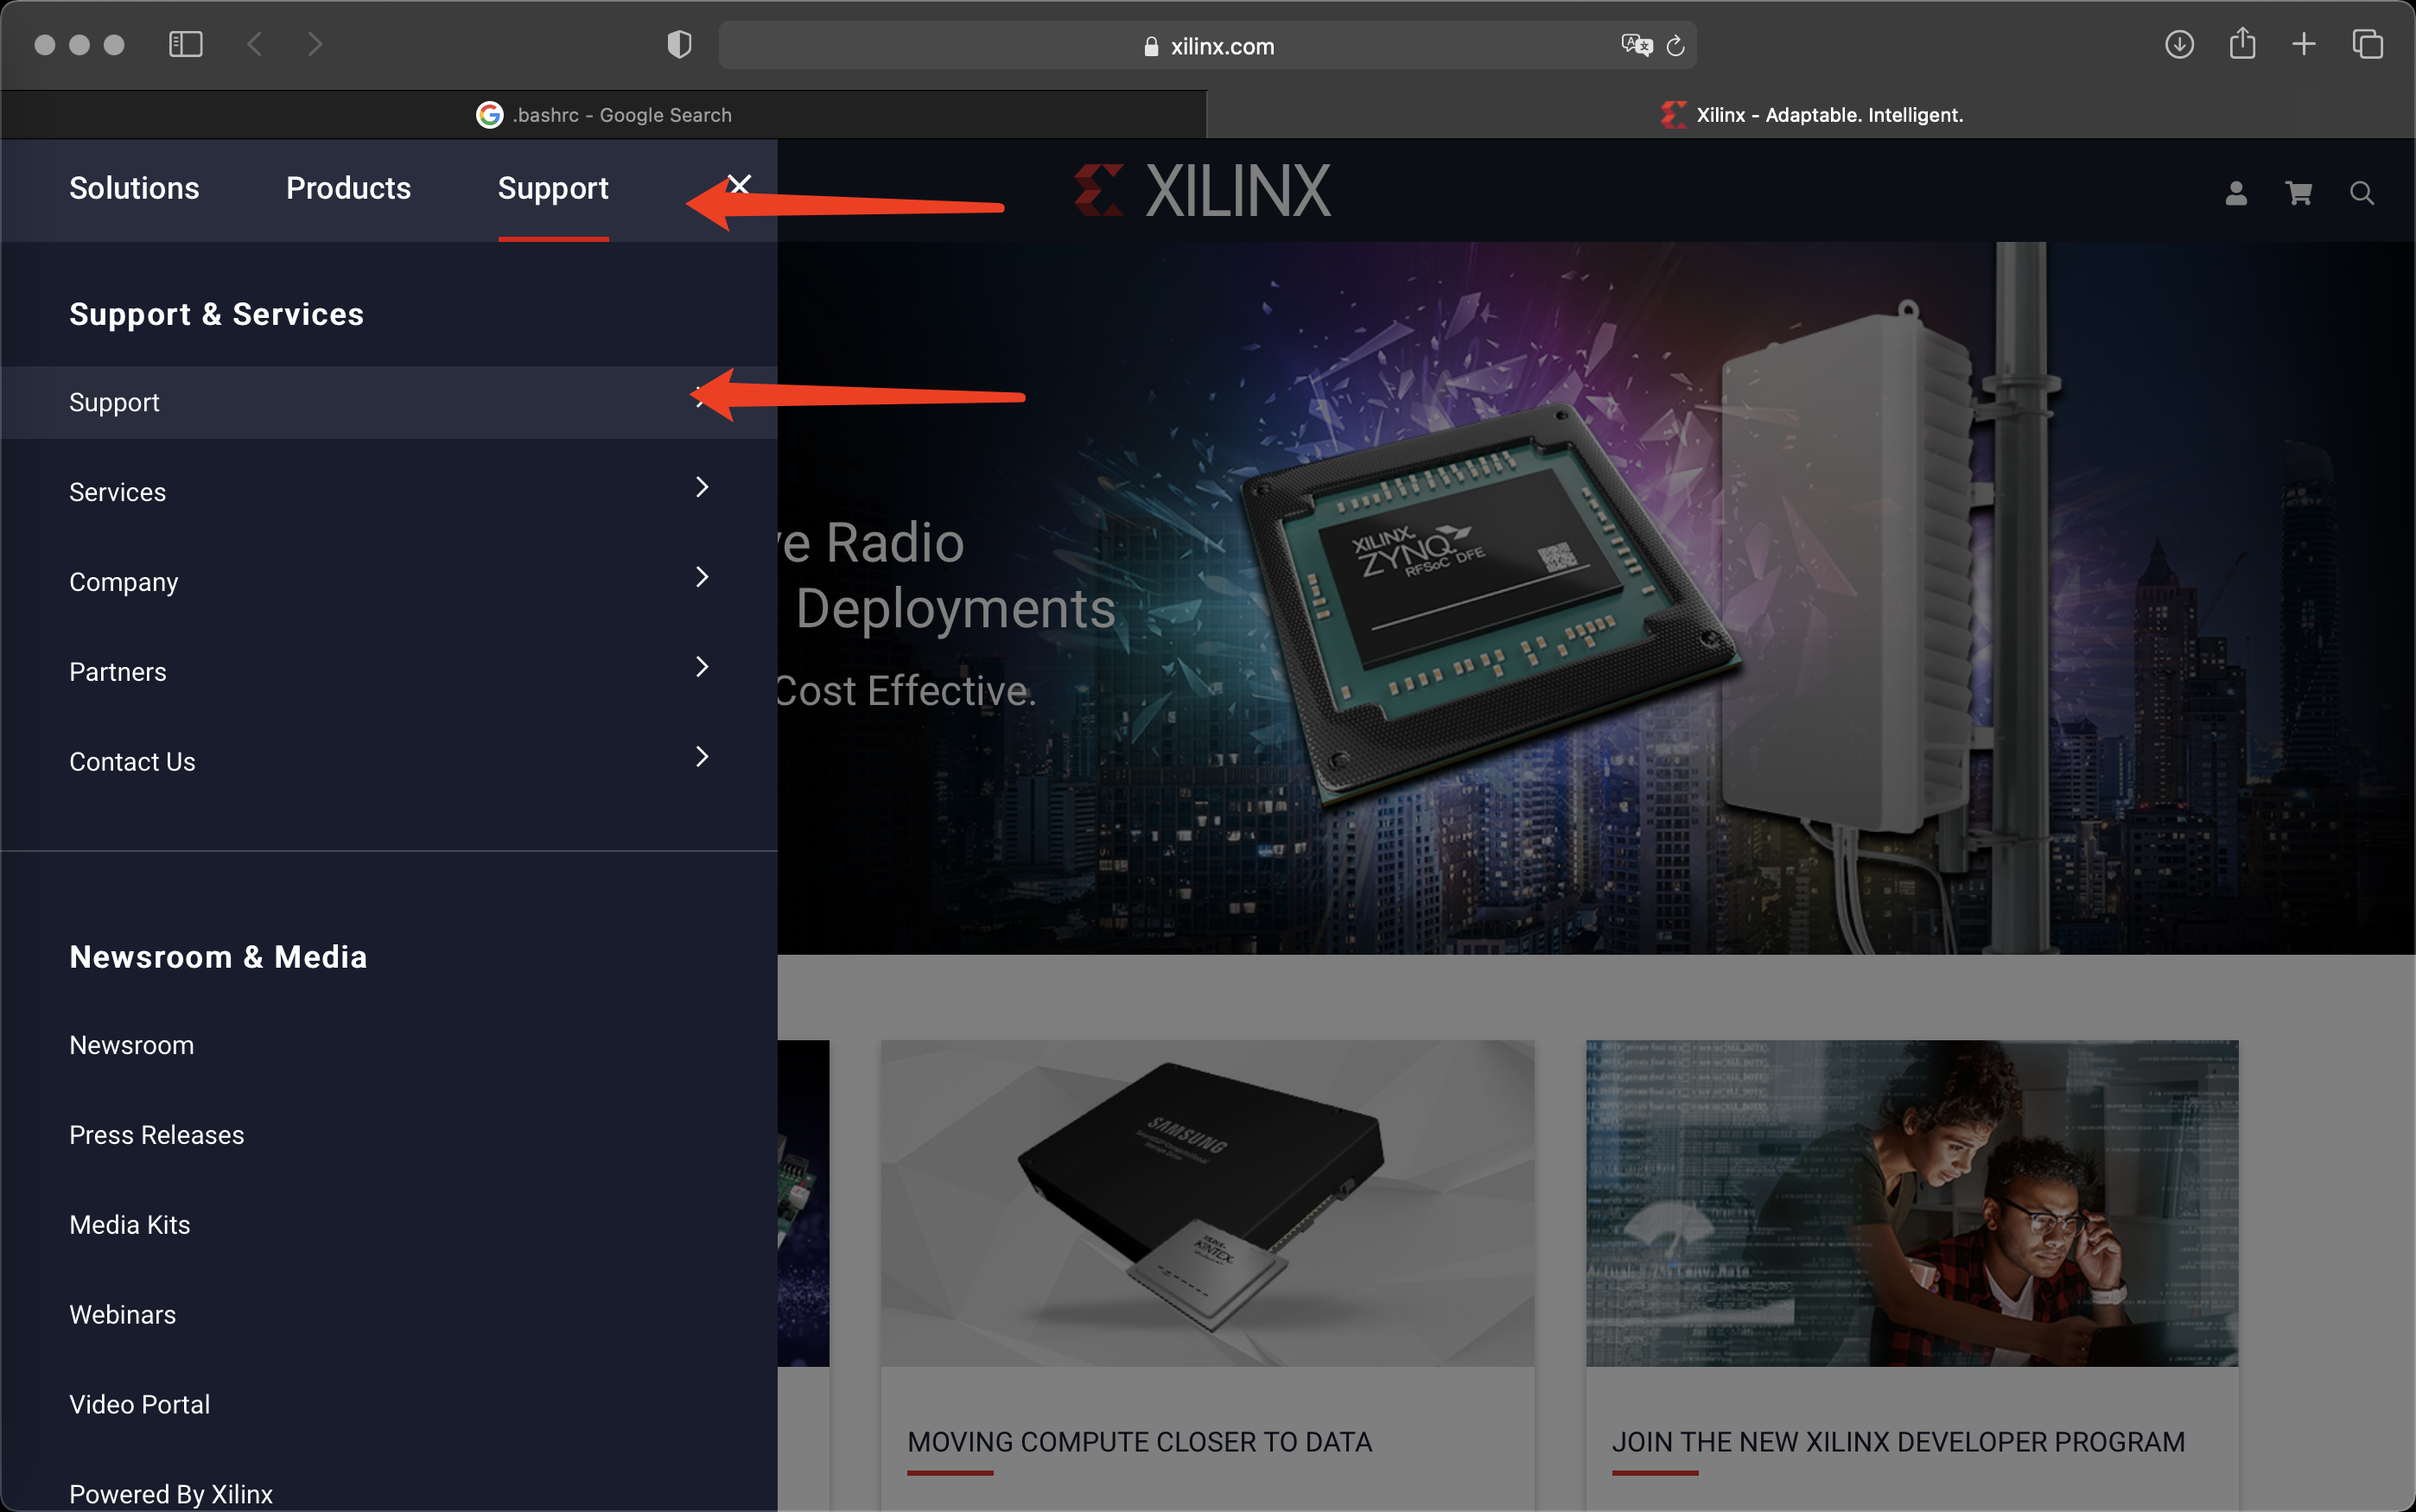
Launch your browser and head to https://xilinx.com
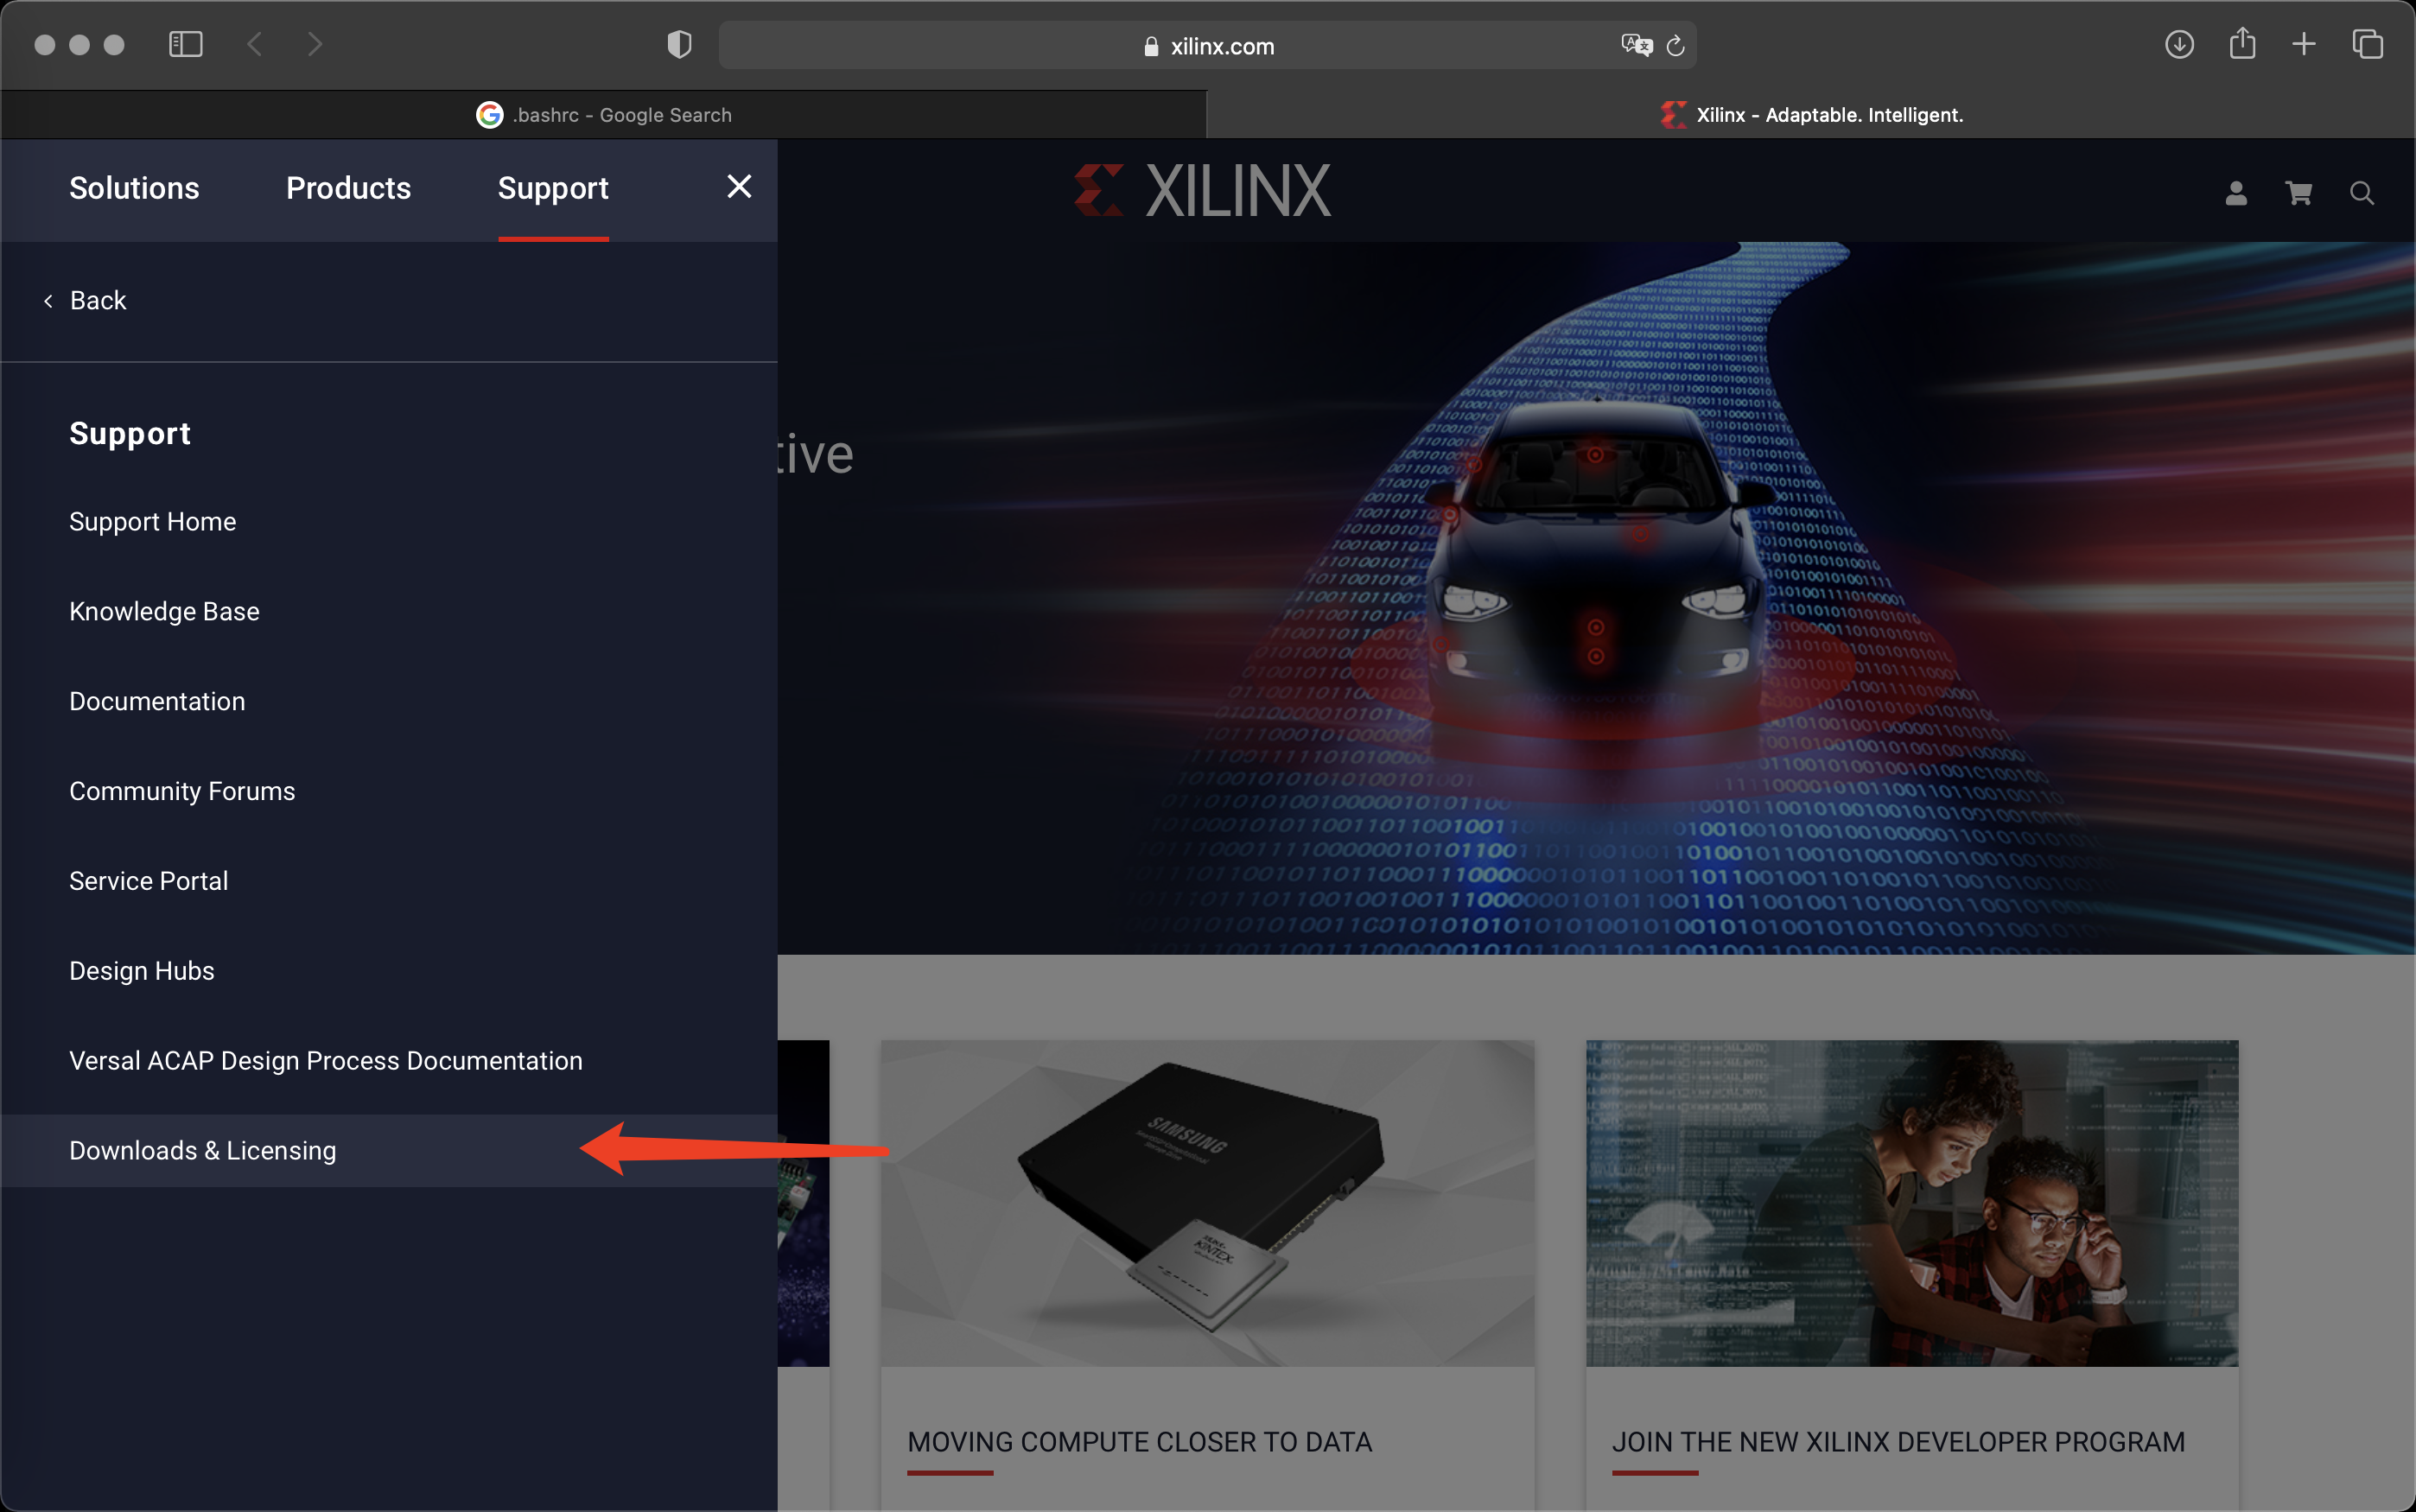
We will now click Support under the Support tab.
Next, click Downloads and Licensing from the drop-down that shows up.
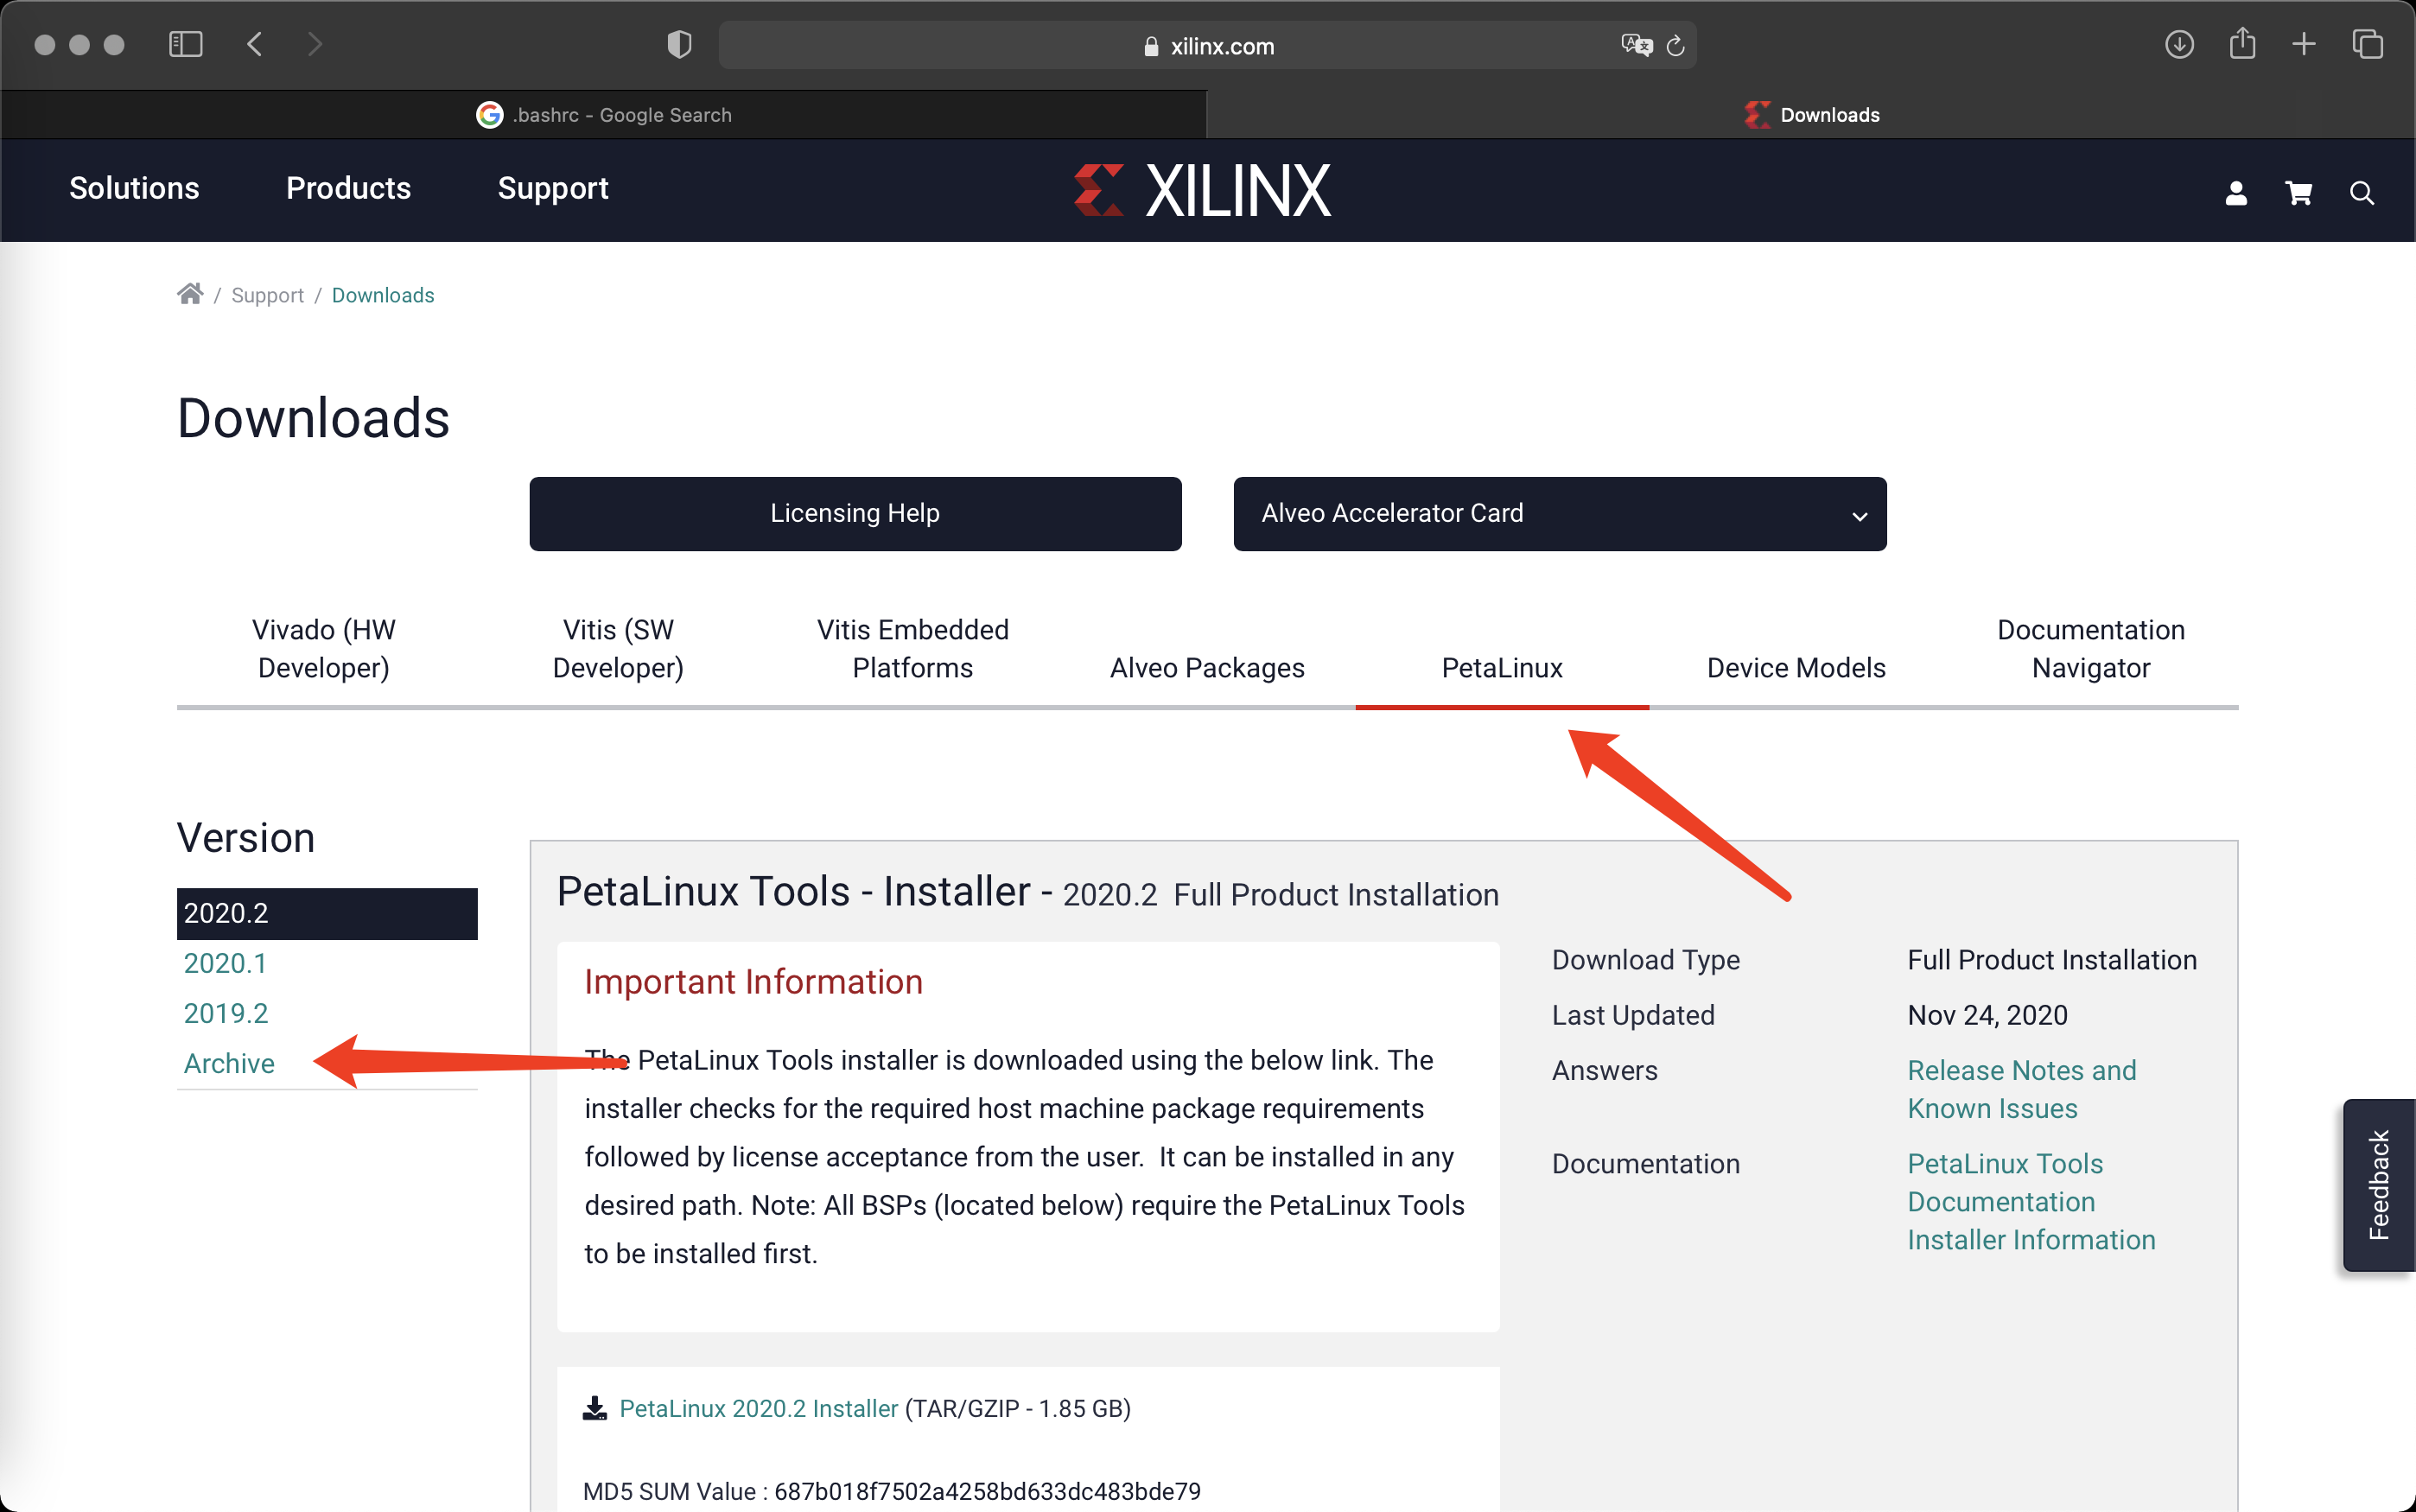
Next, we will click on PetaLinux and click on the Archive link that shows up.
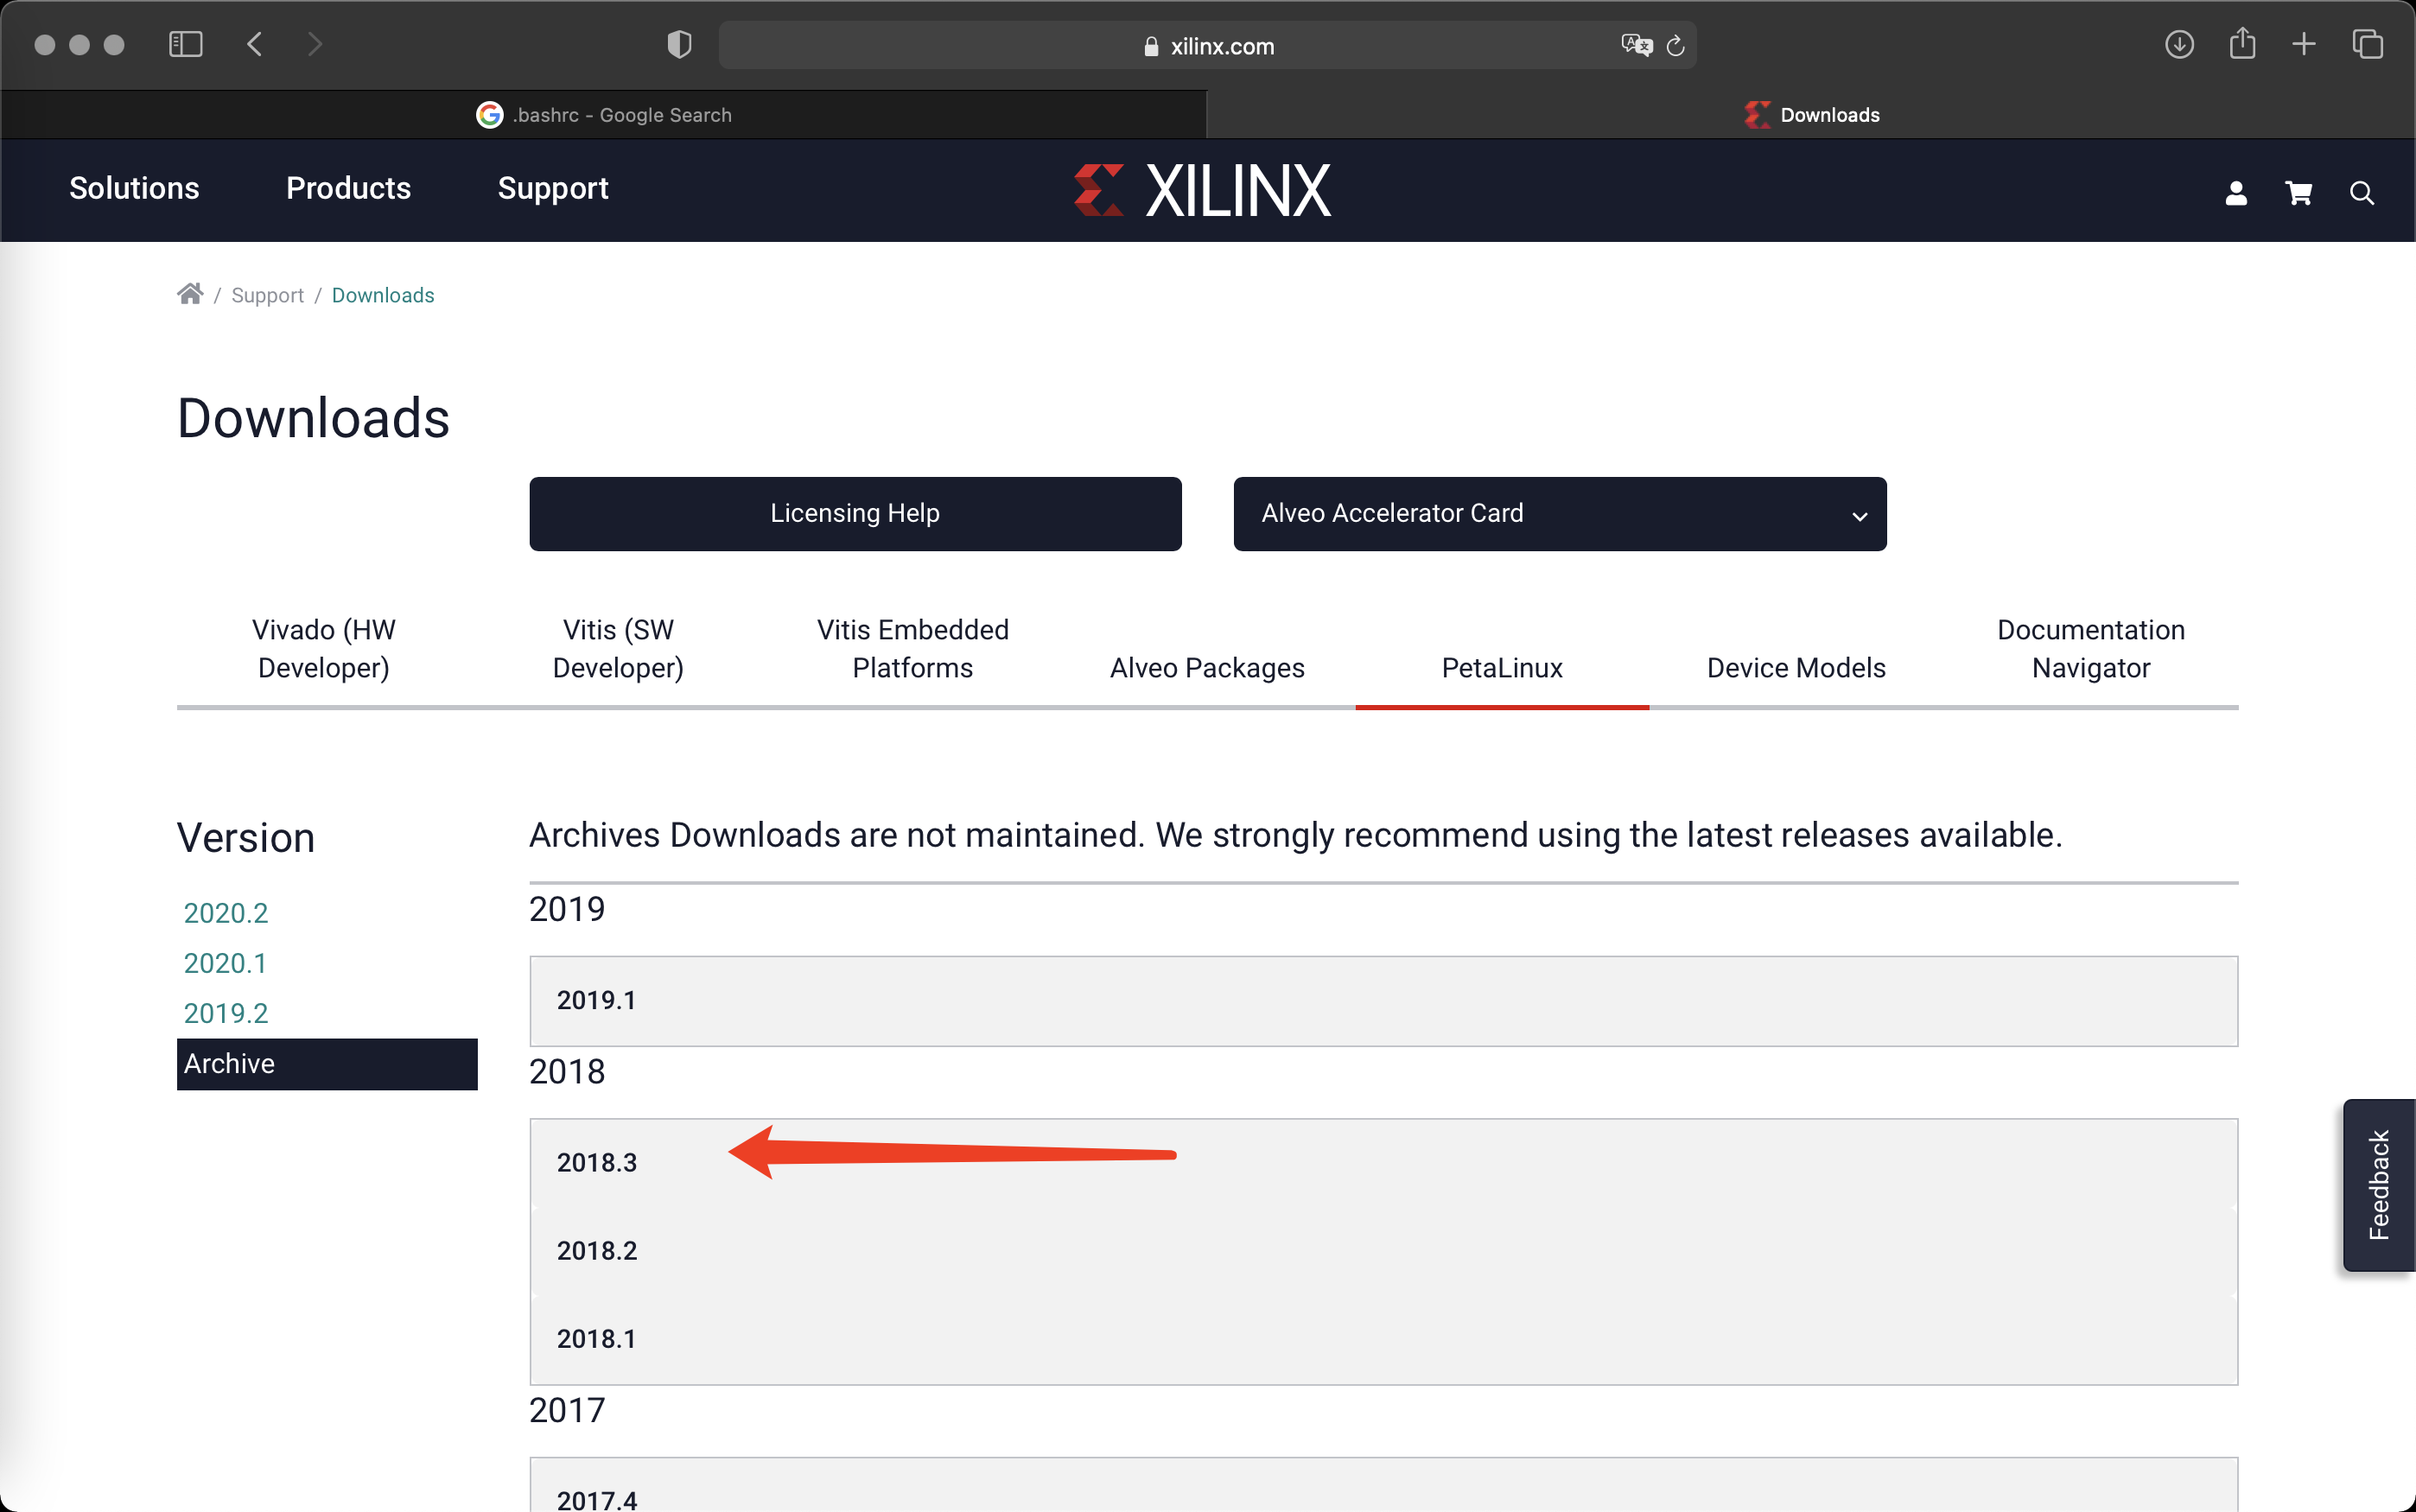
We will click on 2018.3 on the page that shows up.
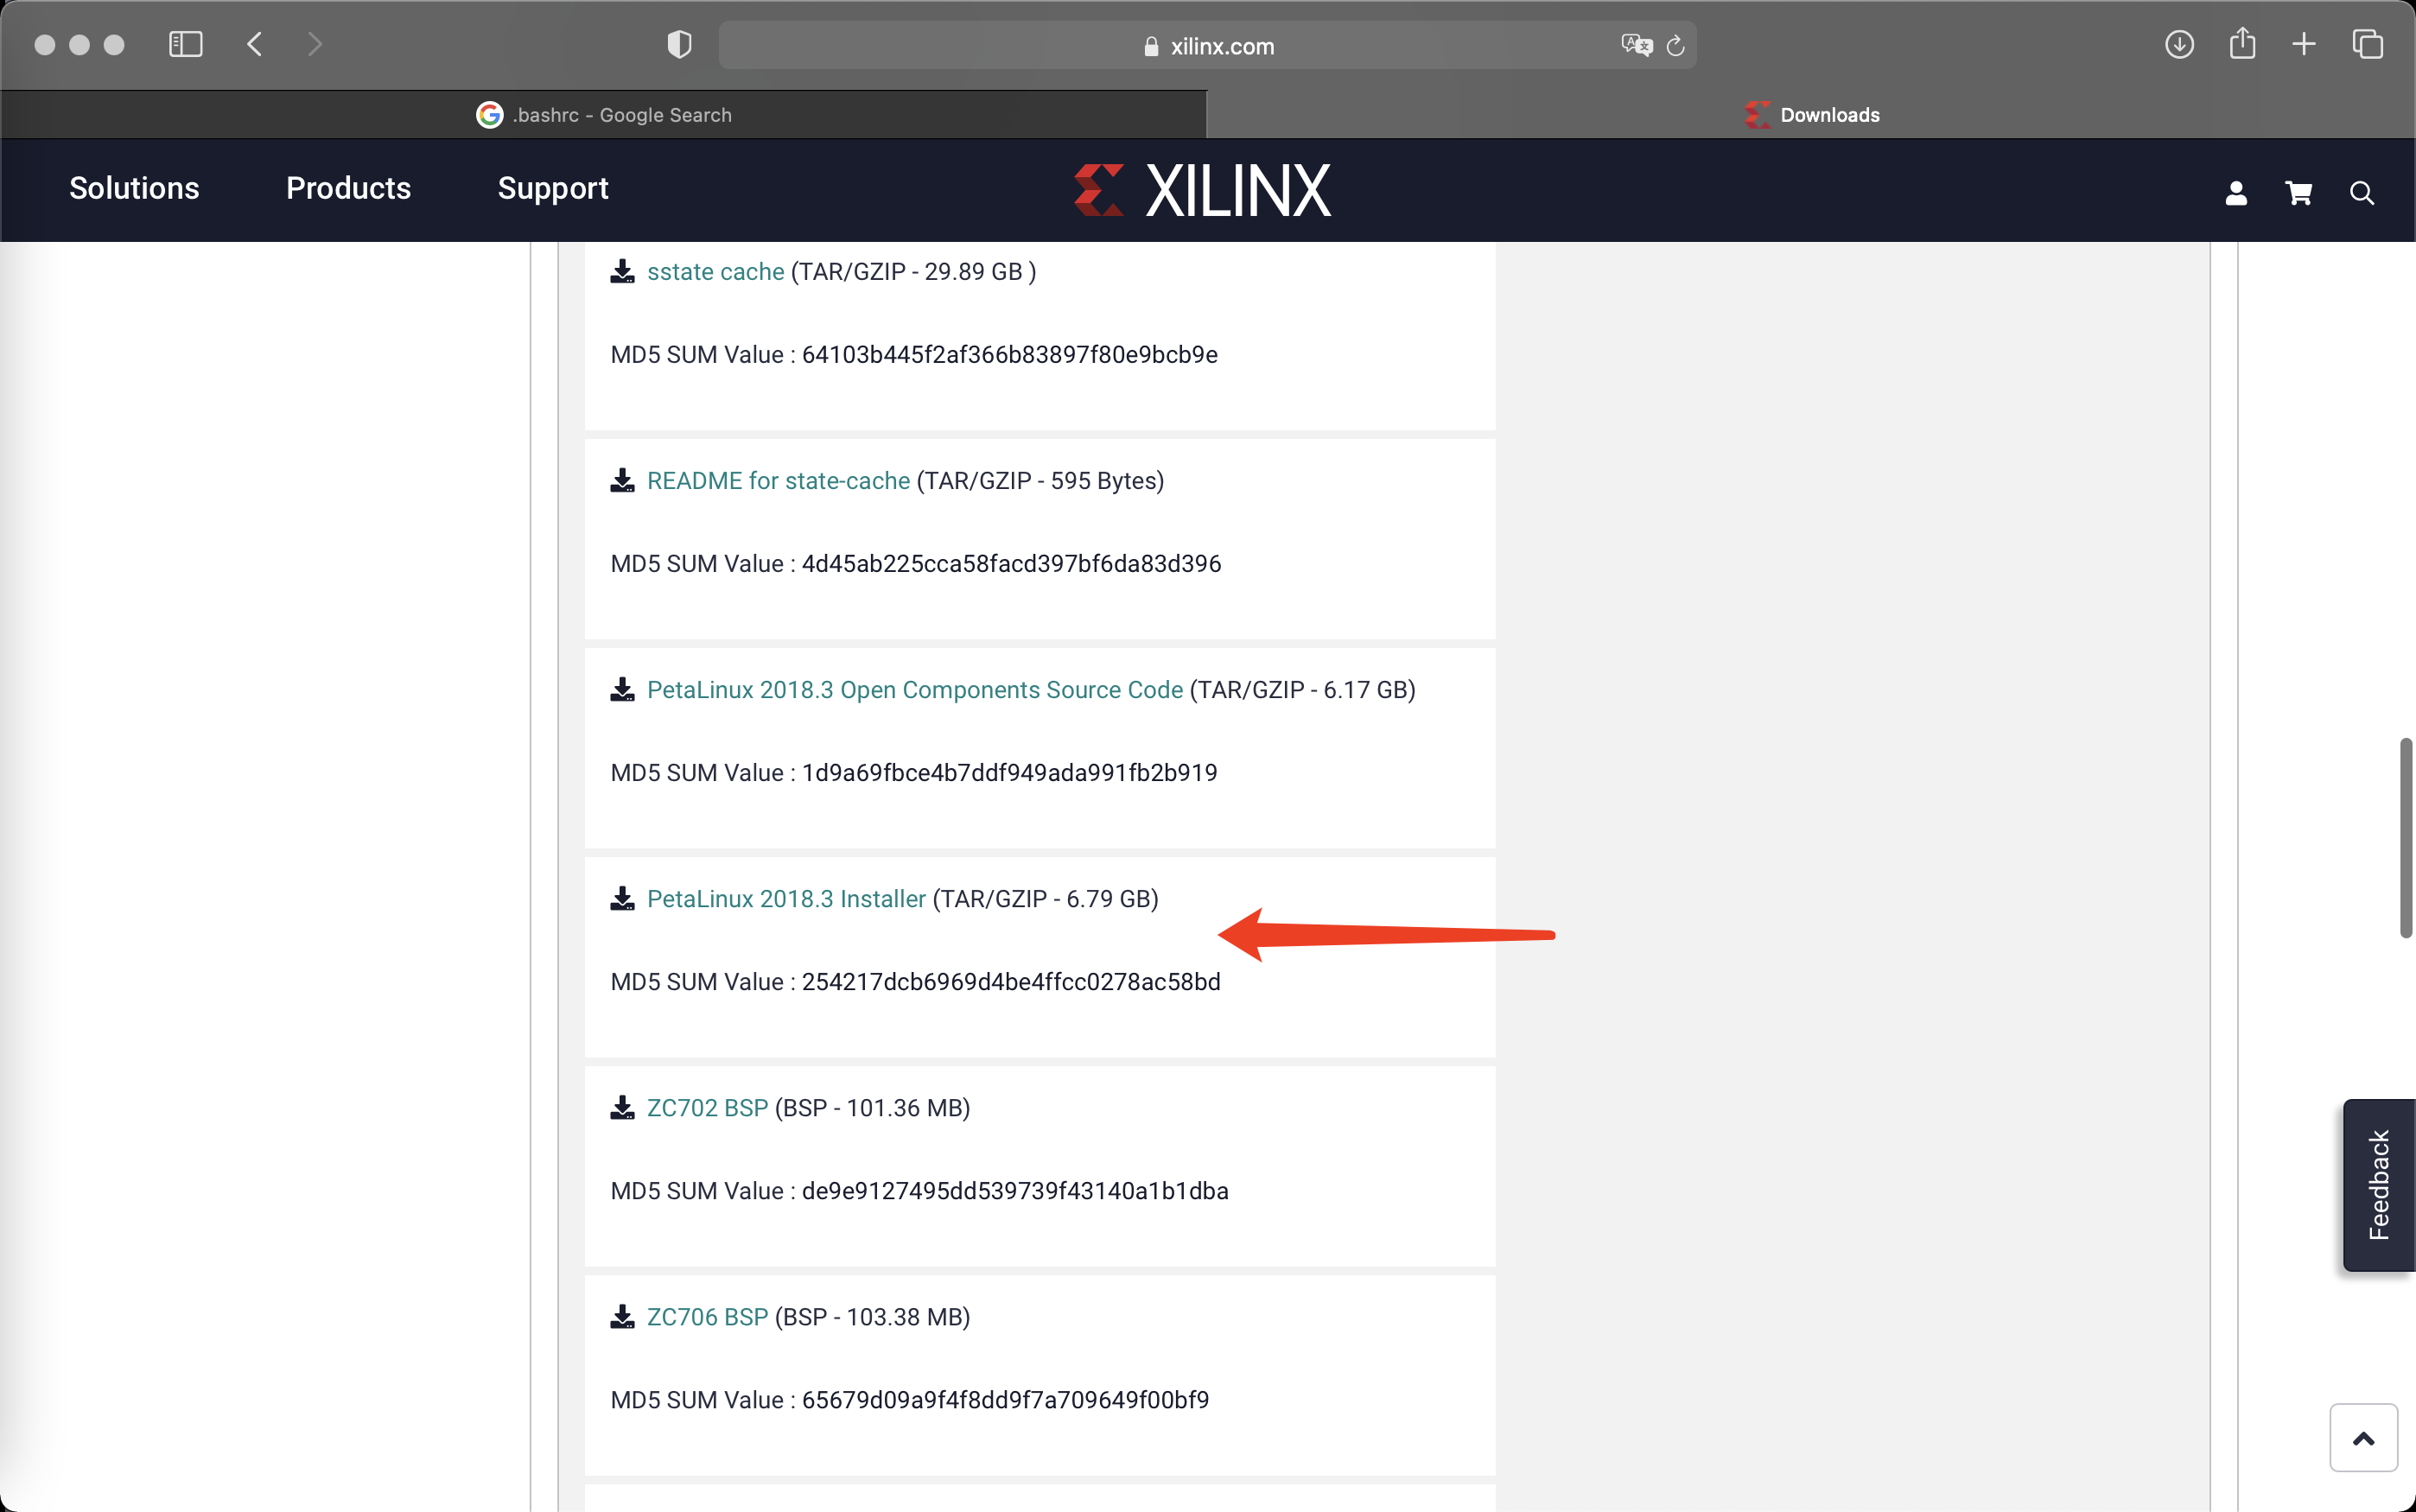
Scroll down to find the installer file titled PetaLinux 2018.3 Installer that is around 6.79 GB.
You will be prompted to sign in. Create a new account if you’re new or simply log in.
The download should start after everything is filled in and submitted.
Make sure you save the file somewhere you can easily access.
3.2 Sharing files and data between your system and the virtual machine
Shared folders are folders that your system shares with the virtual machine, which makes accessing files much easier.
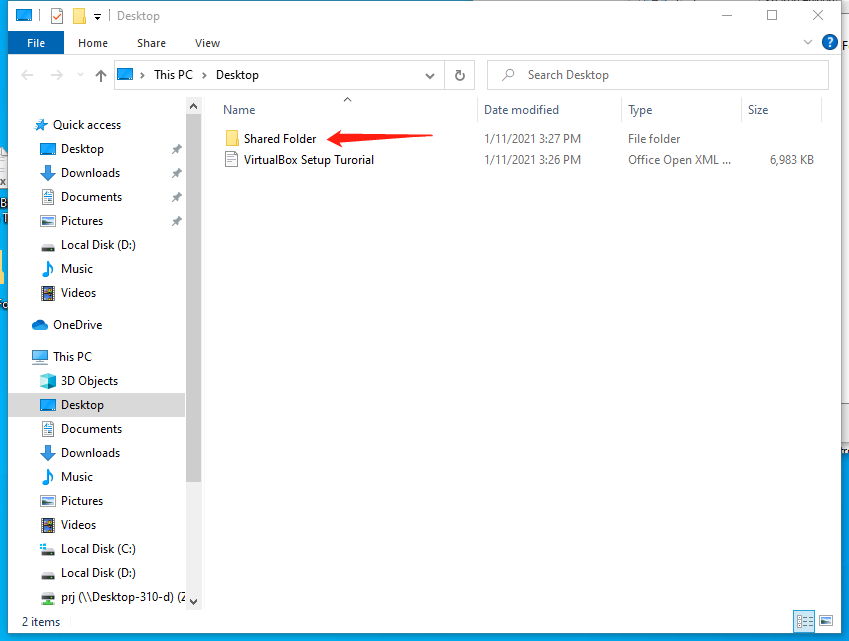
We will first create a new folder anywhere on your Windows system. You may name it whatever you want, but for this tutorial we will name it as Shared Folder, and we will have it on our desktop. Copy the PetaLinux installer file we just downloaded into it.
*All numbered figures in this section are on the next three pages
Next, we will go to Settings in VirtualBox (See Fig.3.2.1)
Go to Shared Folders and click the blue icon to add a new Shared Folder (See Fig.3.2.2)
Select Other for the Folder Path (See Fig.3.2.3)
Locate the shared folder that we just created and press Select Folder (See Fig.3.2.4)
Make sure you check Auto-mount (See Fig.3.2.5)
Finally, click OK when finished (See Fig.3.2.6)
 Fig.3.2.1
 Fig.3.2.2
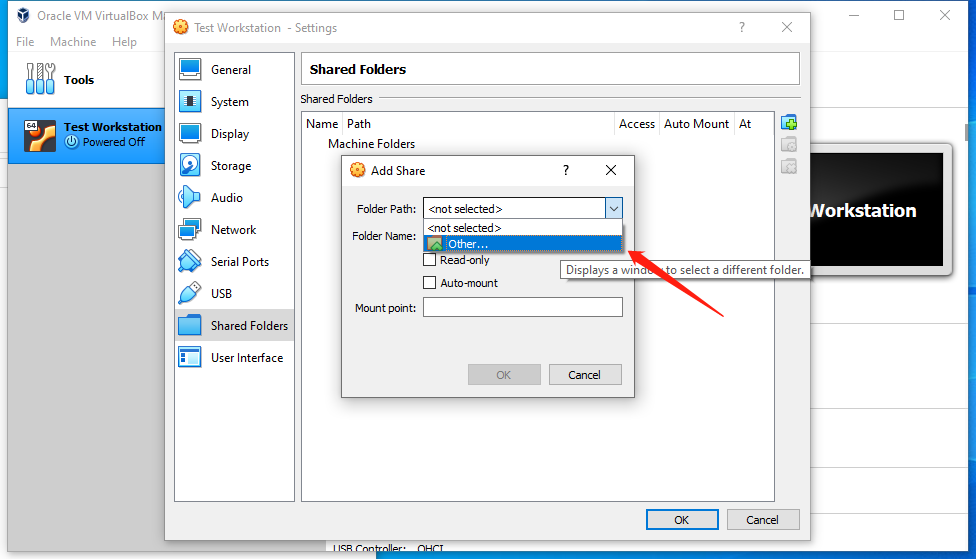 Fig.3.2.3
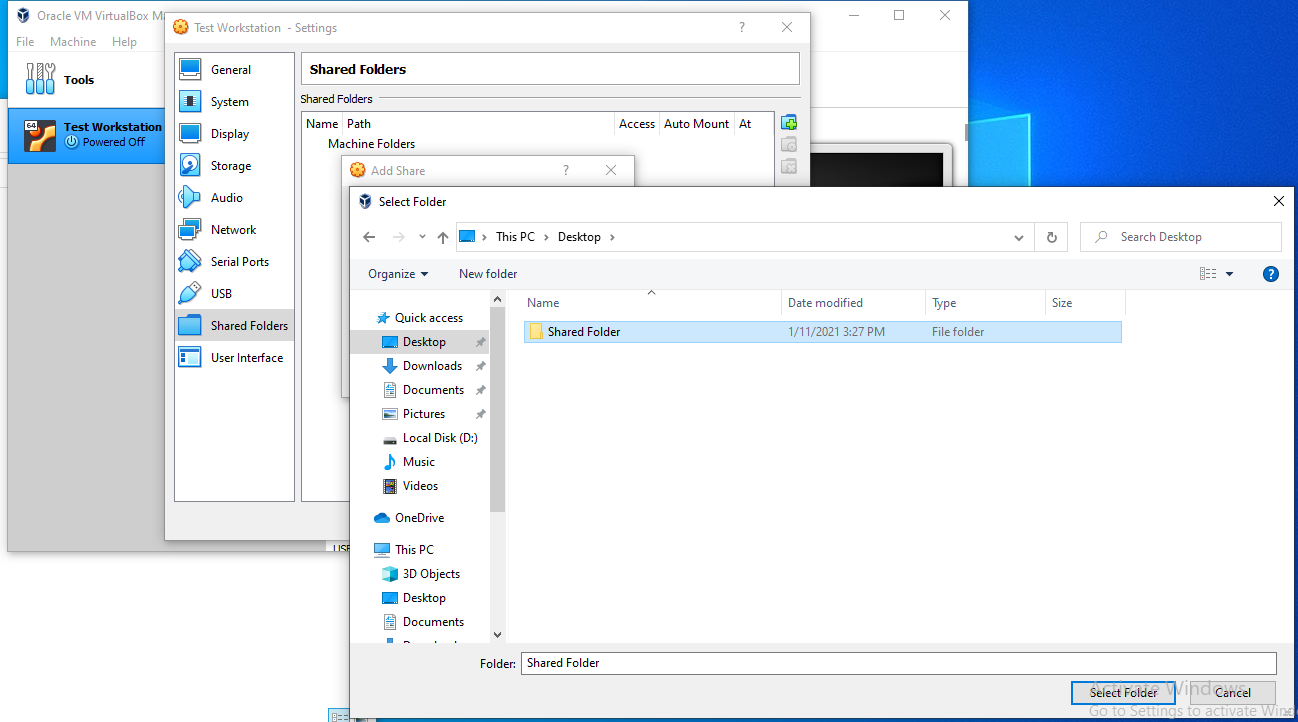 Fig.3.2.4
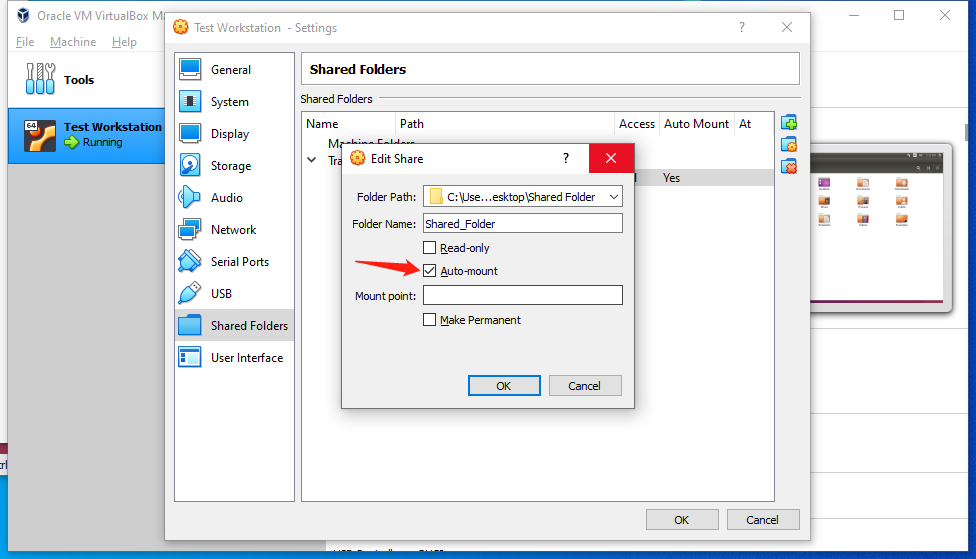 Fig.3.2.5
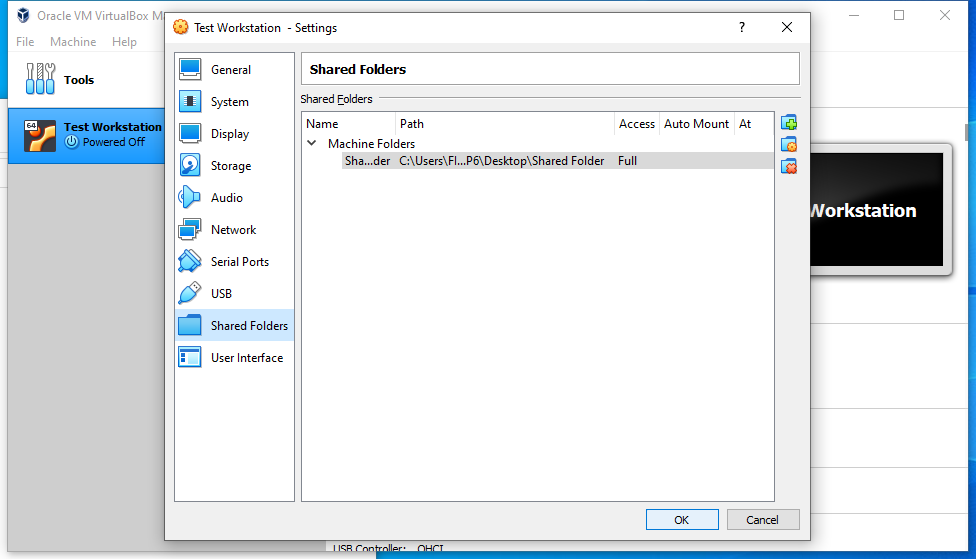 Fig.3.2.6
In order for us to be able to see the shared folder in Ubuntu, we will need to Create Guest Addition.
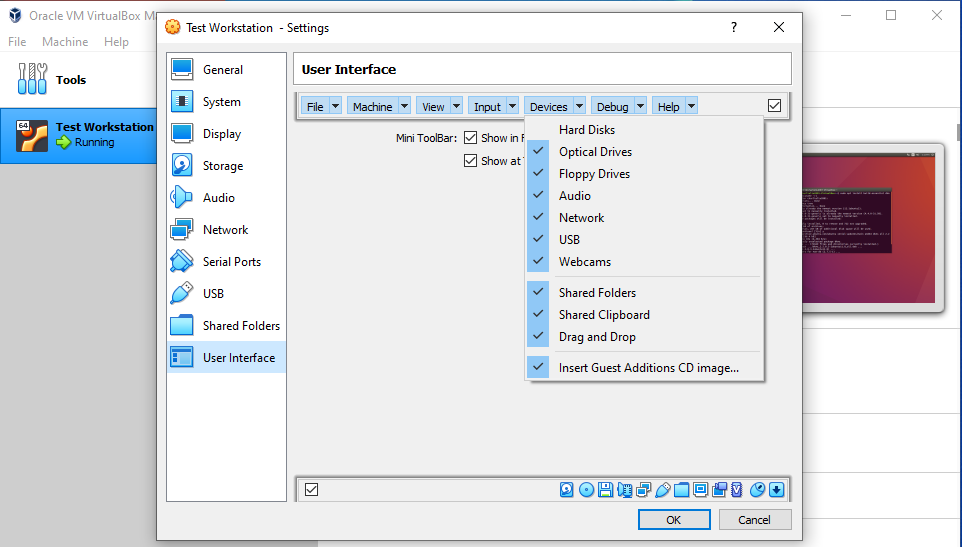
We will first make sure that we can do so by going back into the VirtualBox Settings and going into the User Interface tab.
Make sure you have Devices highlighted and all of its components are checked, most importantly the Insert Guest Additions CD image selection.
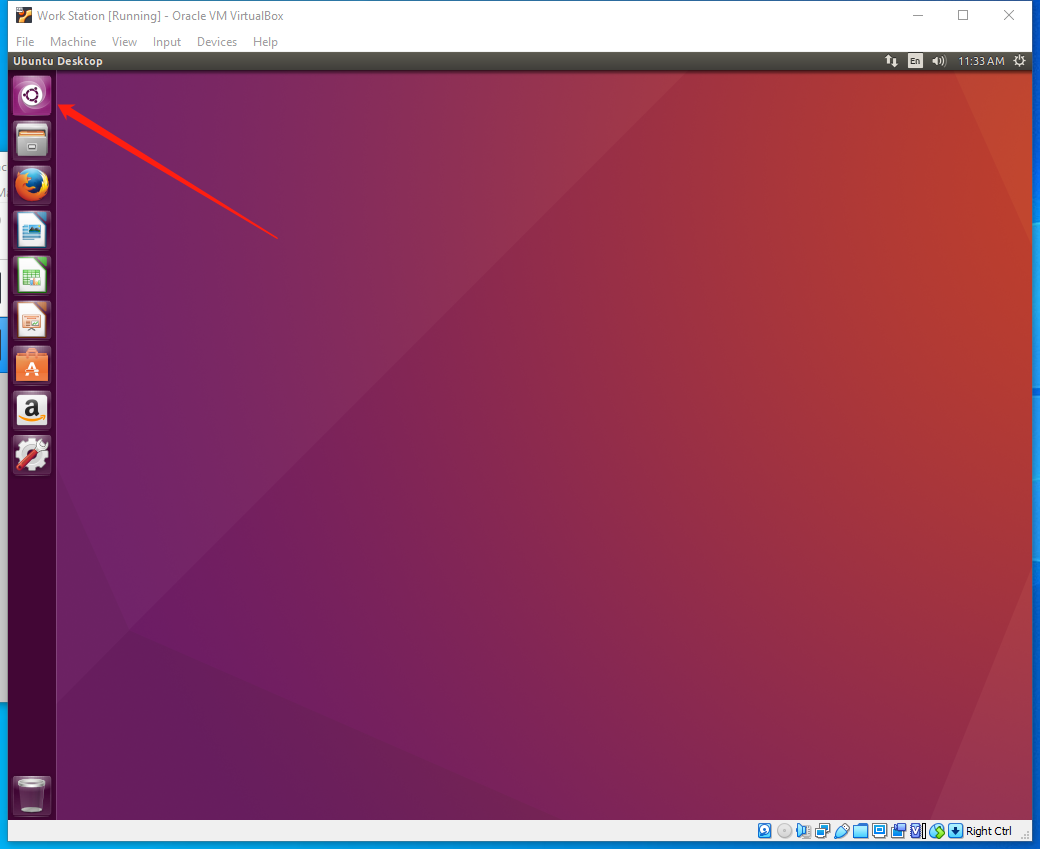
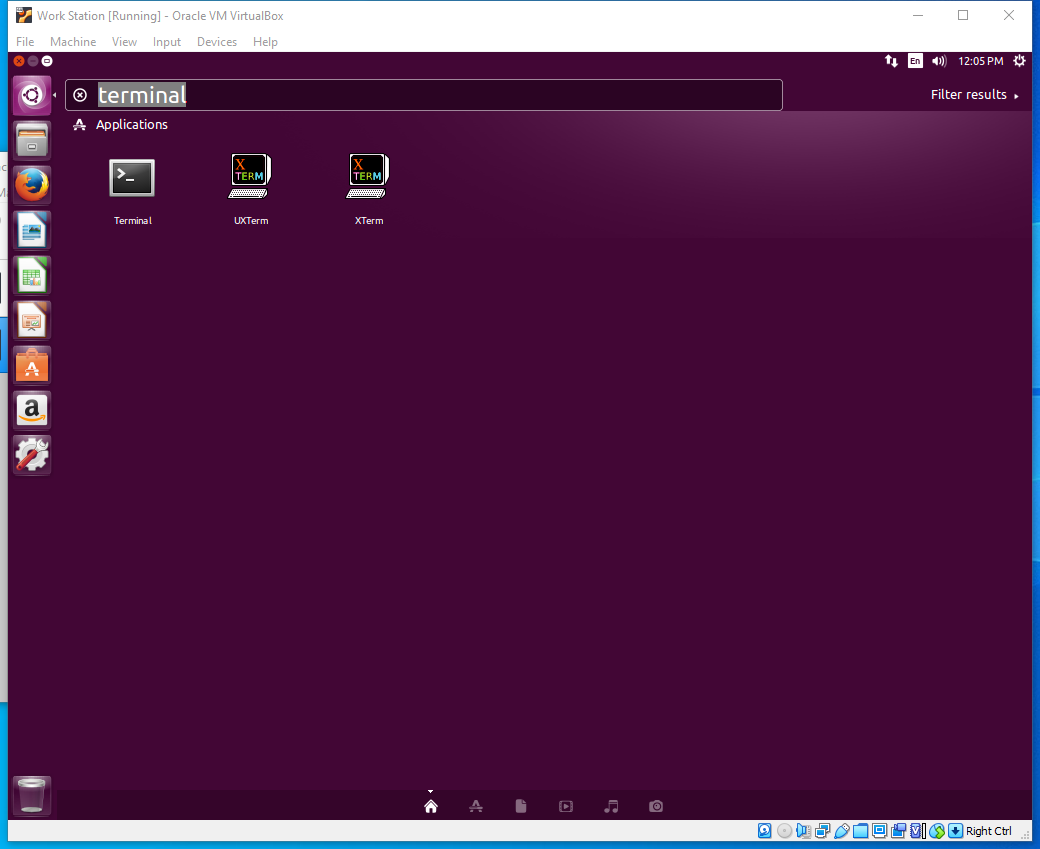
Now we want to boot up Ubuntu and open up the Terminal by clicking Search on the top left and searching for “Terminal”.
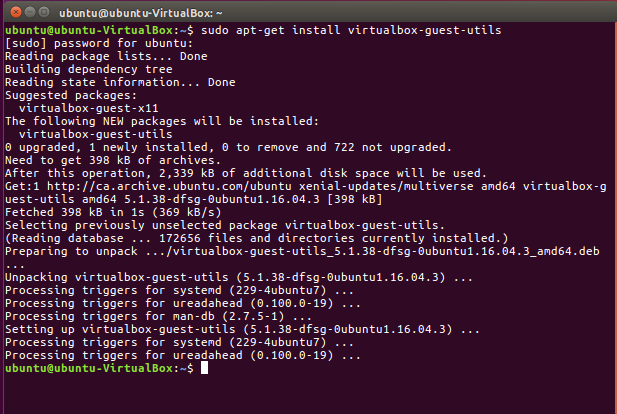
Once Terminal is open, type in the following command and press Enter.
sudo apt-get install virtualbox-guest-utils
Enter the password that we set (should be 12345678) and press Enter when prompted.
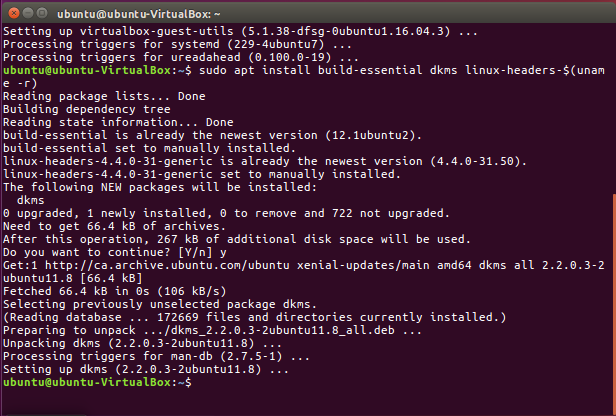
Next, type in the following command and press Enter.
sudo apt install build-essential dkms linux-headers-$(uname -r)
Enter your password when prompted and enter y when prompted.
Next, we will go to the Devices panel at the top and select Insert Guest Additions CD image
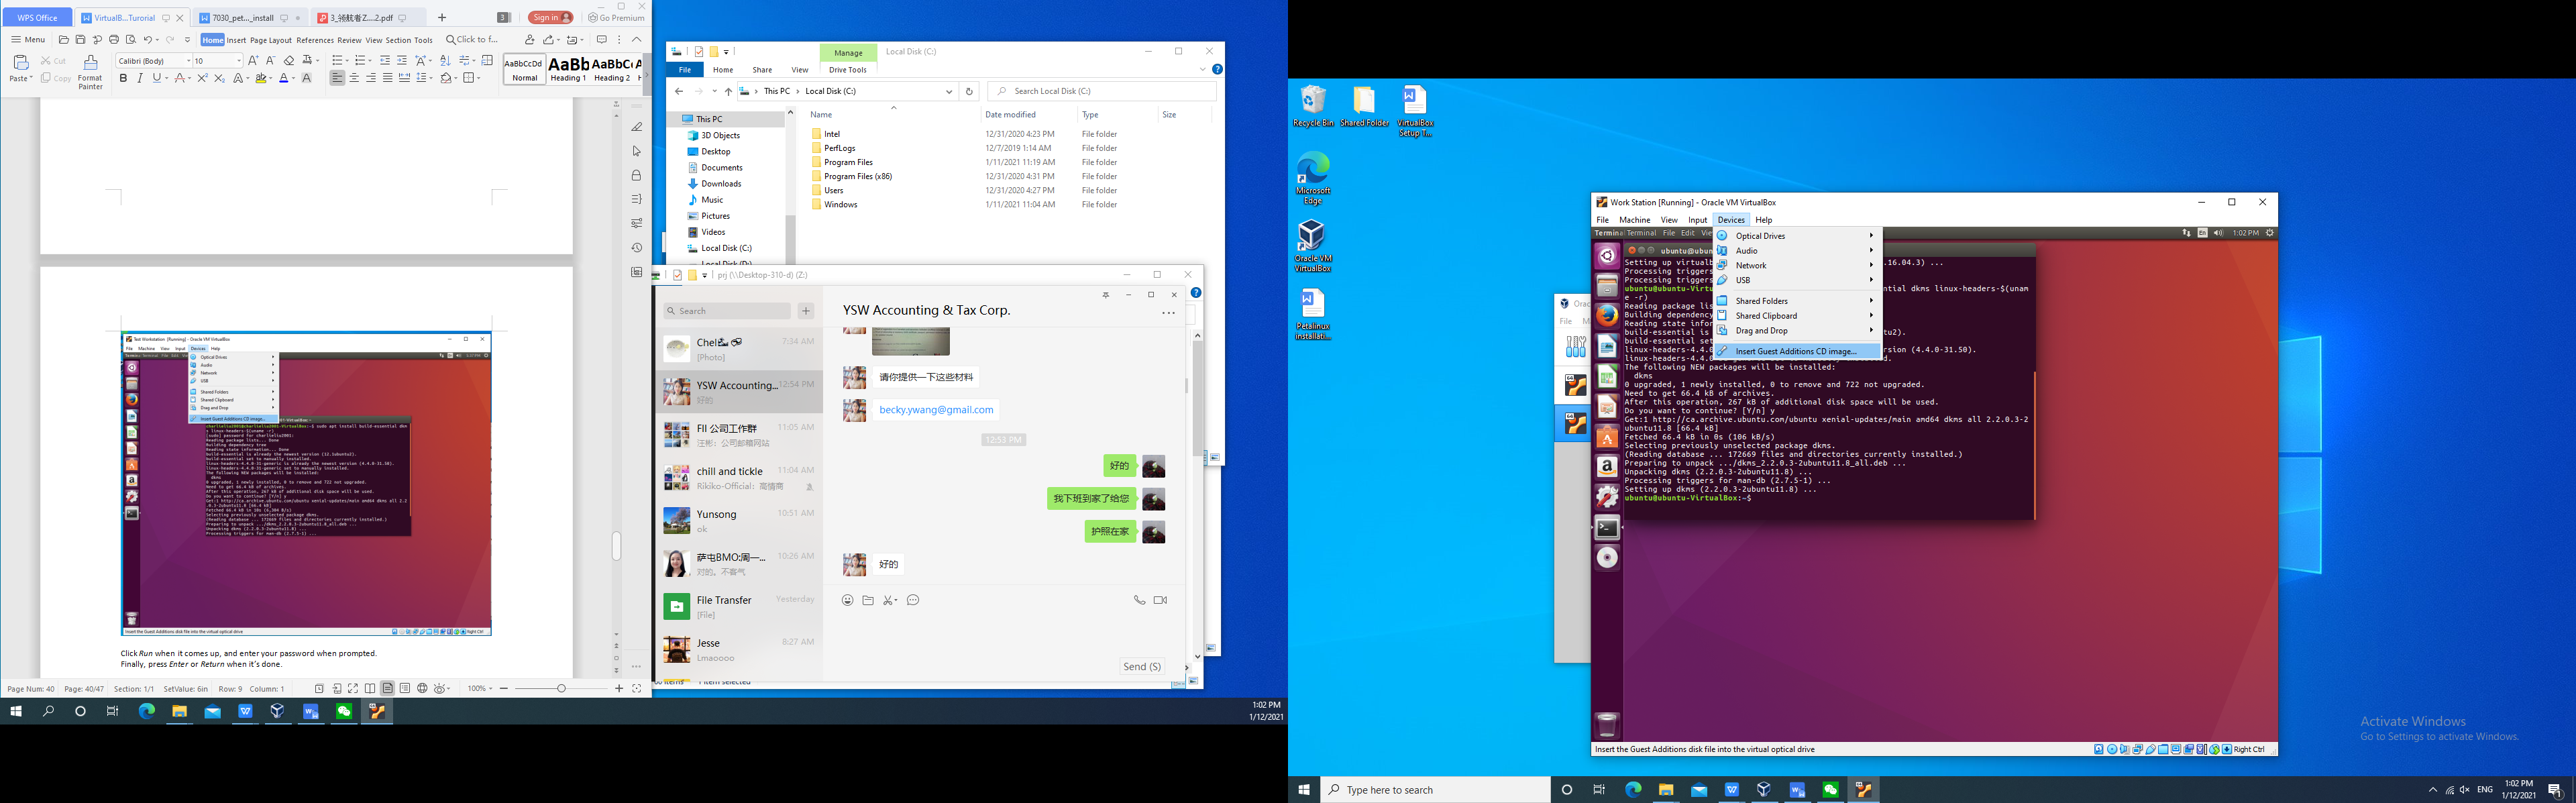
*All numbered figures in this section are on the next two pages
Click Run when prompted (Fig.3.2.7)
Enter your password when prompted (Fig.3.2.8)
Enter Yes when asked if you wish to continue (Fig.3.2.9)
Finally, press Enter when it is all done (Fig.3.2.10)
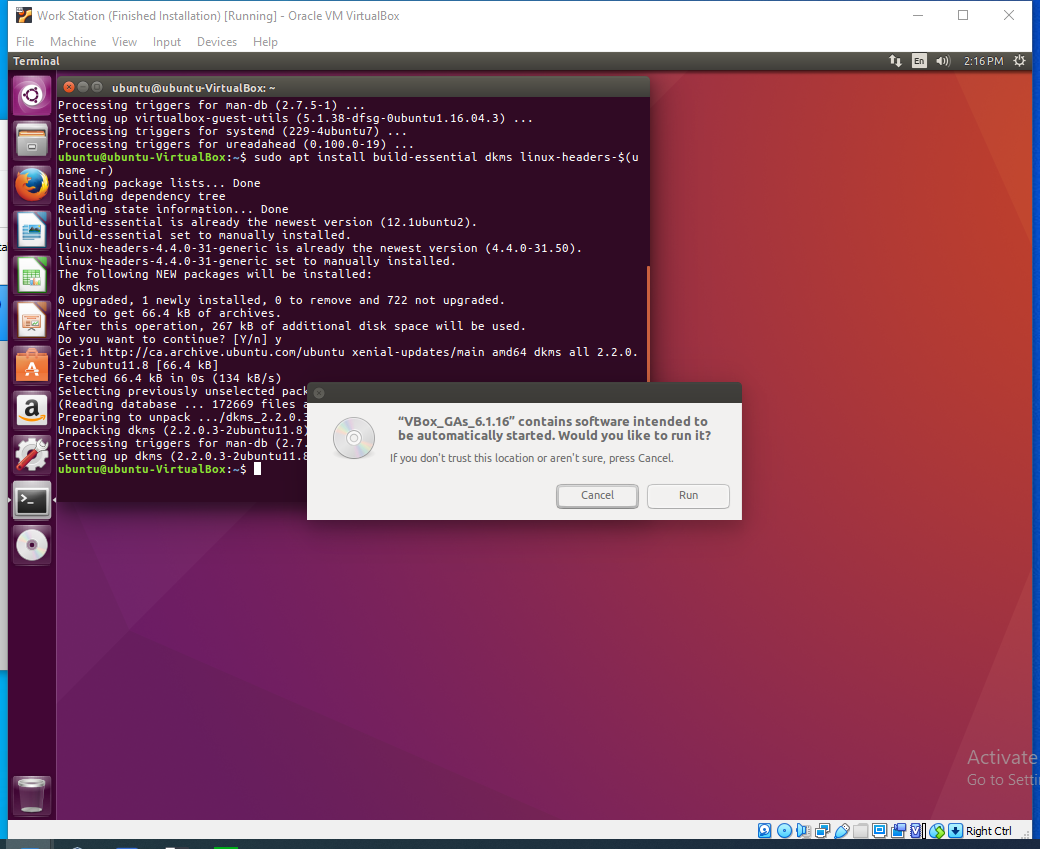 Fig.3.2.7
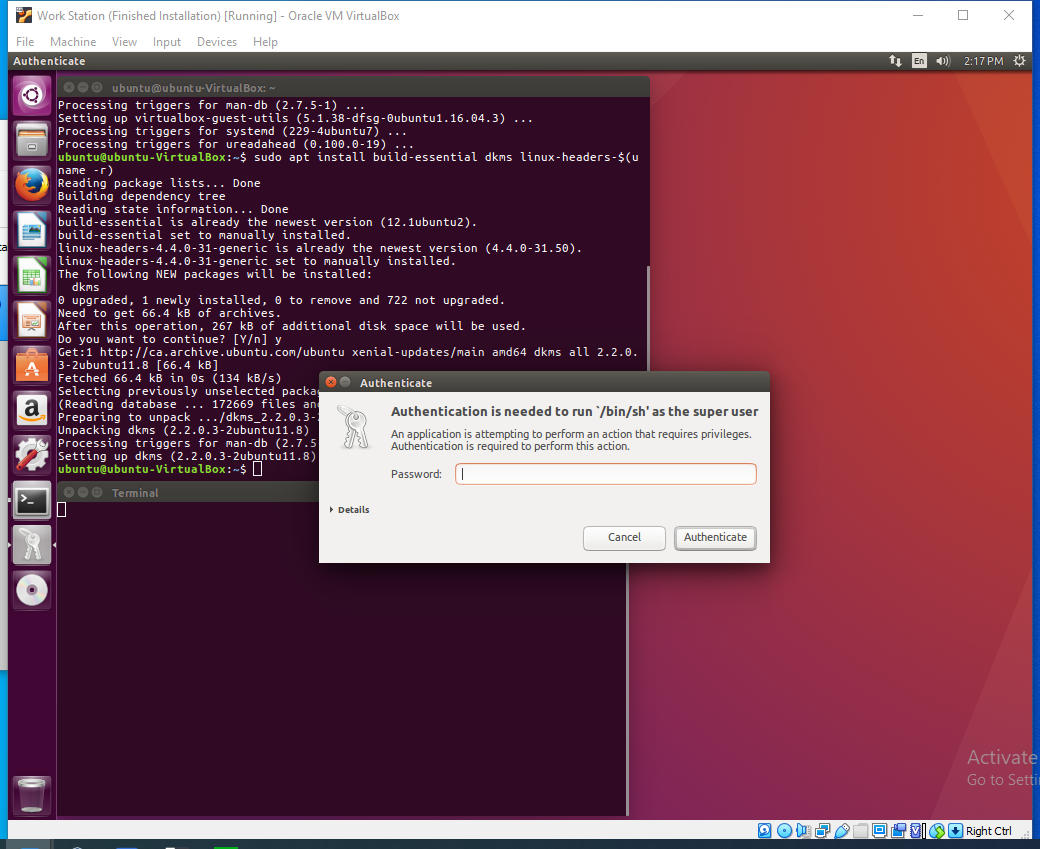 Fig.3.2.8
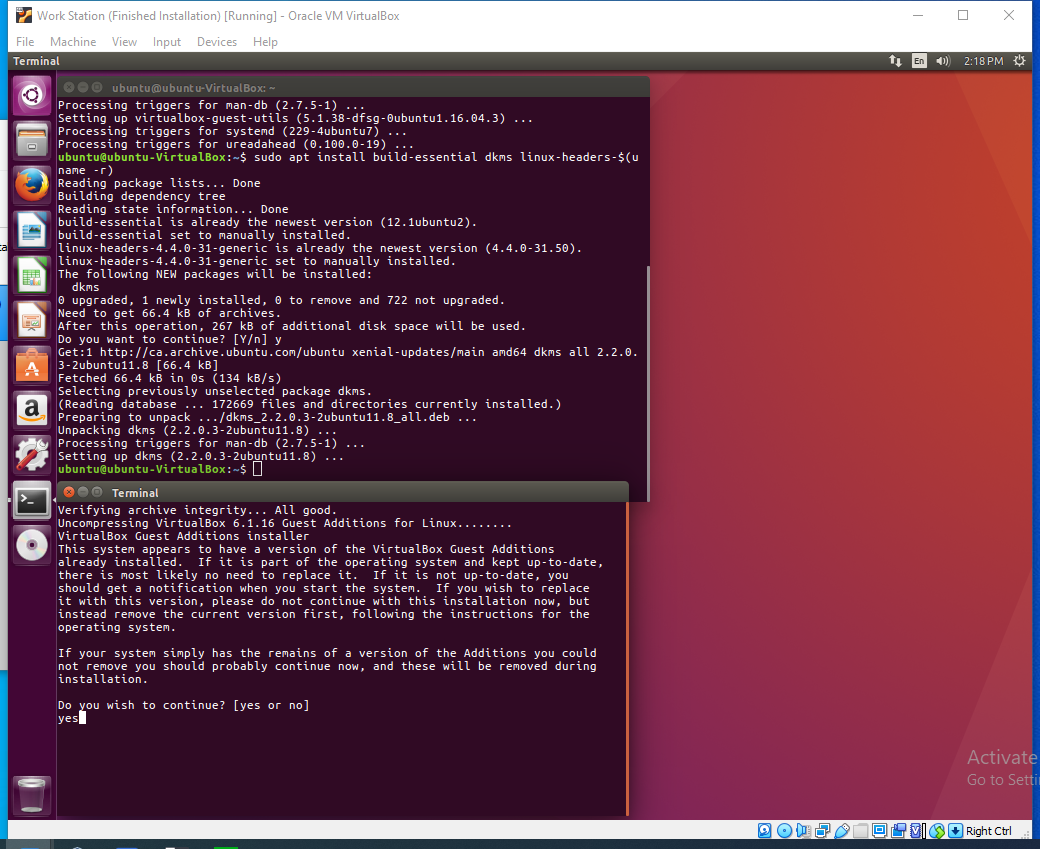 Fig.3.2.9
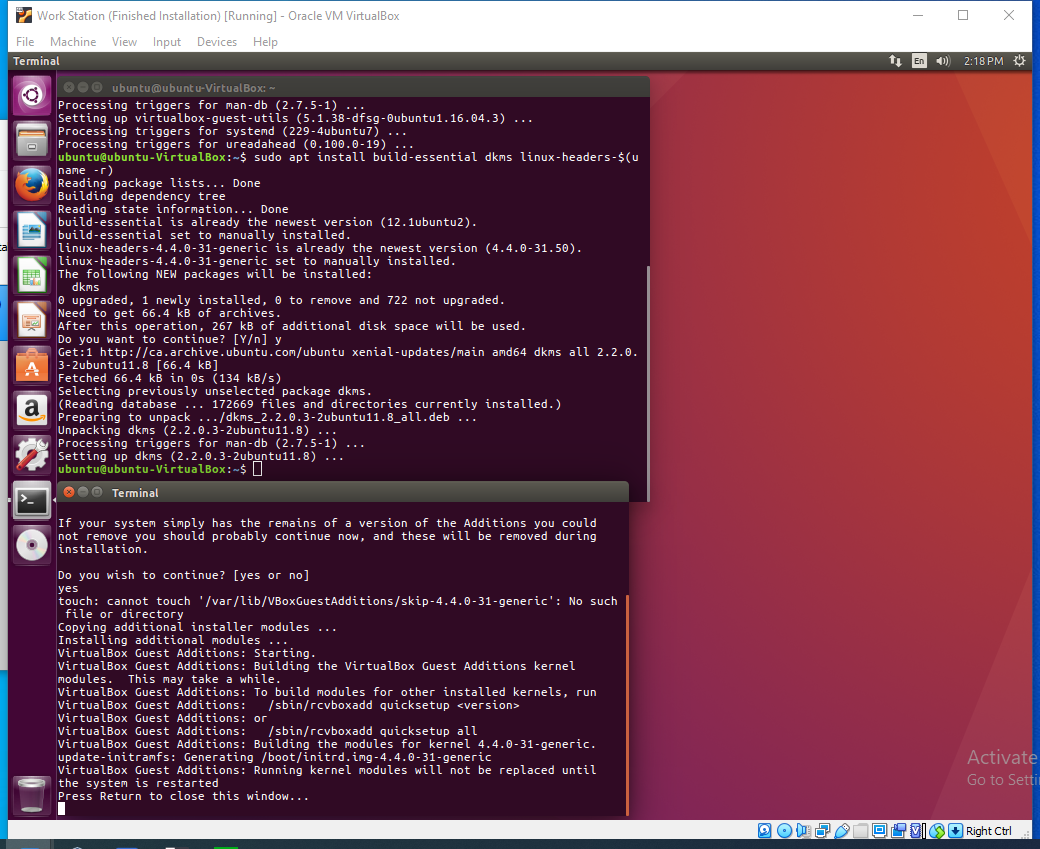 Fig.3.2.10
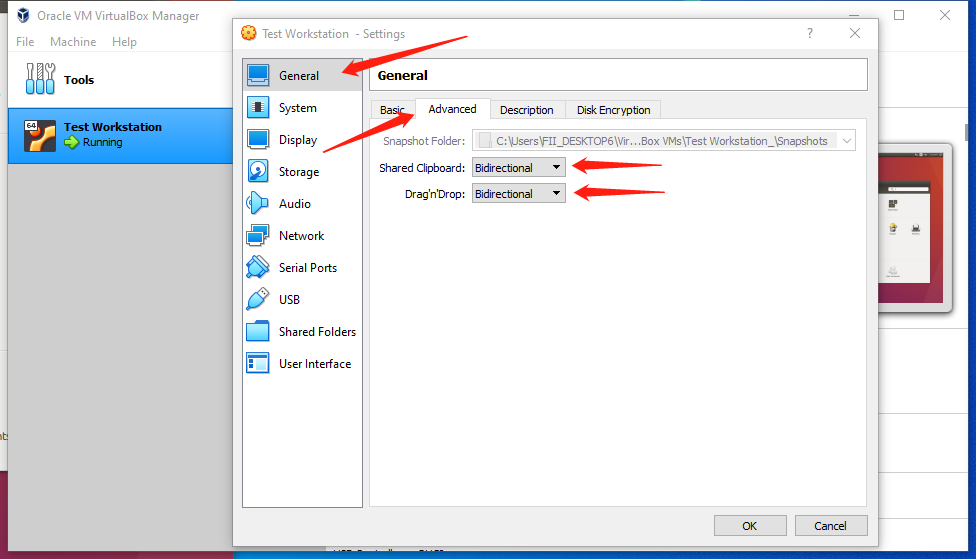
Now we will go back to VirtualBox and navigate to the General tab and click on the Advanced tab at the top.
Change both Shared Clipboard and Drag’n’Drop to Bidirectional.
Reboot Ubuntu for the changes to be applied (See section 2.1).
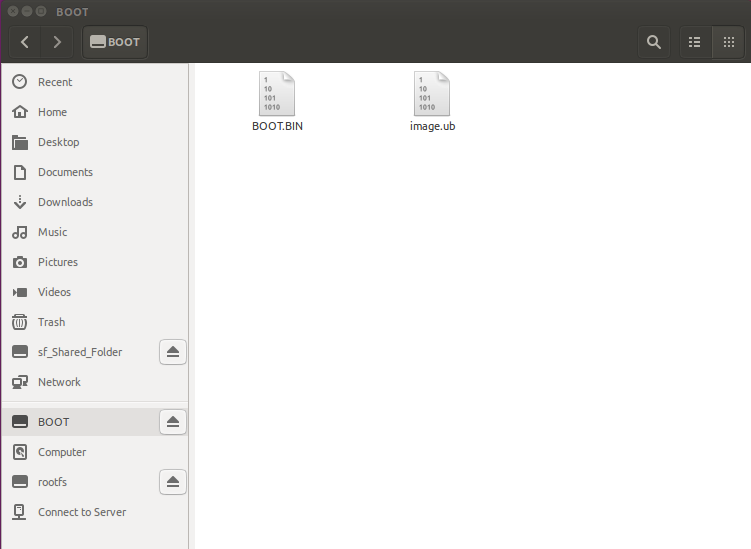
After the reboot, you should be able to see the shared folder if you open up the File Explorer from the task bar on the left. The name of the shared folder would have sf_ added before the name we gave it.
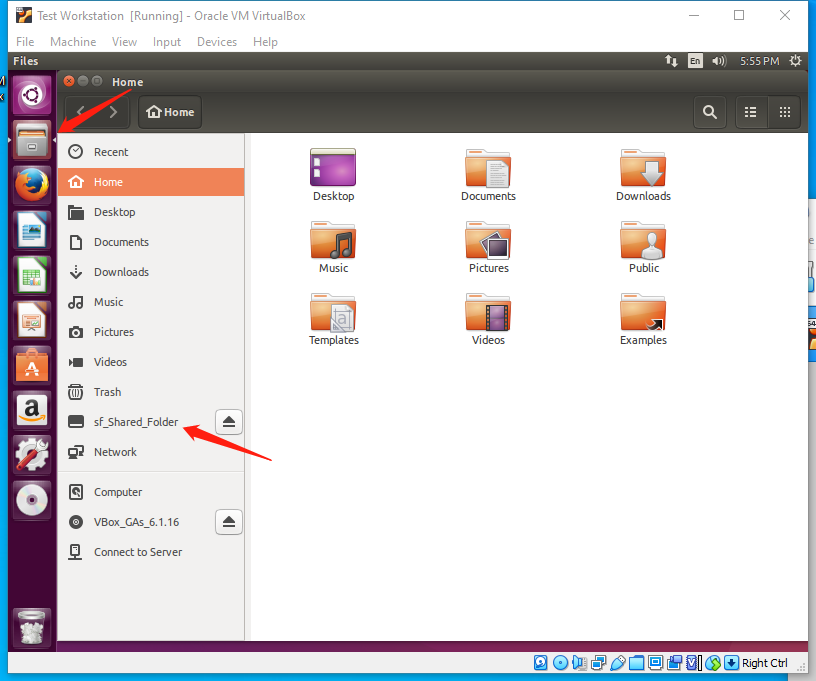
You would, however, discover that you are not able to access the folder.
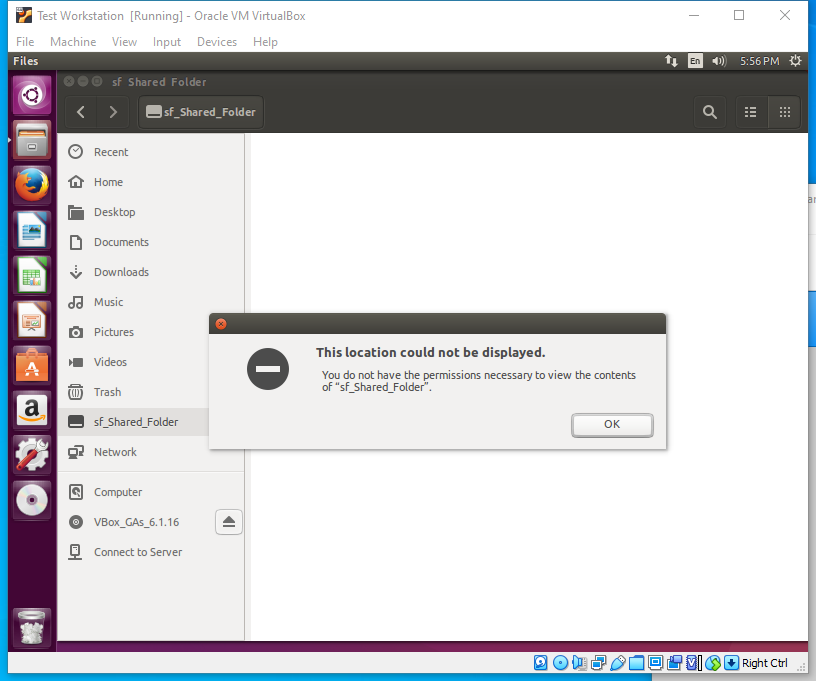
This can be fixed by opening up the Terminal again and executing the following command.
sudo adduser ubuntu vboxsf
Make sure you replace “ubuntu” with your own Ubuntu username if you chose something else.
Enter your password when prompted (which should be 12345678 unless you set it as something else).
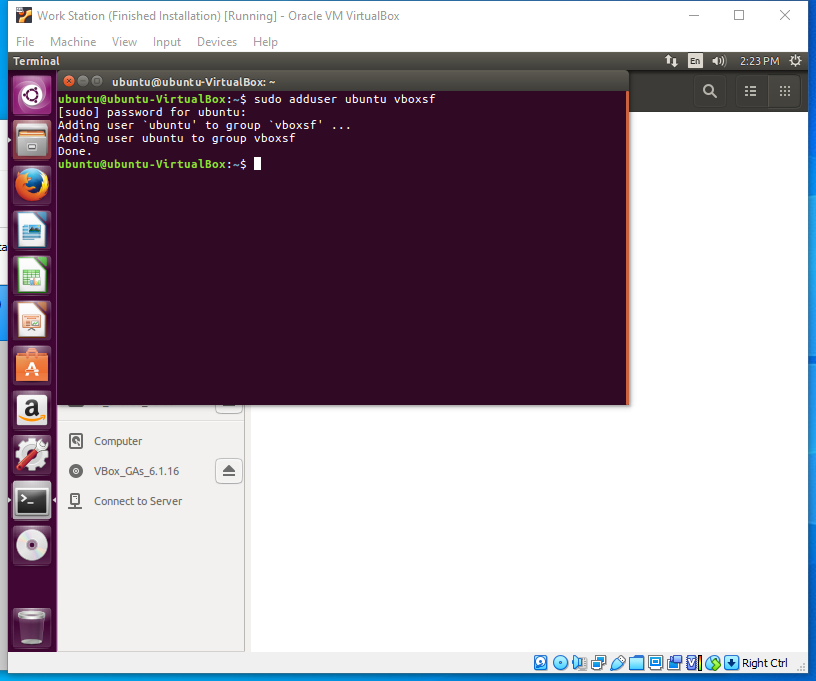
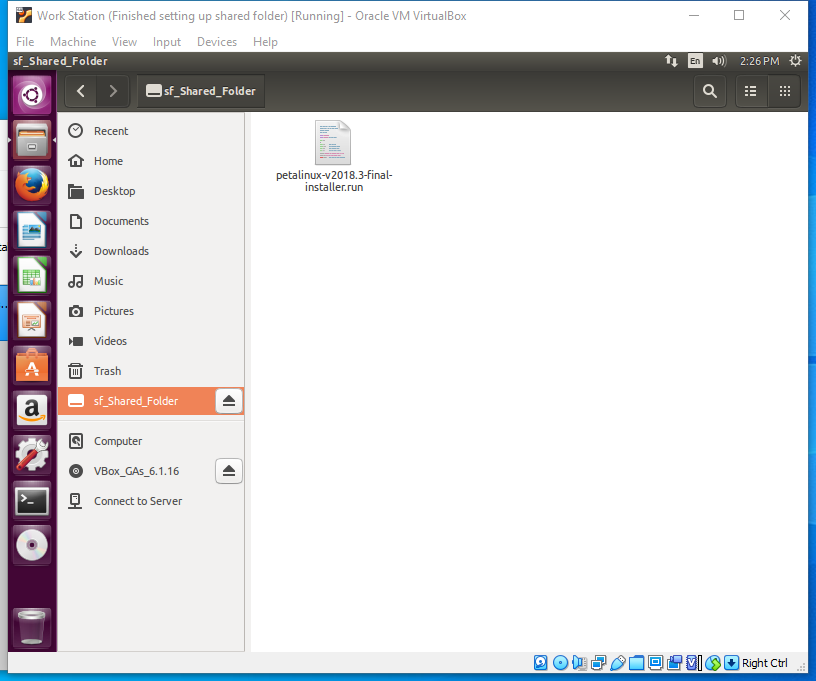
Restart Ubuntu after the command finishes executing, and you should now be able to access the contents of the folder.
The folder should contain the PetaLinux installer as we moved it to the shared folder in Windows previously.
If you haven’t done that yet, please do that right now.
3.3 Installing PetaLinux and additional PetaLinux files
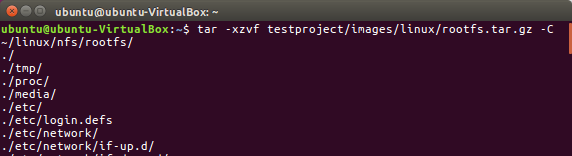
Go ahead and open Terminal again, and type in the following. Hit Enter when it is all typed in.
Note that because we set up guest additions and enabled bi-directional copy-pasting, you can directly copy and paste the following commands to the terminal. Note that if you’re typing it it, press Enter after each forward slash (\).
Enter your password when prompted.
sudo apt-get install tofrodos iproute2 gawk gcc g++ git make net-tools libncurses5-dev tftpd \
zlib1g:i386 libssl-dev flex bison libselinux1 gnupg wget diffstat chrpath socat xterm autoconf \
libtool tar unzip texinfo zlib1g-dev gcc-multilib build-essential libsdl1.2-dev libglib2.0-dev screen\
pax gzip automake
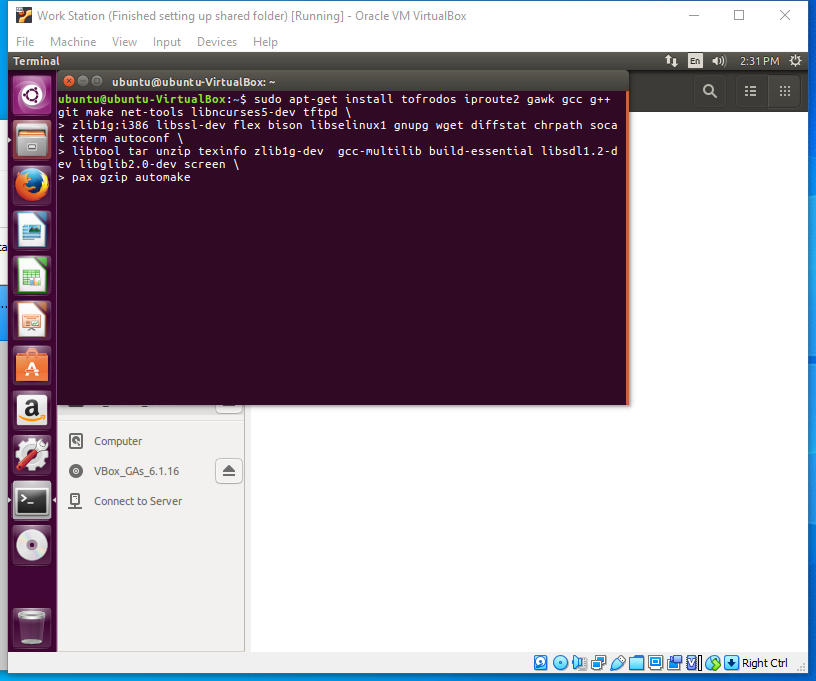
Upon executing the command, it will start the installation of a couple packages. When asked Do you want to continue, please type in y and press Enter.
The download will proceed. Keep in mind that it may take a while.

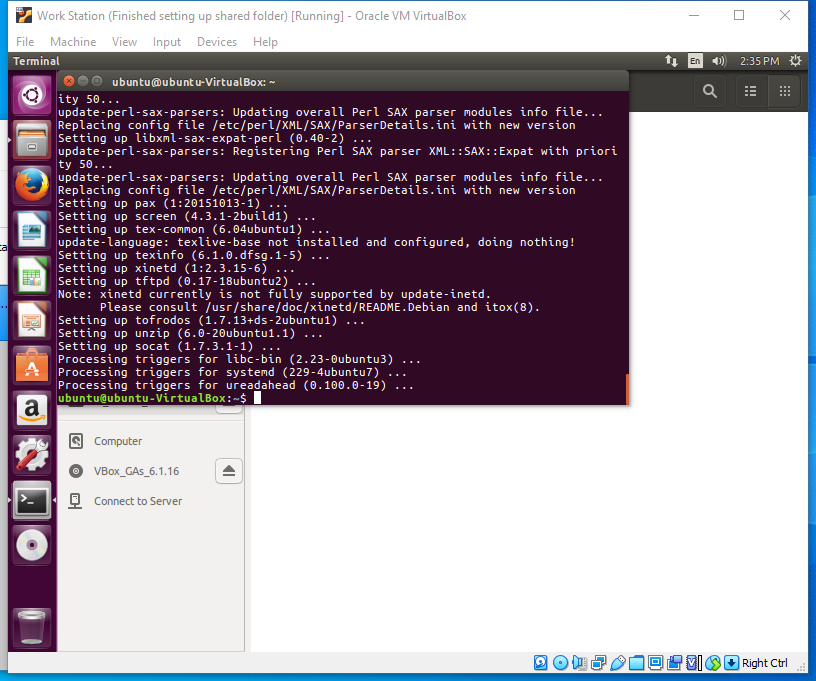
When the setup is complete, run the following command in the terminal.
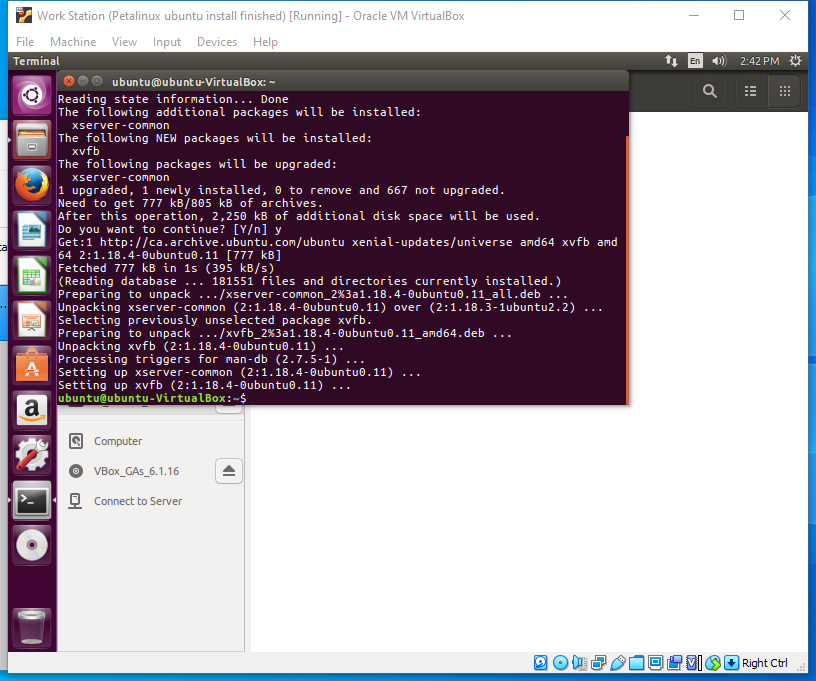
sudo apt-get install xvfb
Enter your password and y when prompted.

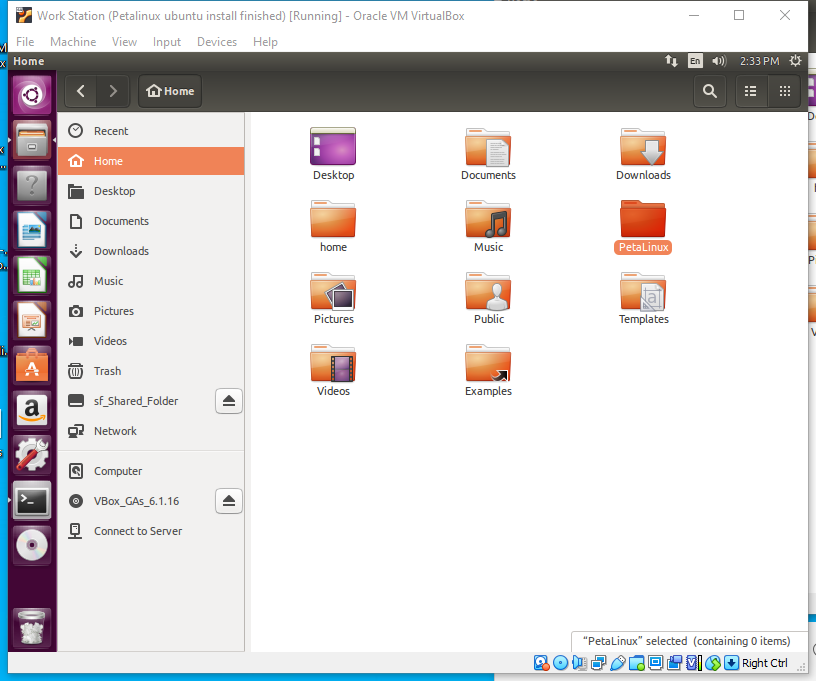
First, we want to create a new folder to install PetaLinux. Go to your Home folder and create a new folder named PetaLinux.
Next, locate the PetaLinux installer file in the shared folder and note its location path and name by right-clicking it and going into Properties.
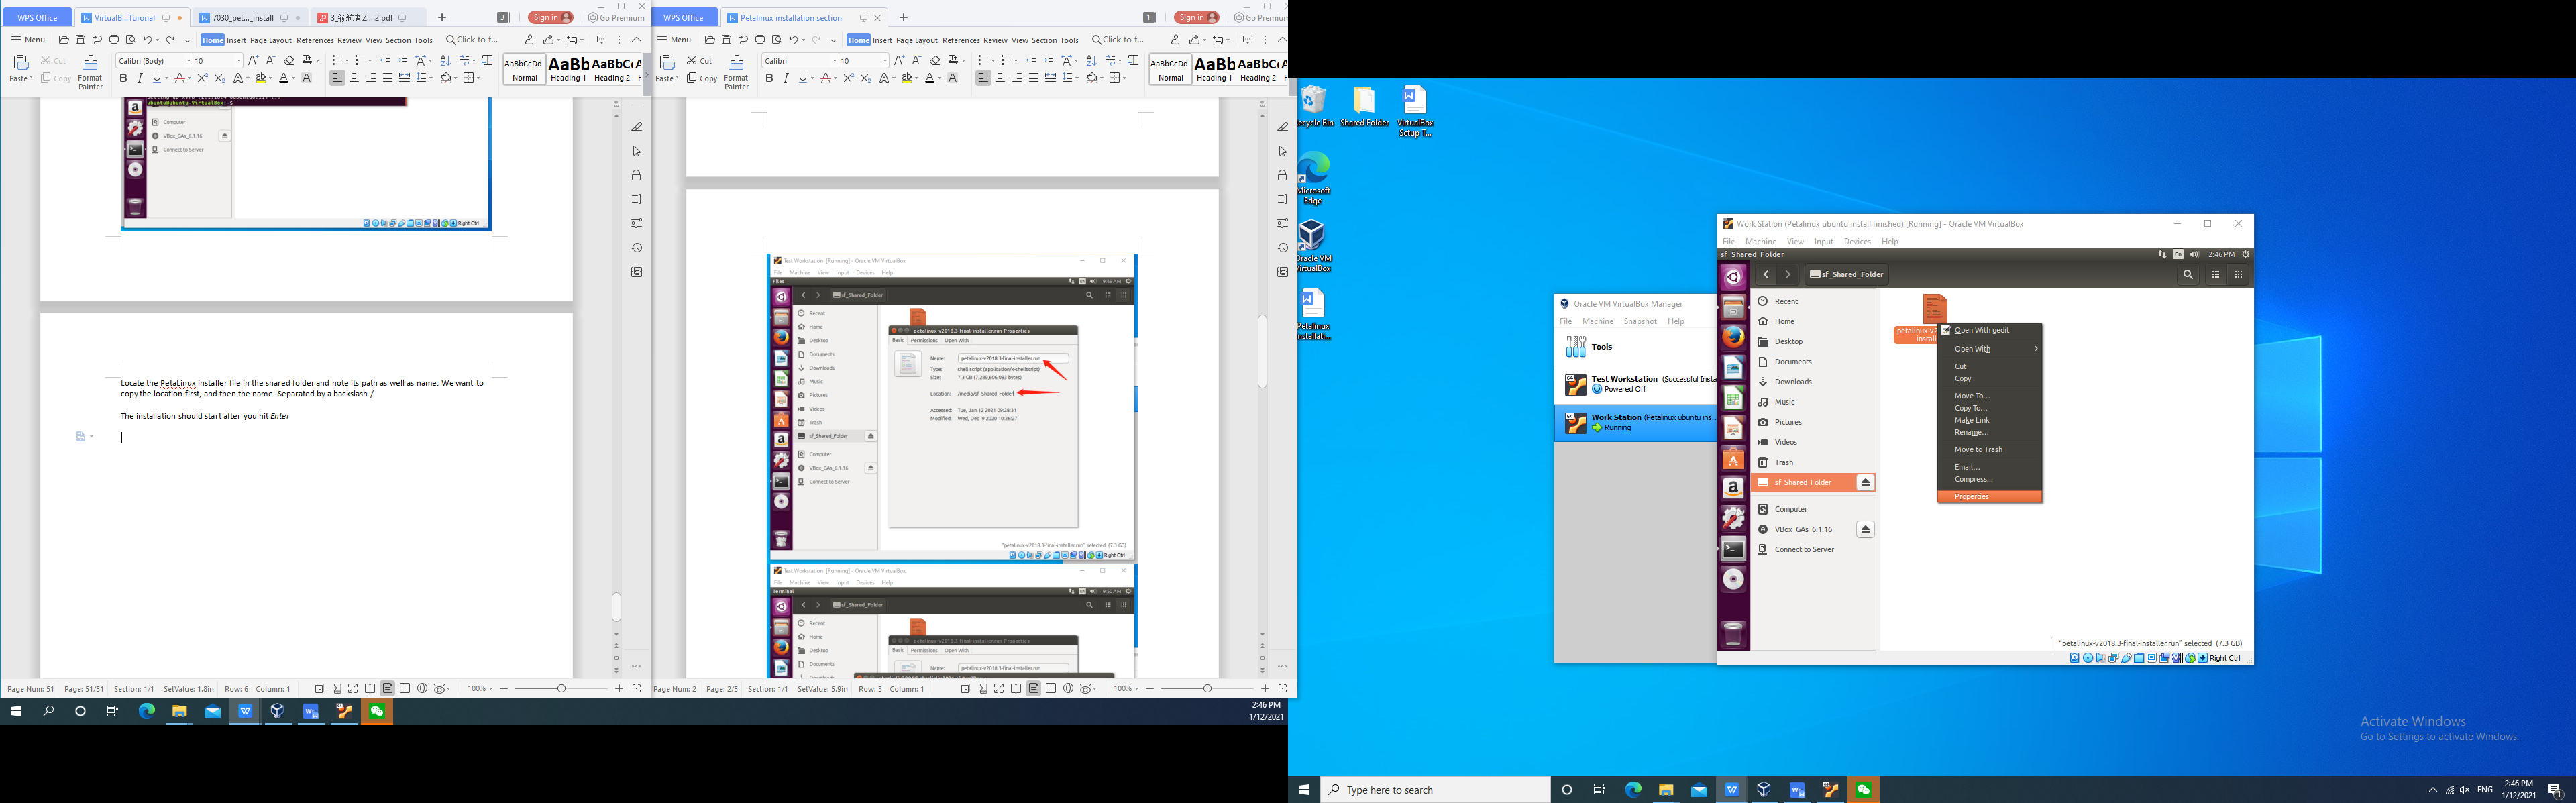
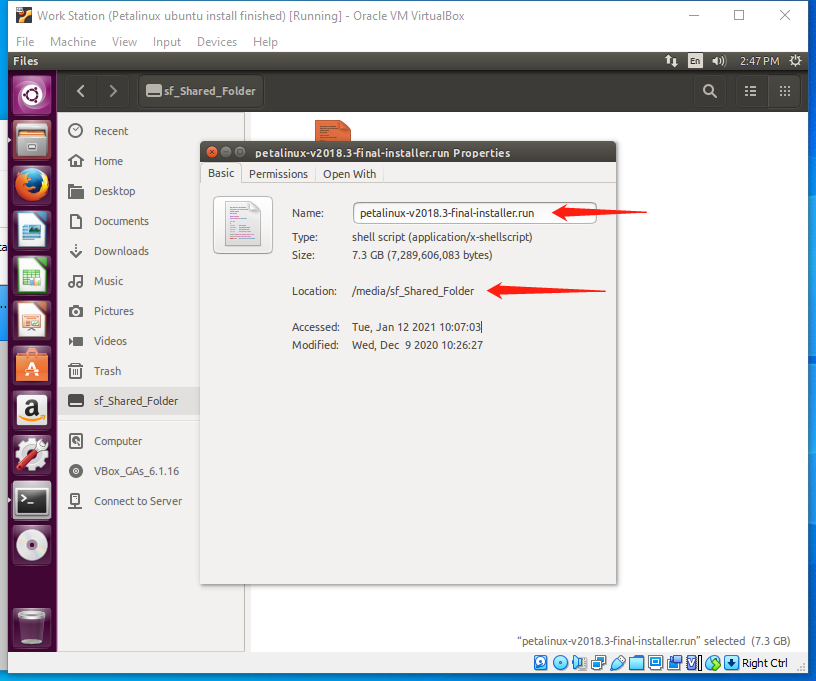
We want to copy the location followed by the name, with a backslash (/) separating the two.
/media/sf_Shared_Folder/petalinux-v2018.3-final-installer.run
Finally, we want to end it with the installation path. Because we created our folder in Home and named it PetaLinux, the directory would be
./home/ubuntu/PetaLinux
Thus, if we combine it, it would be
/media/sf_Shared_Folder/petalinux-v2018.3-final-installer.run ./home/ubuntu/PetaLinux
If we run this command, PetaLinux would be installed to the PetaLinux folder that we just created.
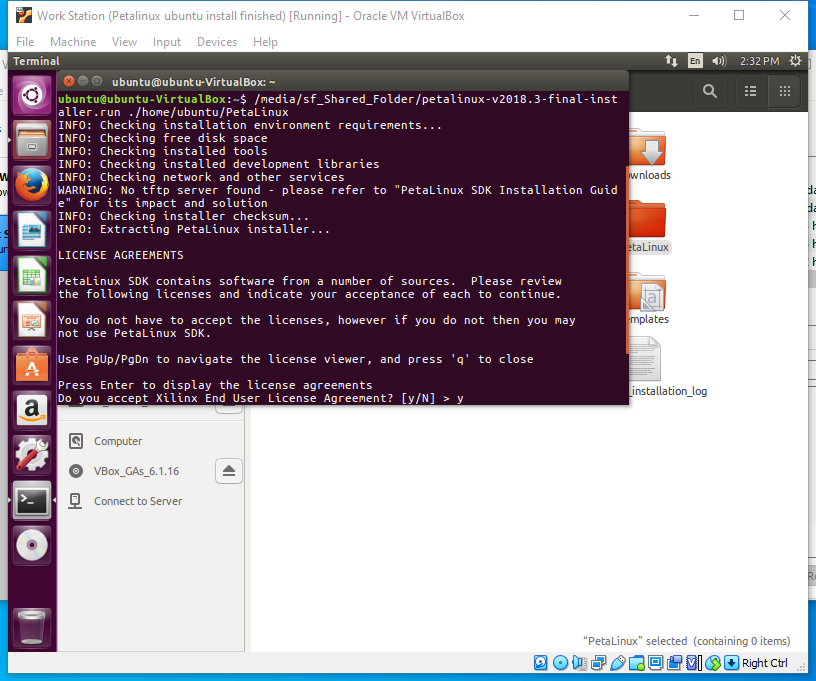
In order to proceed with the installation, make sure you follow the on-screen prompts very carefully.
They will be listed on the next page.
First, press Enter to display the license agreements.
Then, press q to exit the first license agreement, and press y followed by Enter to accept the first license agreement.
Do the same q – y – Enter sequence for the second and third license agreement.
If there are additional prompts, please follow them carefully.
Under normal circumstances, you should now have PetaLinux installed. Keep in mind that the installation process is quite time consuming, and your system may freeze at times. This is normal.
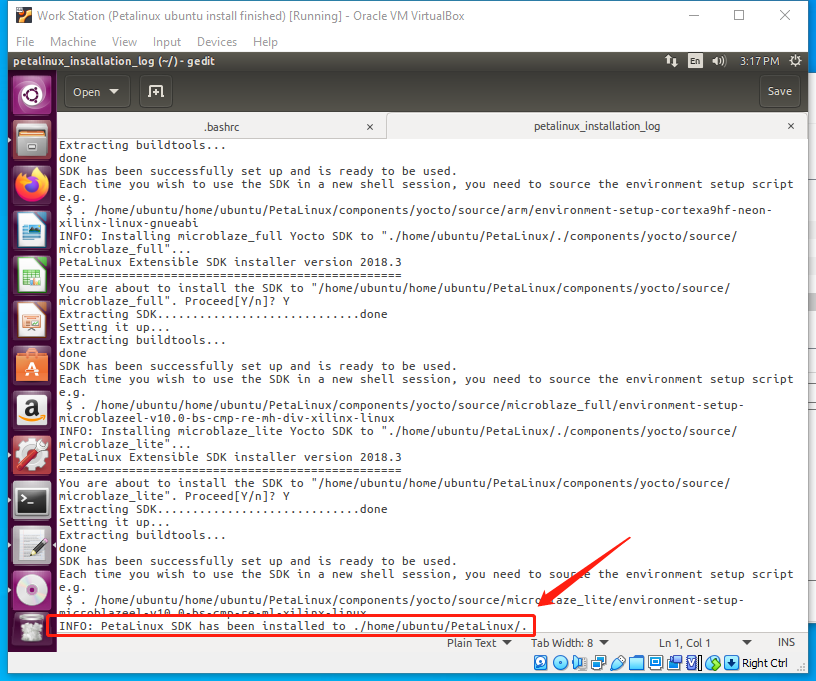
You may notice that there is now a new file under your Home folder. You can open it to check if PetaLinux is installed where you want it.
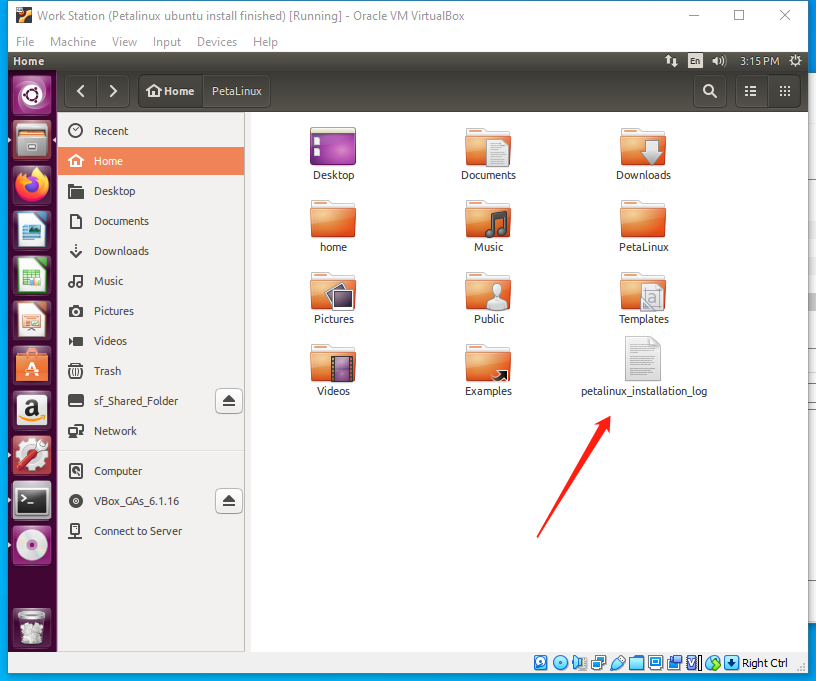
After opening it, scroll all the way to the bottom. Please verify to see if it is the location that you want.
3.4 Setting up PetaLinux and .bashrc
Now, please open up the Terminal once more.
We will change the dash by using the following command
sudo dpkg-reconfigure dash
Please enter your password when prompted.
In the pop-up, please select <No> by using the arrow keys on your keyboard and pressing Enter.

Next, we will set up .bashrc for PetaLinux. We can achieve this by typing in
echo “alias sptl=’source /home/ubuntu/PetaLinux/settings.sh’” >> ~/.bashrc
Followed by
gedit .bashrc
To open up the .bashrc file.

Scroll to the very bottom of the file that opens up, you should see the following:
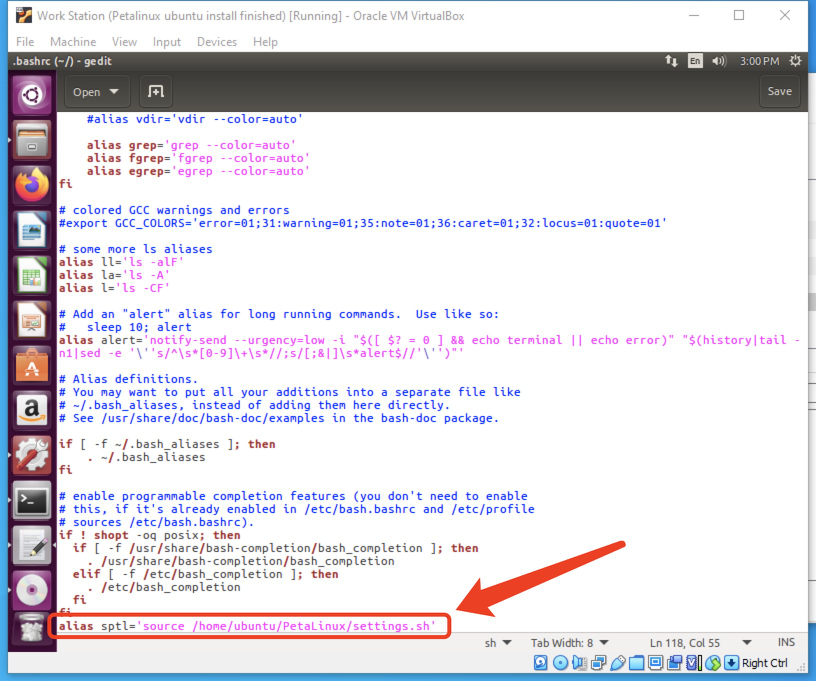
Note that doing so sets up and customizes the shell for use in the Ubuntu PetaLinux environment.
Thus marks the end of this Tutorial.