Altera JTAG Setup & Troubleshooting
Table of Contents
Installing Components for Quartus Prime 5
Manually Install Device Drivers 7
Choosing the Correct Hardware 9
© 2020 Fraser Innovation Inc ALL RIGHTS RESERVED
Without written permission of Fraser Innovation Inc, no unit or individual may extract or modify part of or all the contents of this manual. Offenders will be held liable for their legal responsibility.
Thank you for purchasing the FPGA development board. Please read the manual carefully before using the product and make sure that you know how to use the product correctly. Improper operation may damage the development board. This manual is constantly updated, and it is recommended that you download the latest version when using.
Official Shopping Website:
Common Problems:
- “Components not installed” or similar error message upon app launch.
- Being unable to find the hardware in Quartus hardware setup.
- Quartus hardware setup displays “No devices available” or similar.
- Cannot find device and/or device isn’t identified in Device Manager; FII BRD JTAG has warning sign.

- USB Serial Converter A and USB Serial Converter B don’t show up in Devices after board is plugged in.
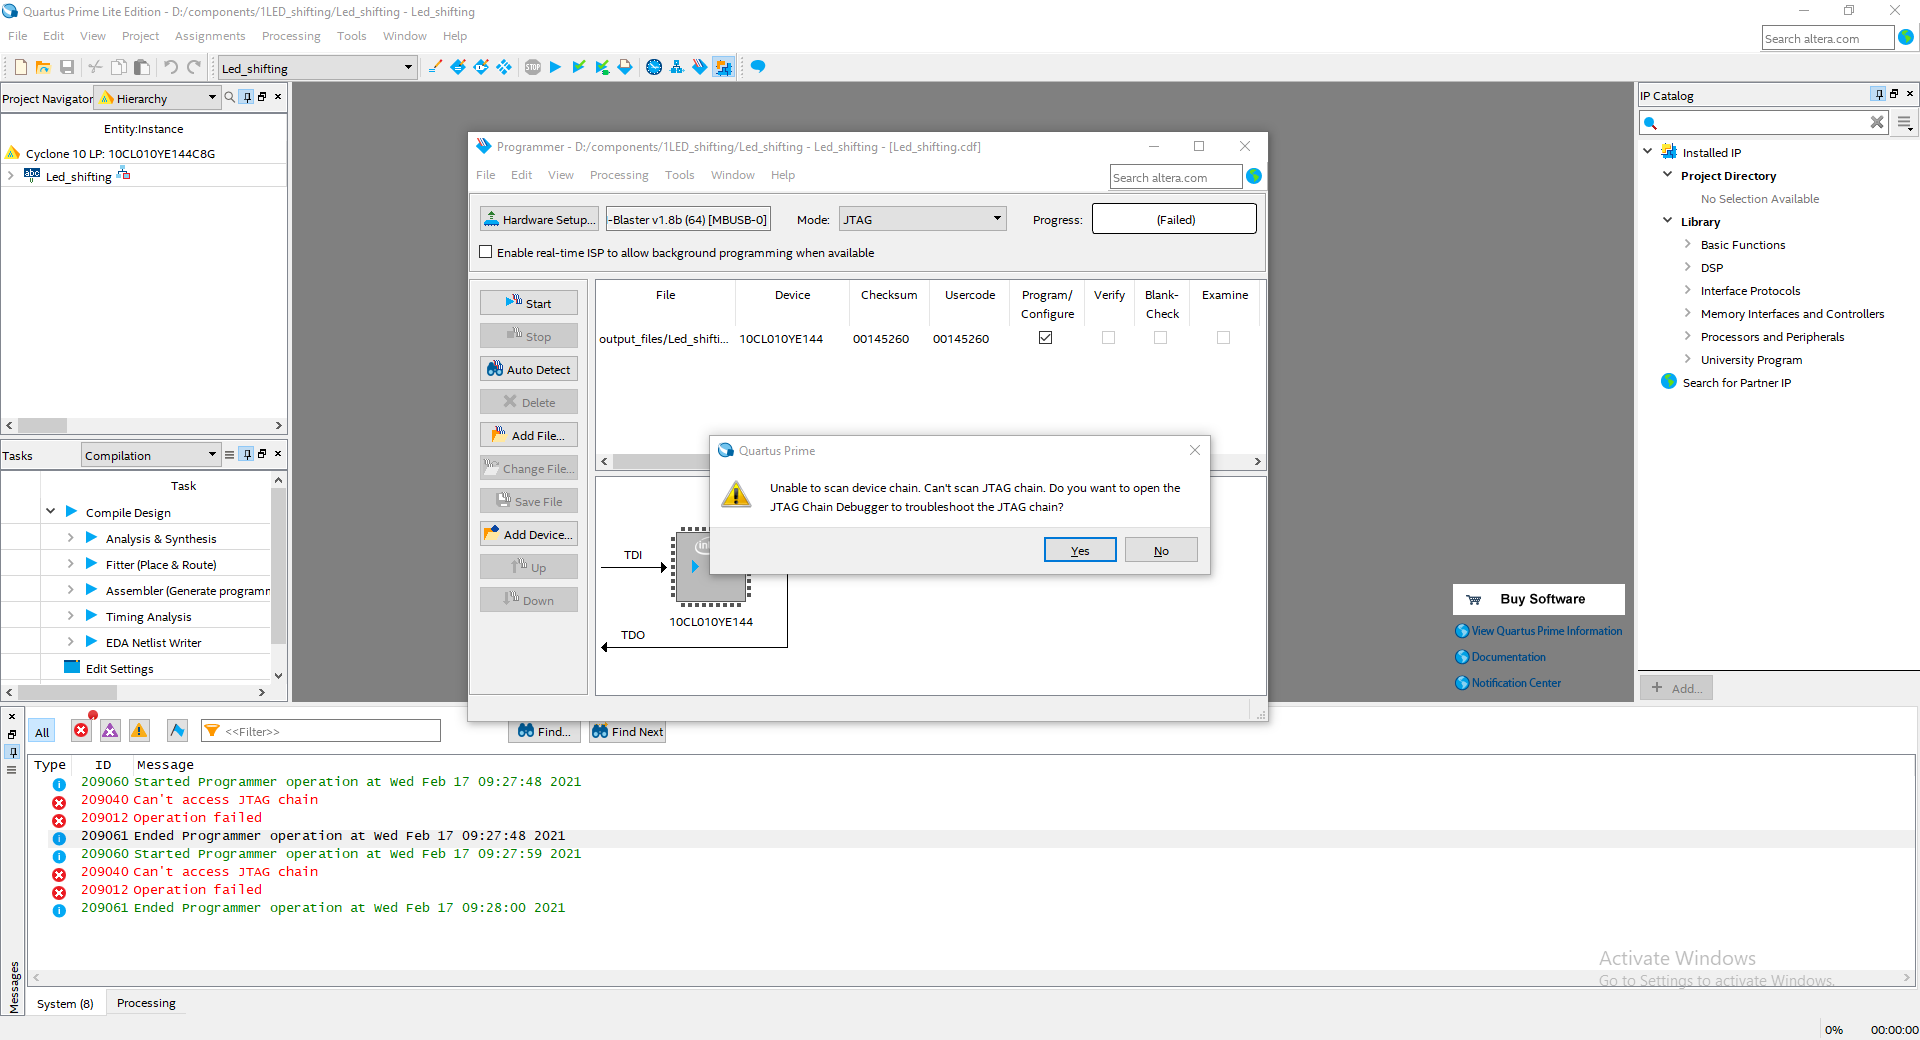
- Unable to scan device/JTAG chain.
- Able to select the correct hardware but still unable to scan device/JTAG chain.
Installing Quartus Prime
If the Quartus Prime software you downloaded asks you to install additional packages after you launch it, you may choose to bypass that by uninstalling it and installing the Combined File.
We can download the Combined File from the official website:
https://fpgasoftware.intel.com/18.0/?edition=lite&platform=windows
Please select the corresponding edition and version you want. In our case we will be using Lite version 18.0. Make sure you choose to download the Combined Files to make setup easier.

The software should be all setup automatically after installing the package.
Common associated issues:
- “Components not installed” or similar error message upon app launch.
Installing Components for Quartus Prime
If Quartus Prime still asks you to install Components, please launch the Device Installer.

Next, navigate to the directory where you have the .qdz file for the corresponding device. In my case I’m using the Cyclone 10 Board. You will be able to proceed to install the component if it isn’t installed already.

Common associated issues:
- “Components not installed” or similar error message upon app launch.
Setting up the Drivers
In order for your development board to work without fault, you will need to copy the corresponding .dll file for your system (32-bit or 64-bit) to the bin directory under your Quartus installation directory. In my case, my system and Quartus is 64-bit.
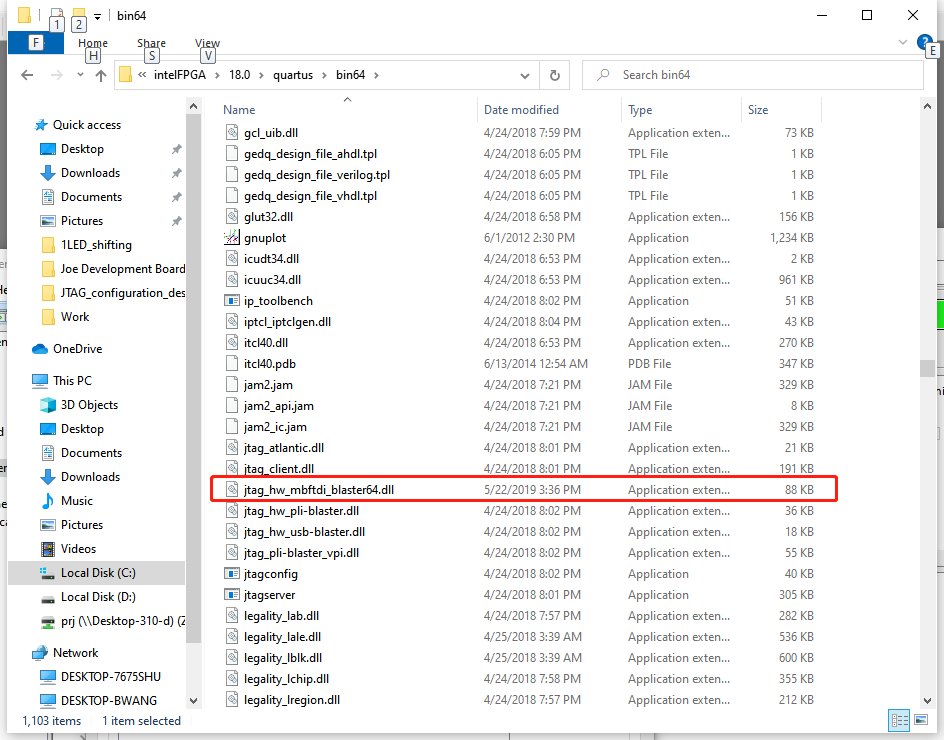
Note that the .dll files are located in the Customer Package.
Common associated issues:
- Being unable to find the hardware in Quartus hardware setup.
- Quartus hardware setup displays “No devices available” or similar.
Manually Install Device Drivers
Note that the FTDI driver comes with Windows 10. Only install if it’s not working.
Download the FTDI driver from the official website: https://ftdichip.com/drivers/d2xx-drivers/
Make sure you select the one for your operating system and directly run the .exe file.

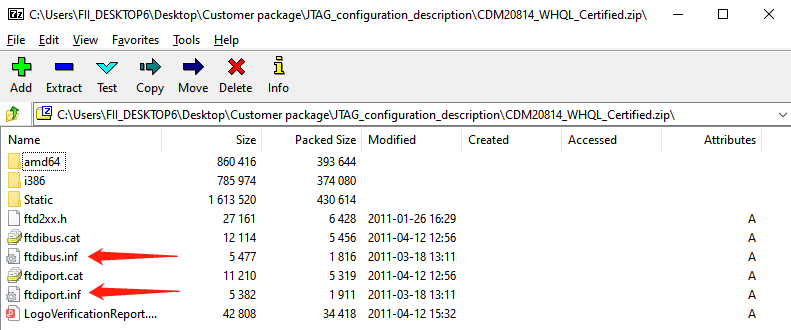
Update the FII BRD JTAG drivers manually by selecting the .inf files in CDM20814_WHQL_Certified.zip in the customer package.
First, right click on the device in device manager and select update driver.
Next, choose to browse your computer for local files.
Finally, select the two files. Make sure you try each file individually.
Common associated issues:
- Cannot find device and/or device isn’t identified in Device Manager:

- USB Serial Converter A and USB Serial Converter B don’t show up in Devices after board is plugged in.


Choosing the Correct Hardware
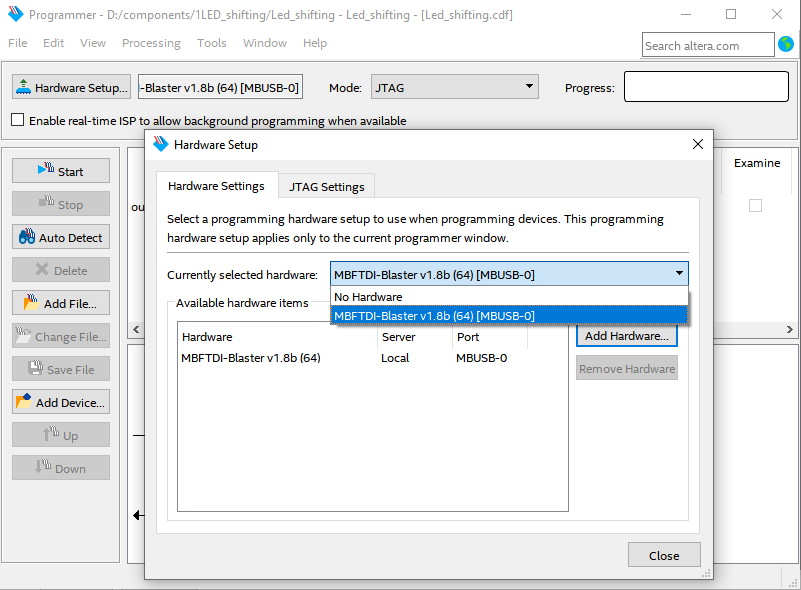
In Quartus’ Hardware Setup, make sure you have the option of choosing MBFTDI-Blaster. This is the correct hardware for the Cyclone 10 development board.
Common associated issues:
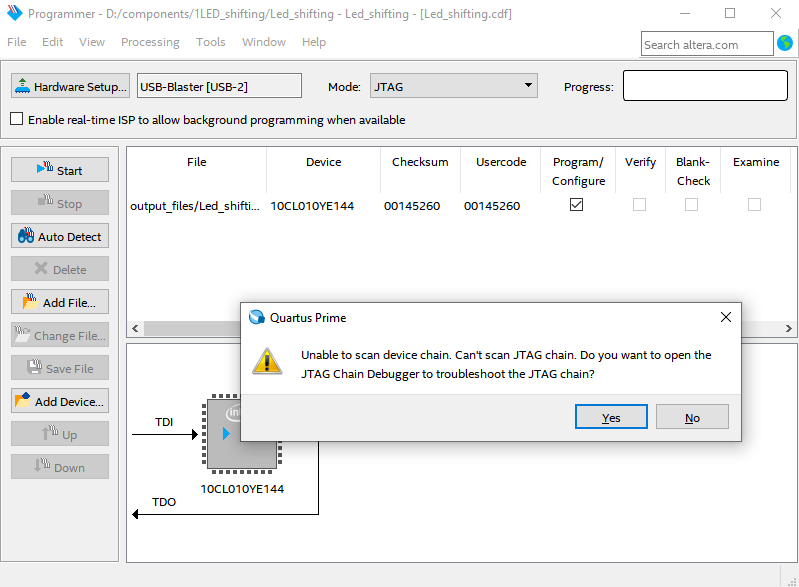
- Unable to scan device/JTAG chain.
Setting the JTAG Interface
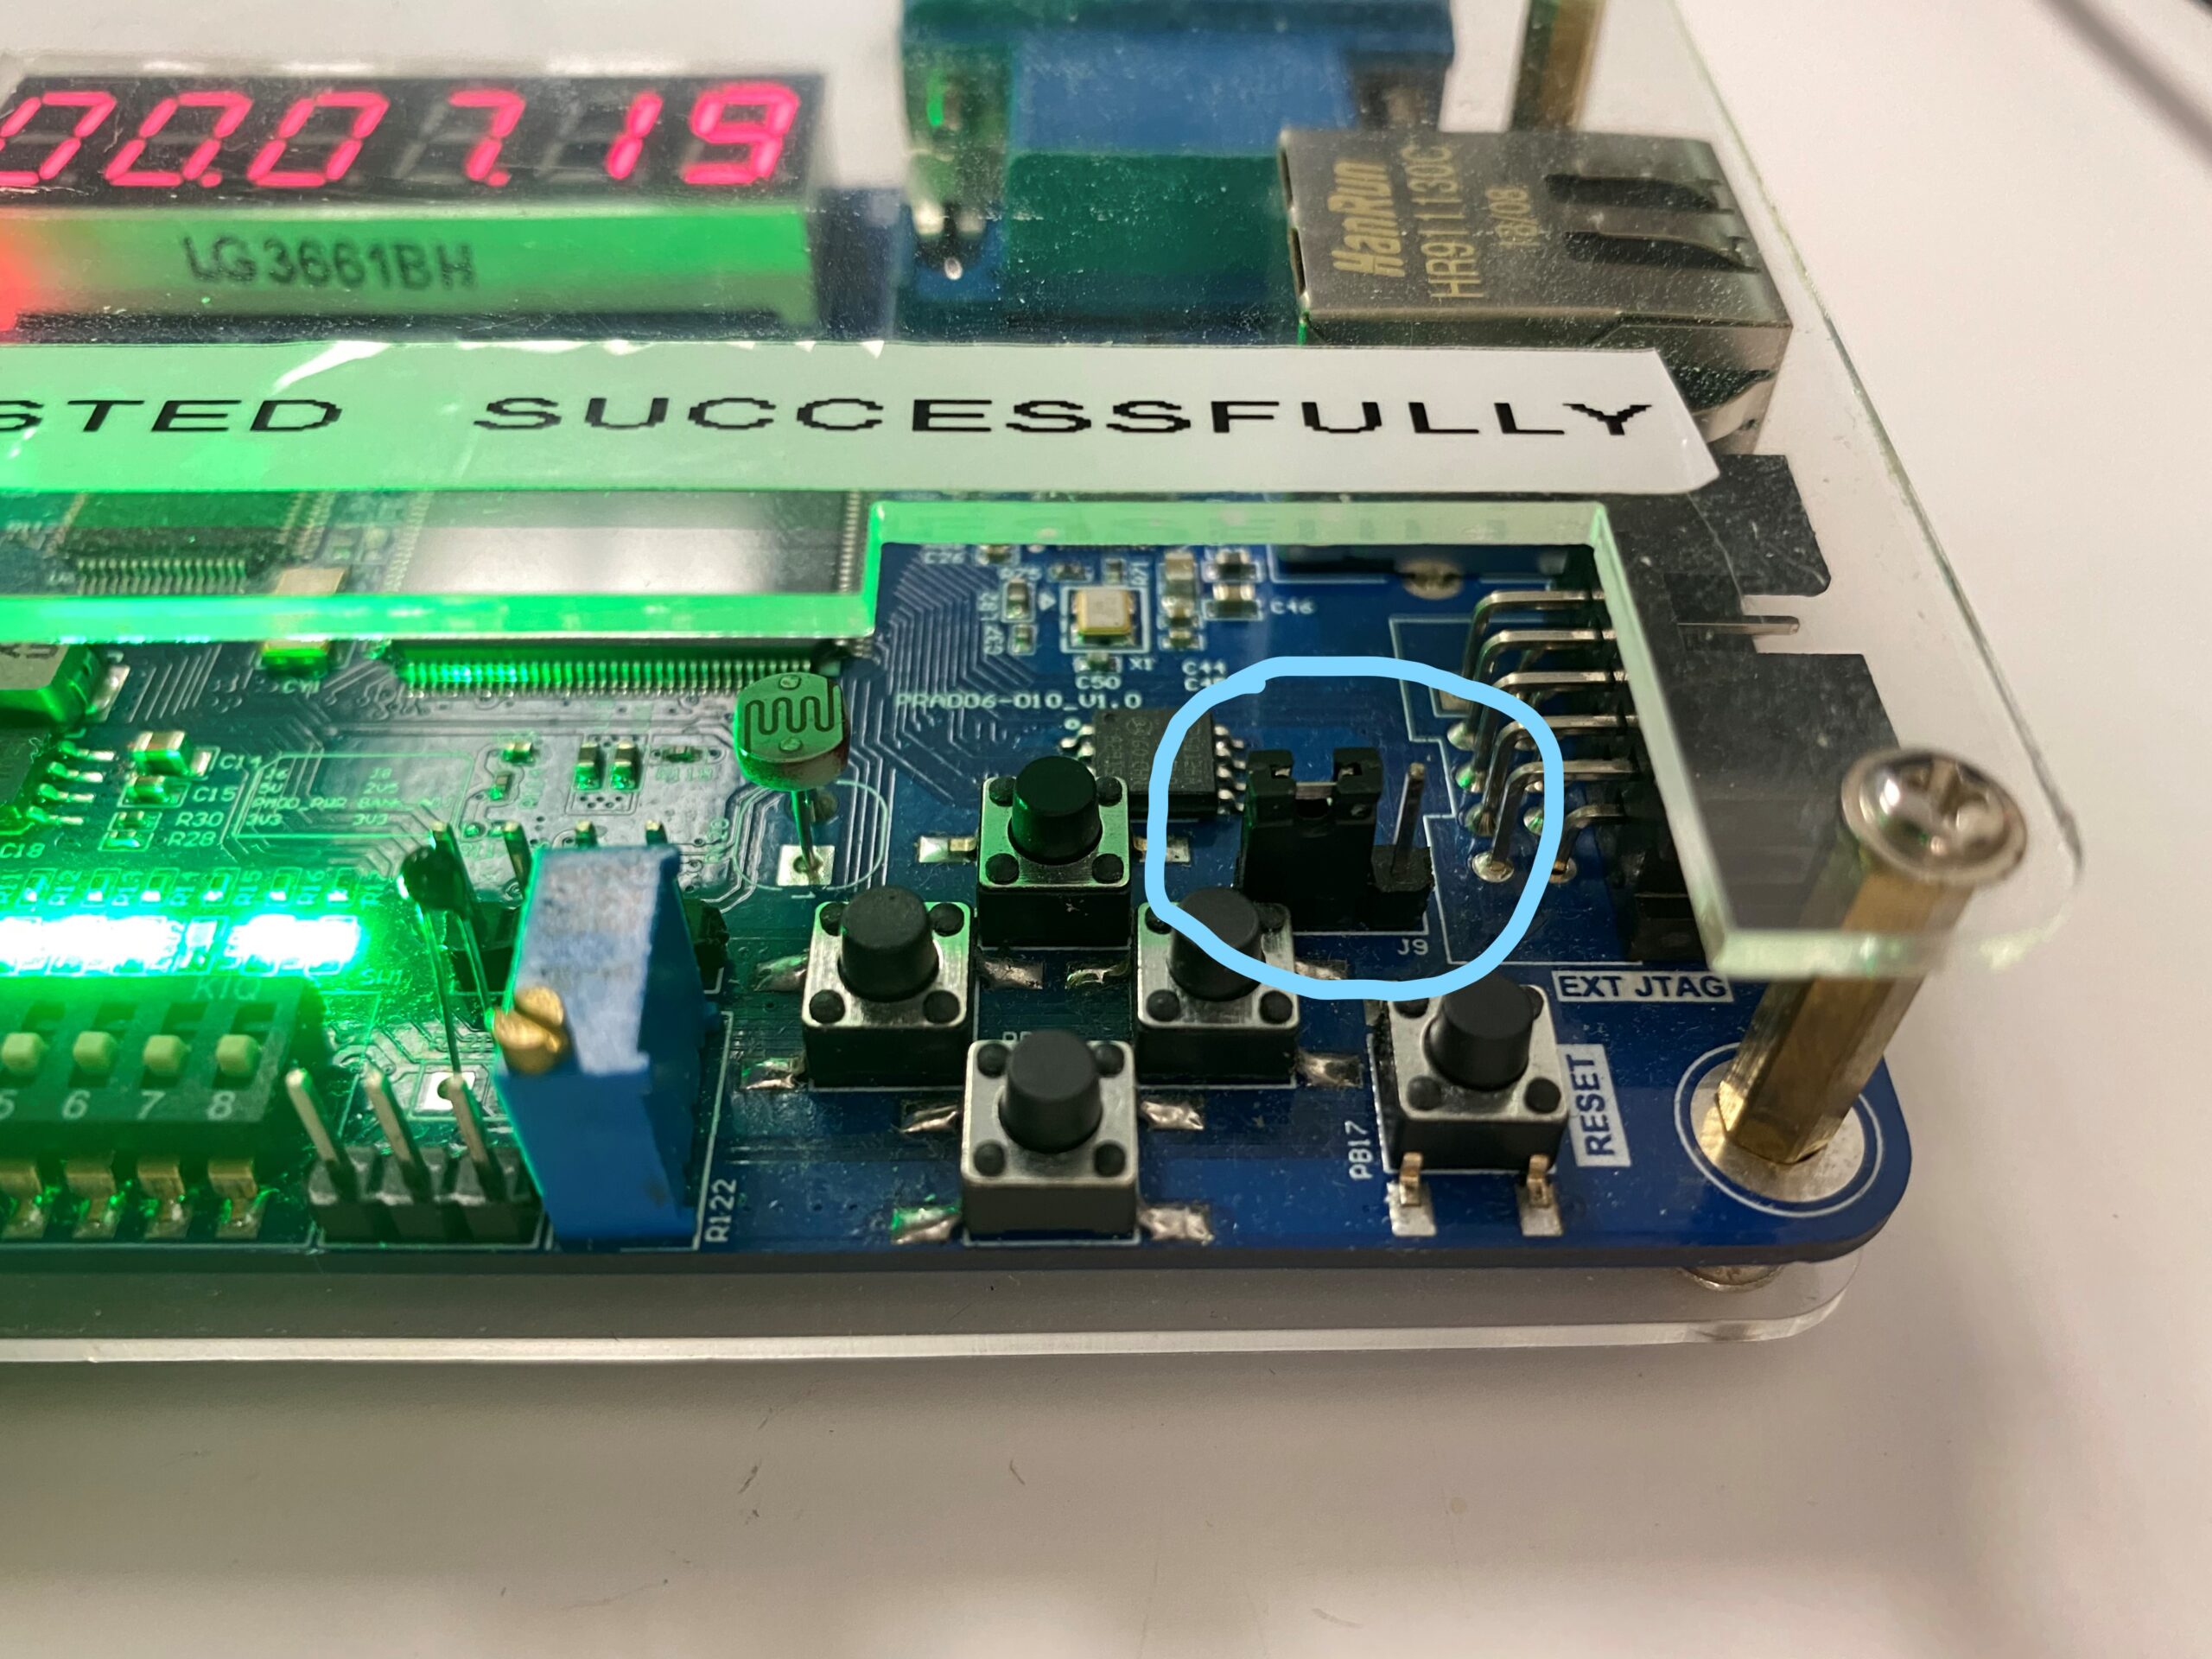
Note that the development board can be used not only as a development board, but also as a JTAG adapter. By connecting the jumper to Ext (external), the development board will be used as a JTAG adapter and downloader. By connecting the jumper to Int (internal), the development board will be used as is, and the USB can download the program for FPGA.
Common associated issues:
- Able to select the correct hardware but still unable to scan device/JTAG chain.
